1
Access Shopify Admin Settings
Go to the Settings section inside your Shopify Admin panel.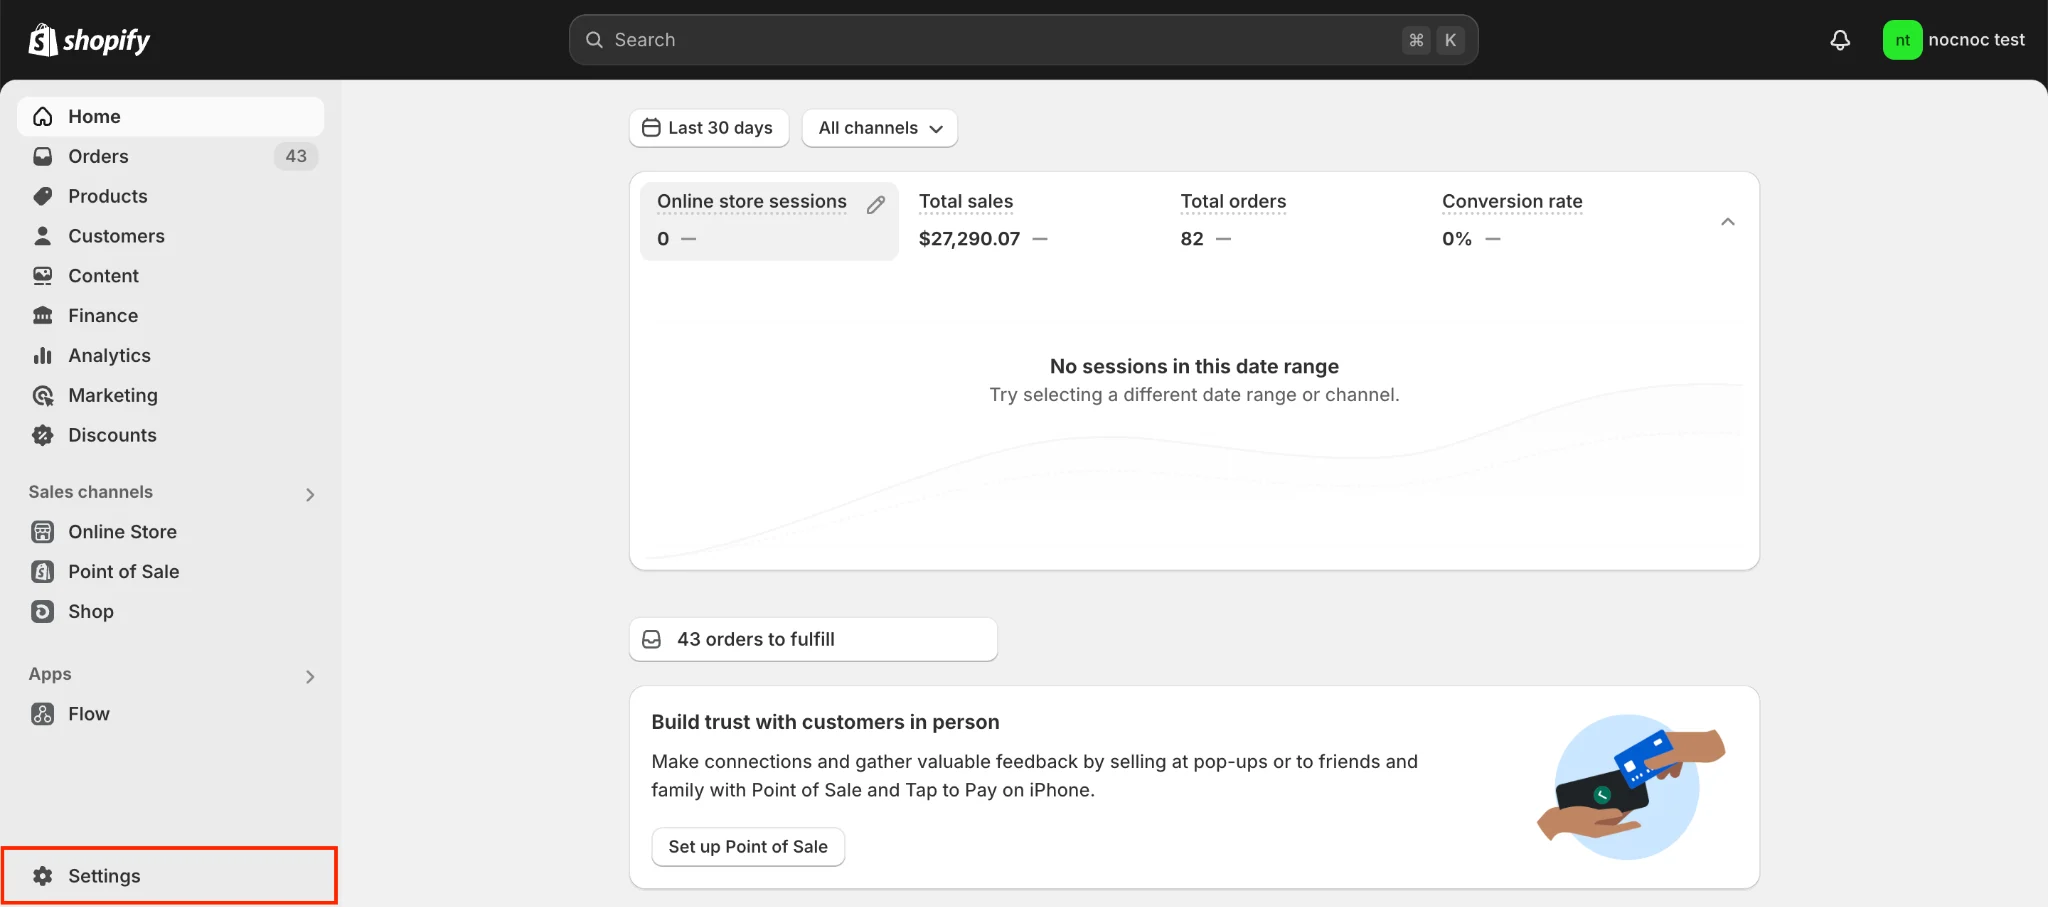
2
Open App Development
Inside Settings, navigate to Apps → Develop Apps.Save your store’s domain URL (visible in the upper left corner) — you’ll need to share it with nocnoc later.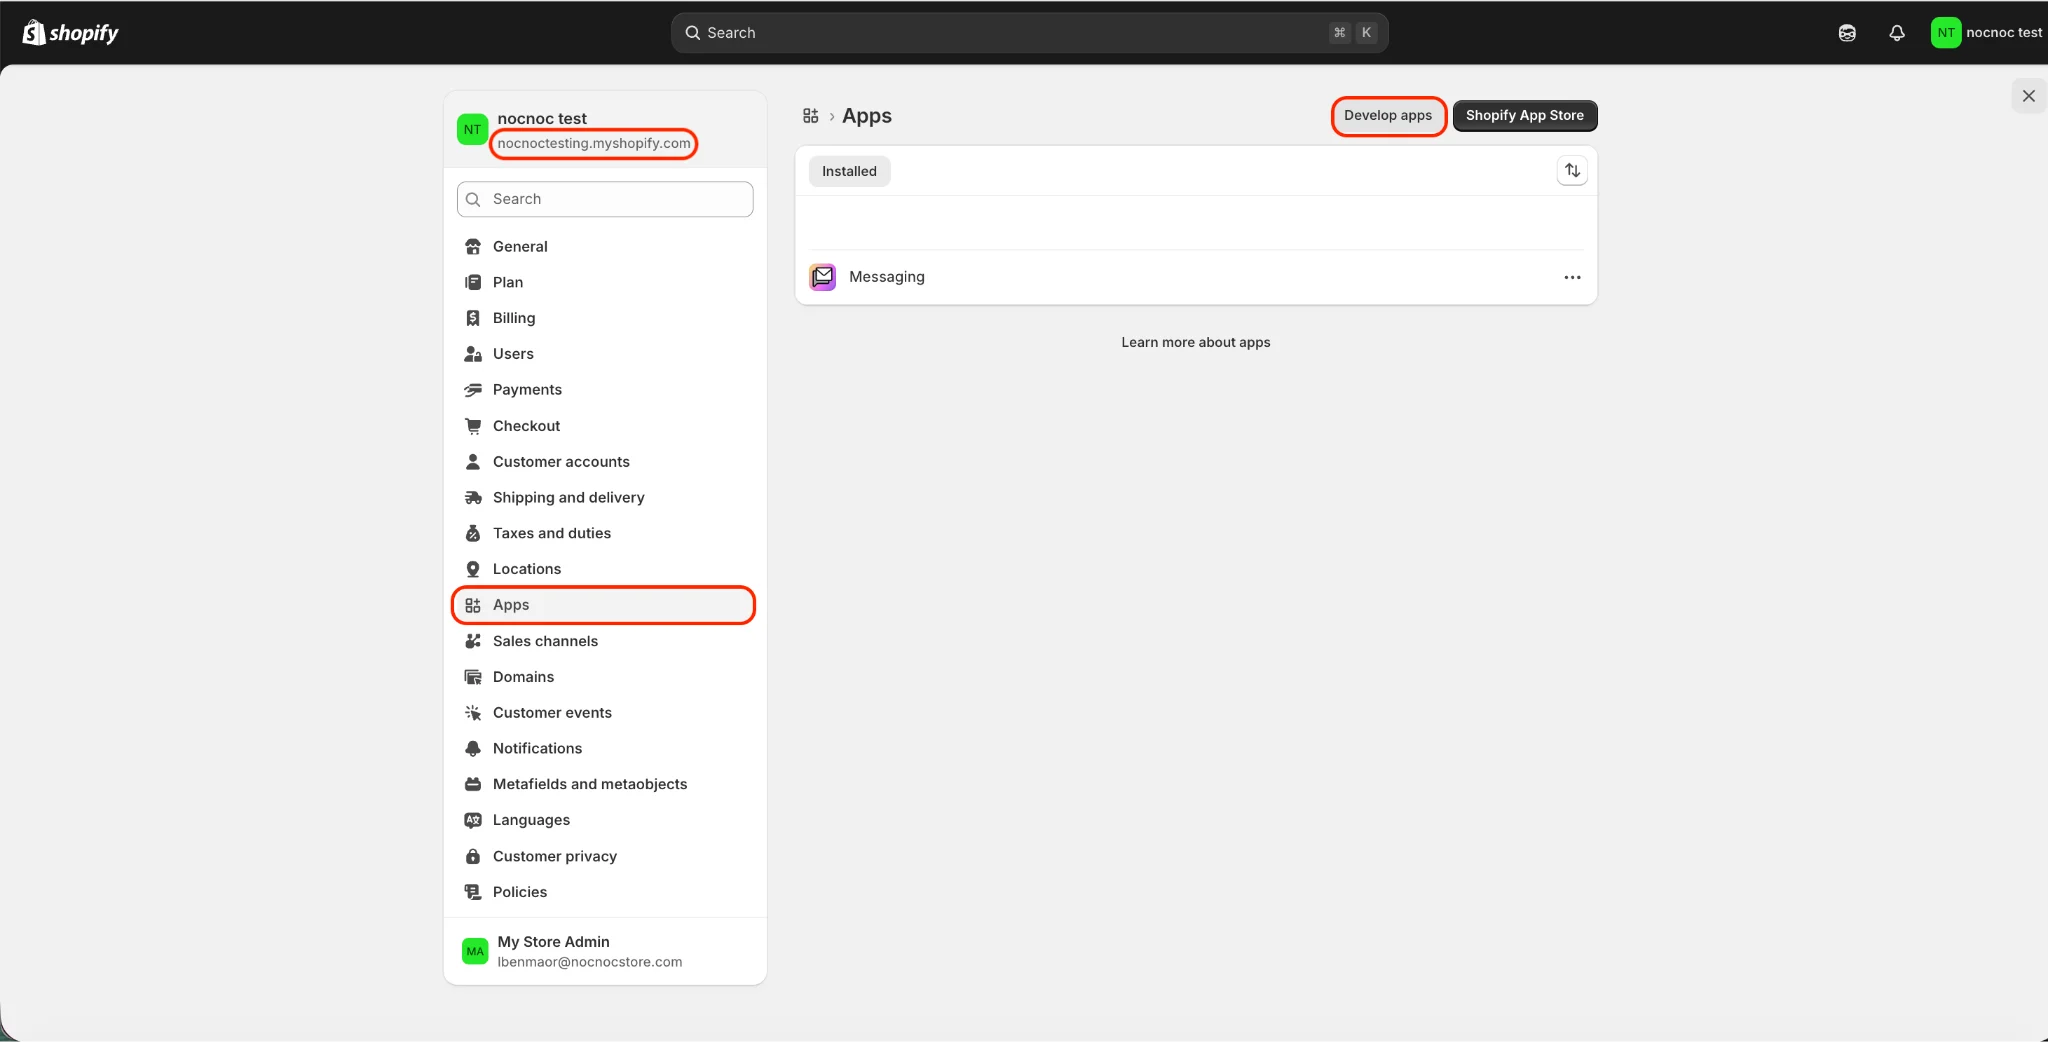
3
Open the Dev Dashboard
Click on Build apps from Dev Dashboard.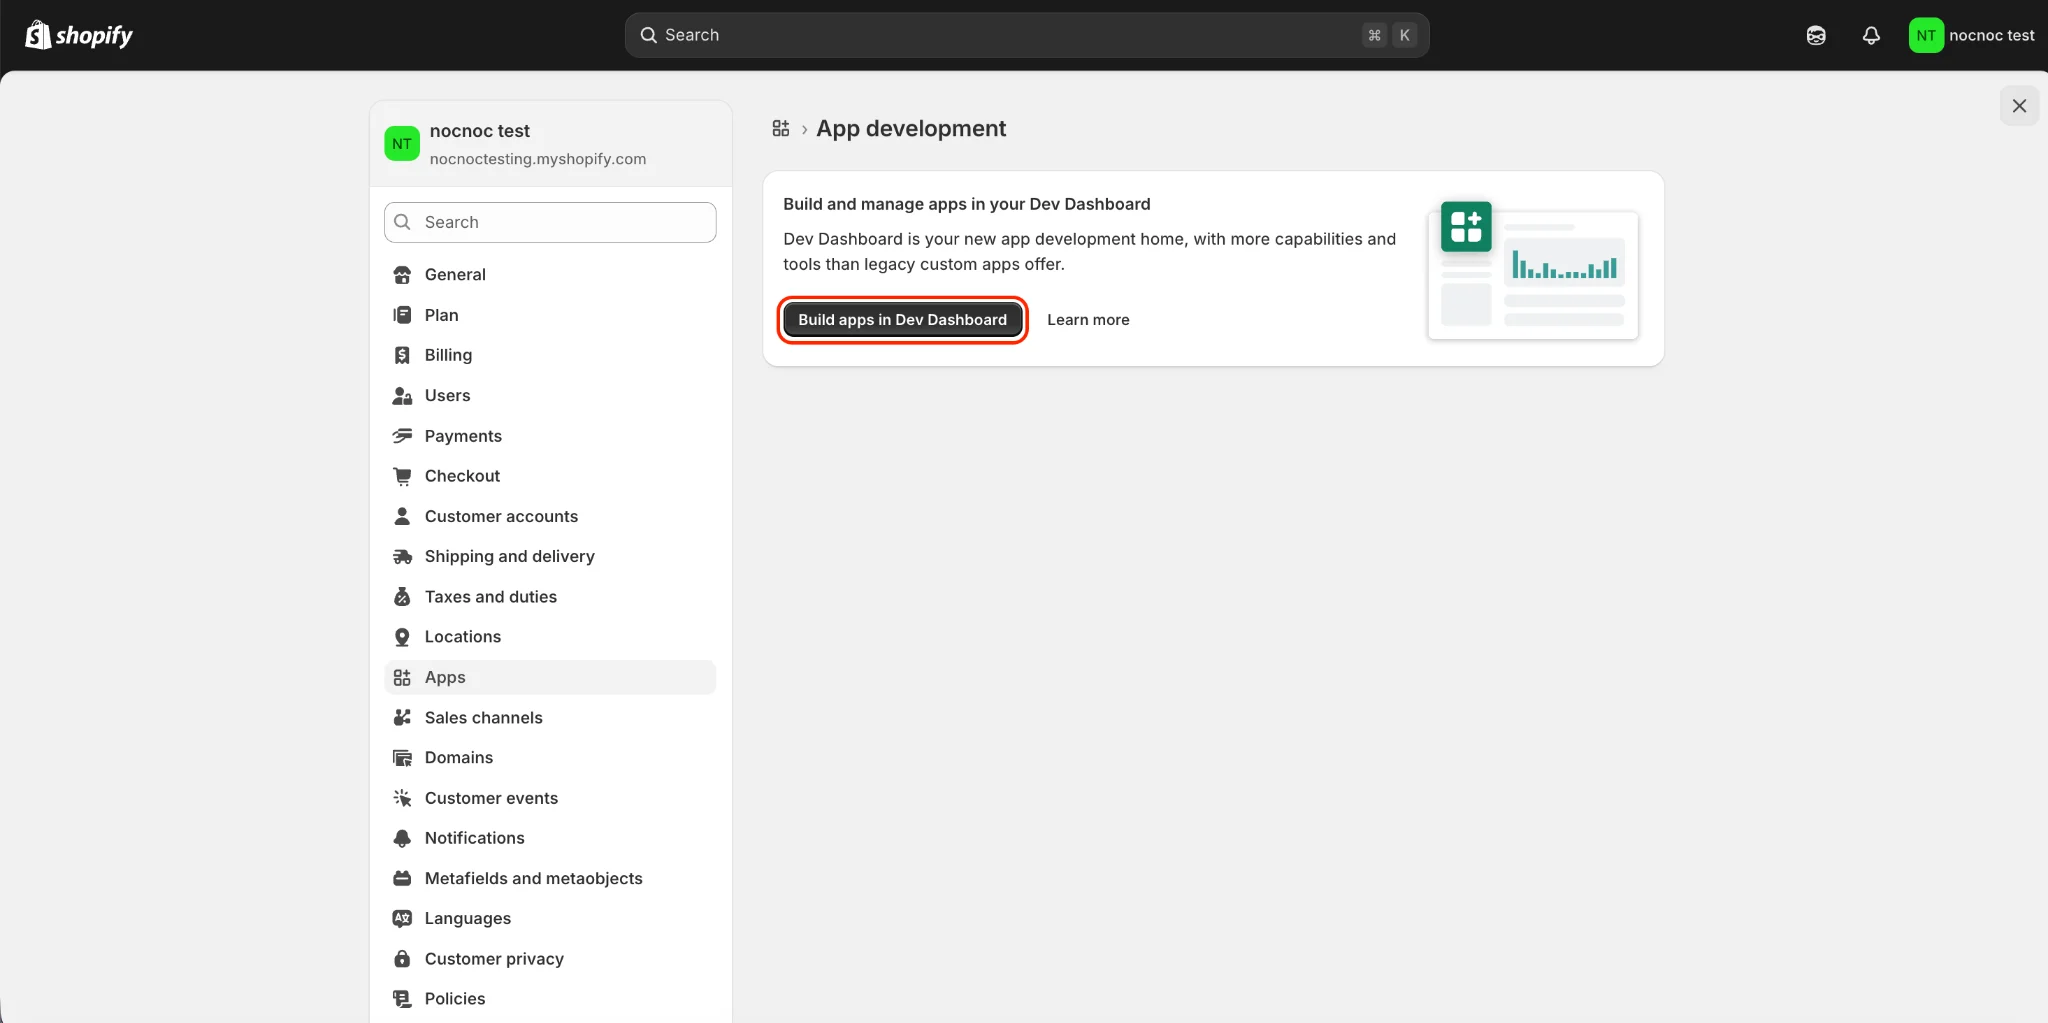
4
Create a new app
Inside the Dev Dashboard, go to the Apps section and click Create App.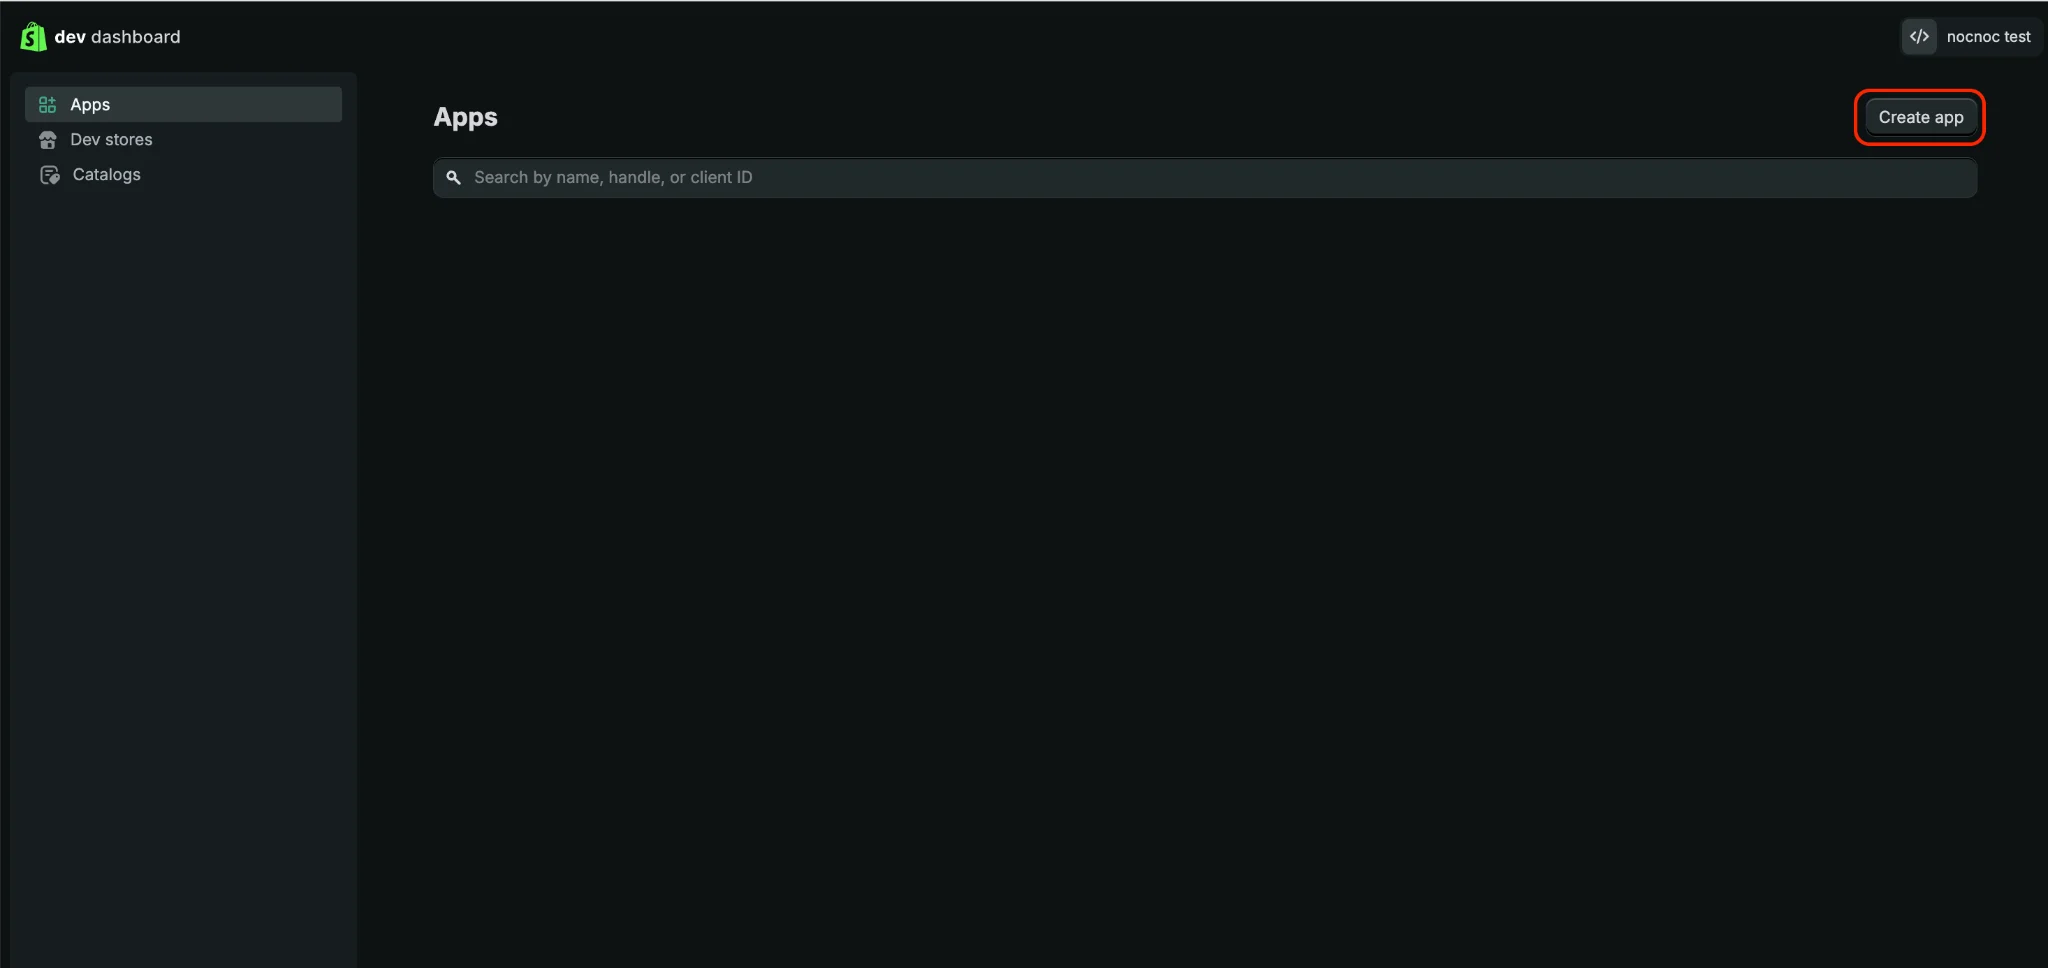
5
Name your app
Fill in the App name (we suggest using 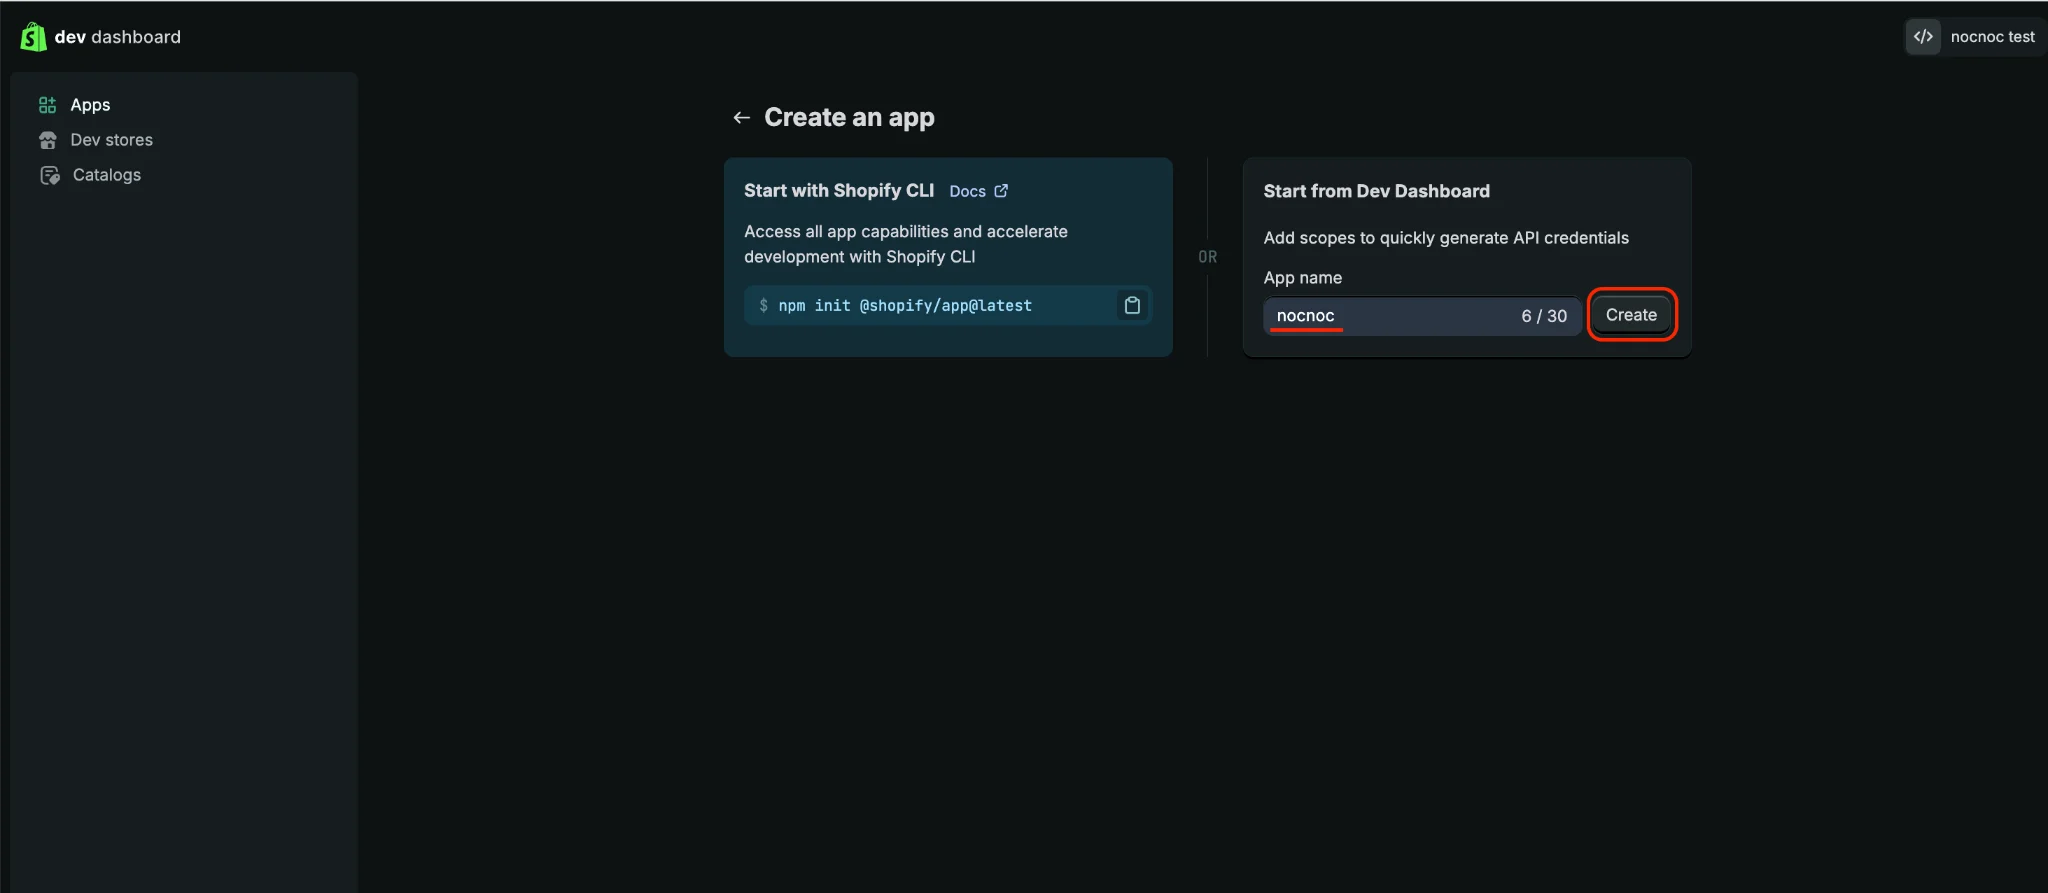
nocnoc) and click Create.6
Configure the app version
In the Create a version section, fill in the following fields: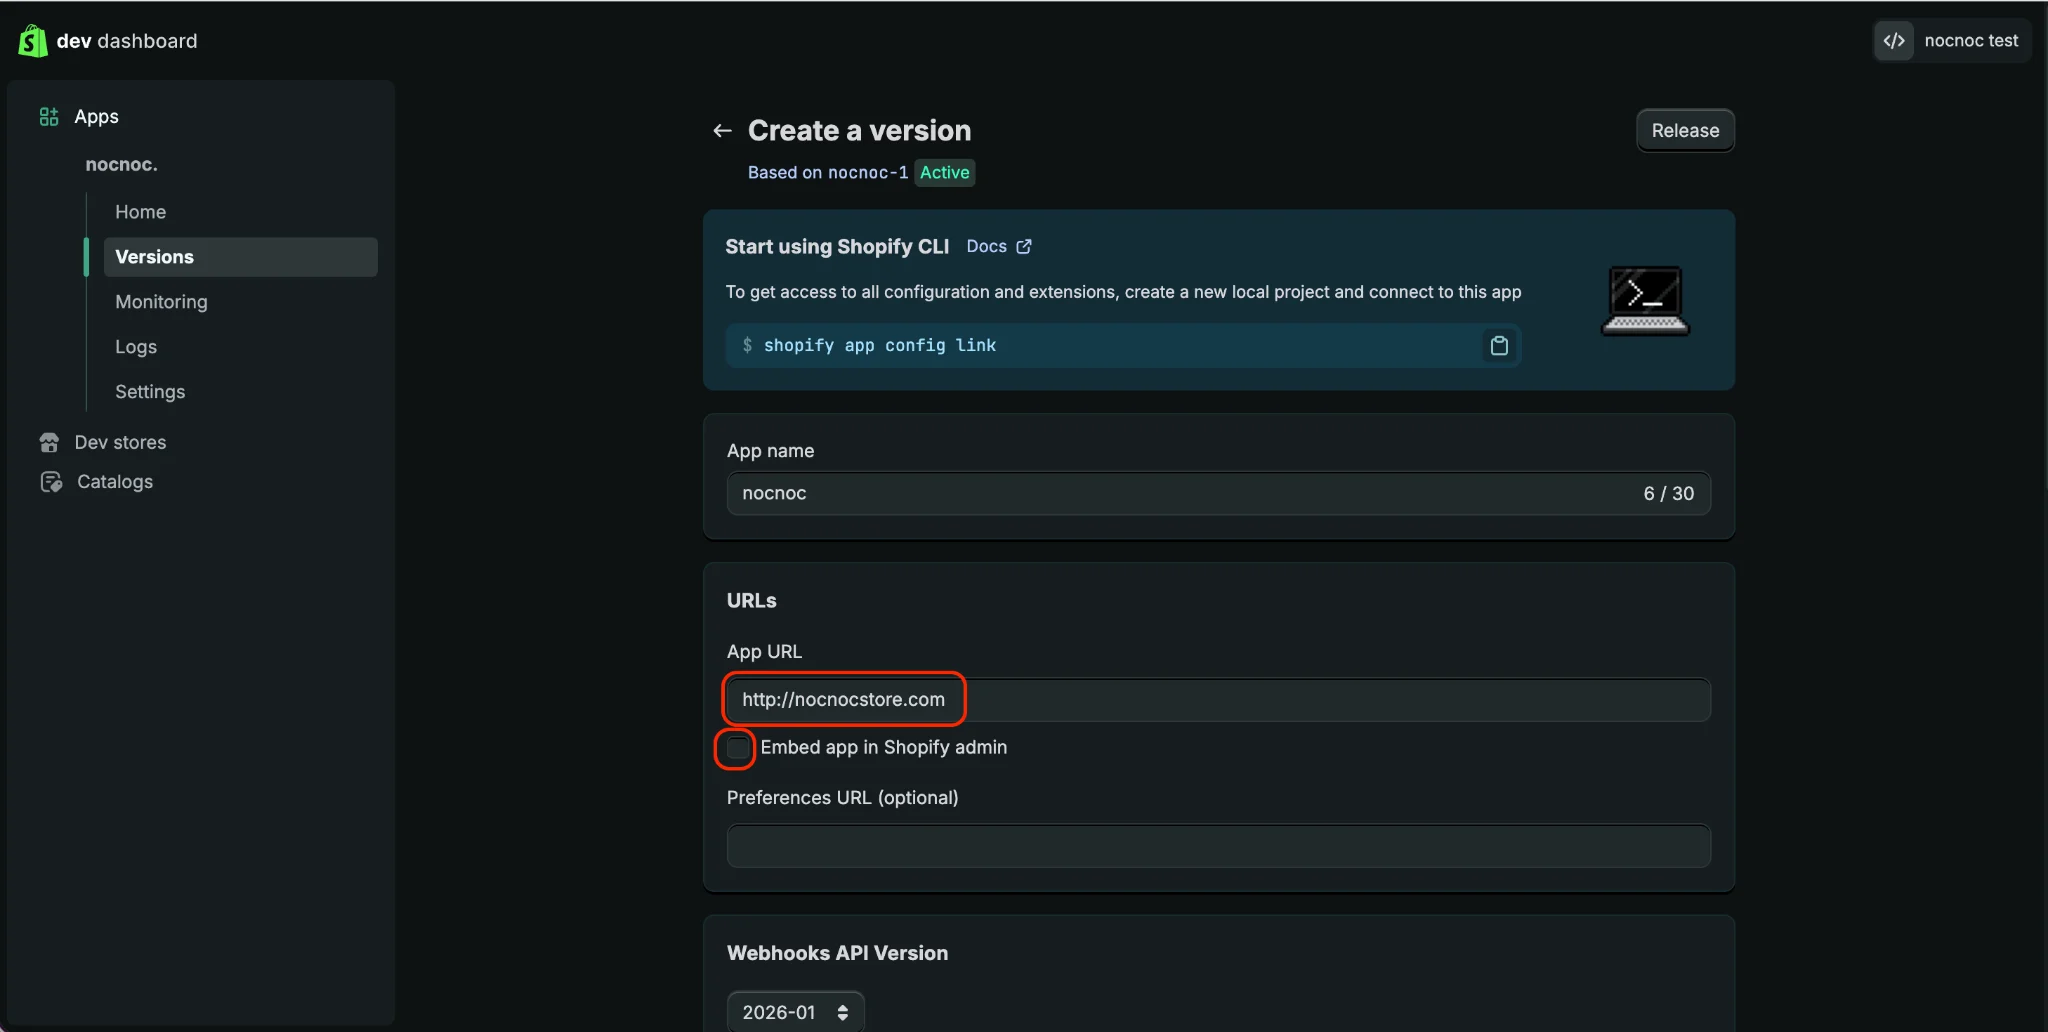
- App name — same as the one you chose above.
- App URL —
http://nocnocstore.com - Uncheck Embed app in Shopify admin.
- Webhooks API Version — select the latest available version.
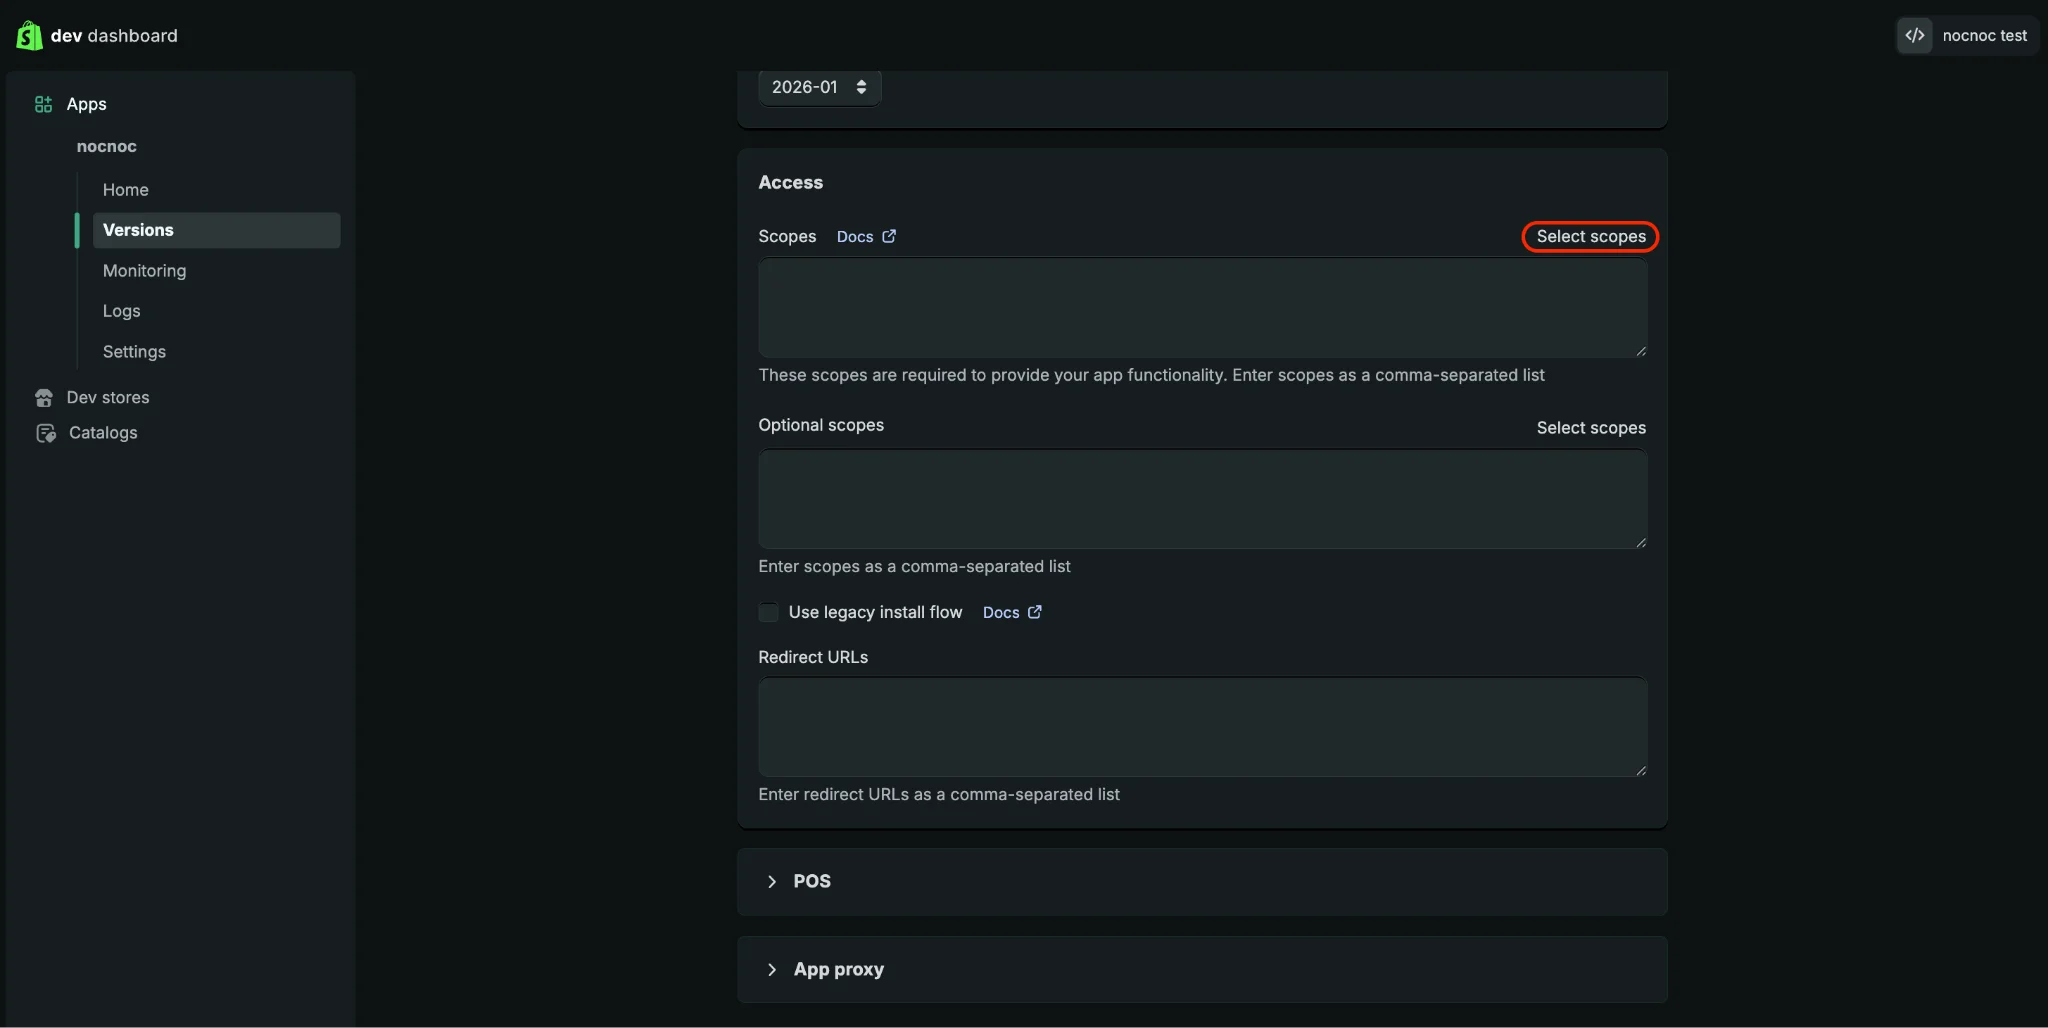
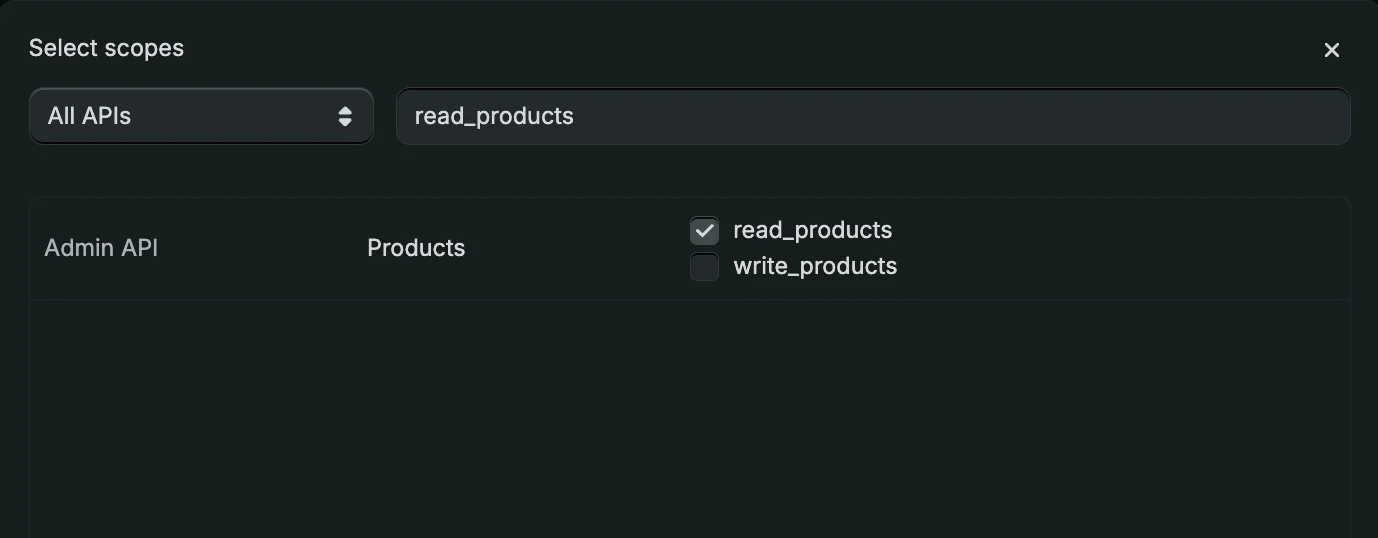
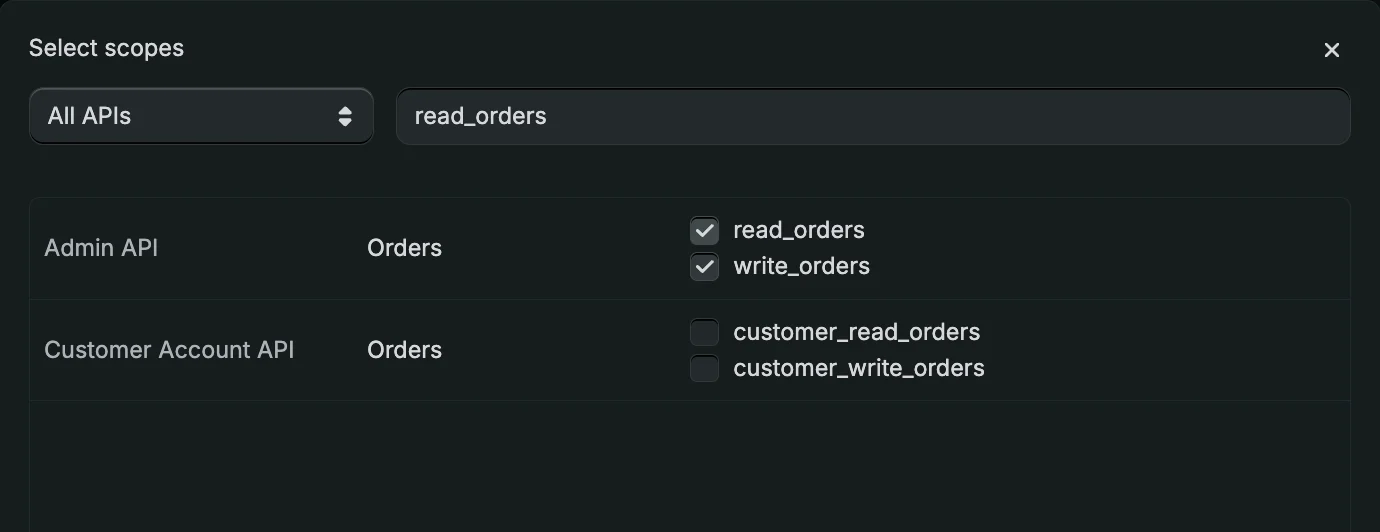
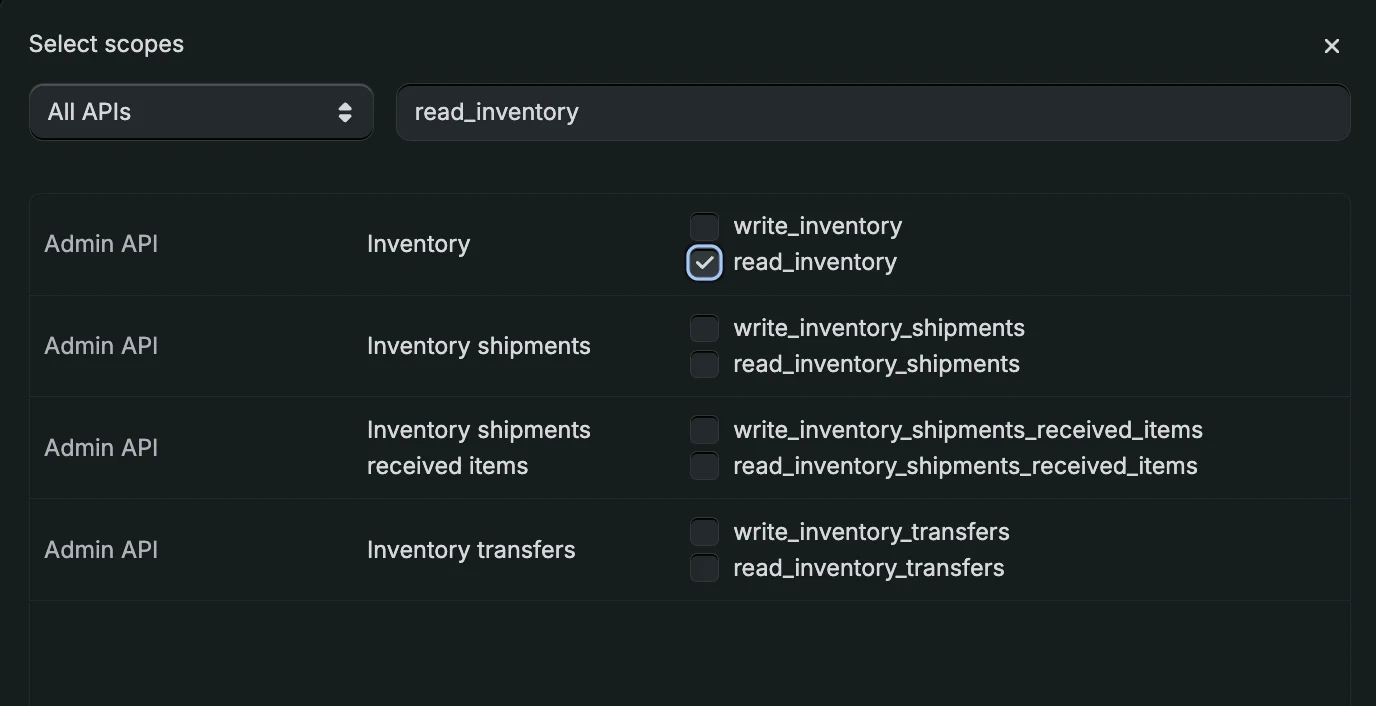
7
Set the Redirect URL and release
Confirm all required scopes are selected, then set the Redirect URL to: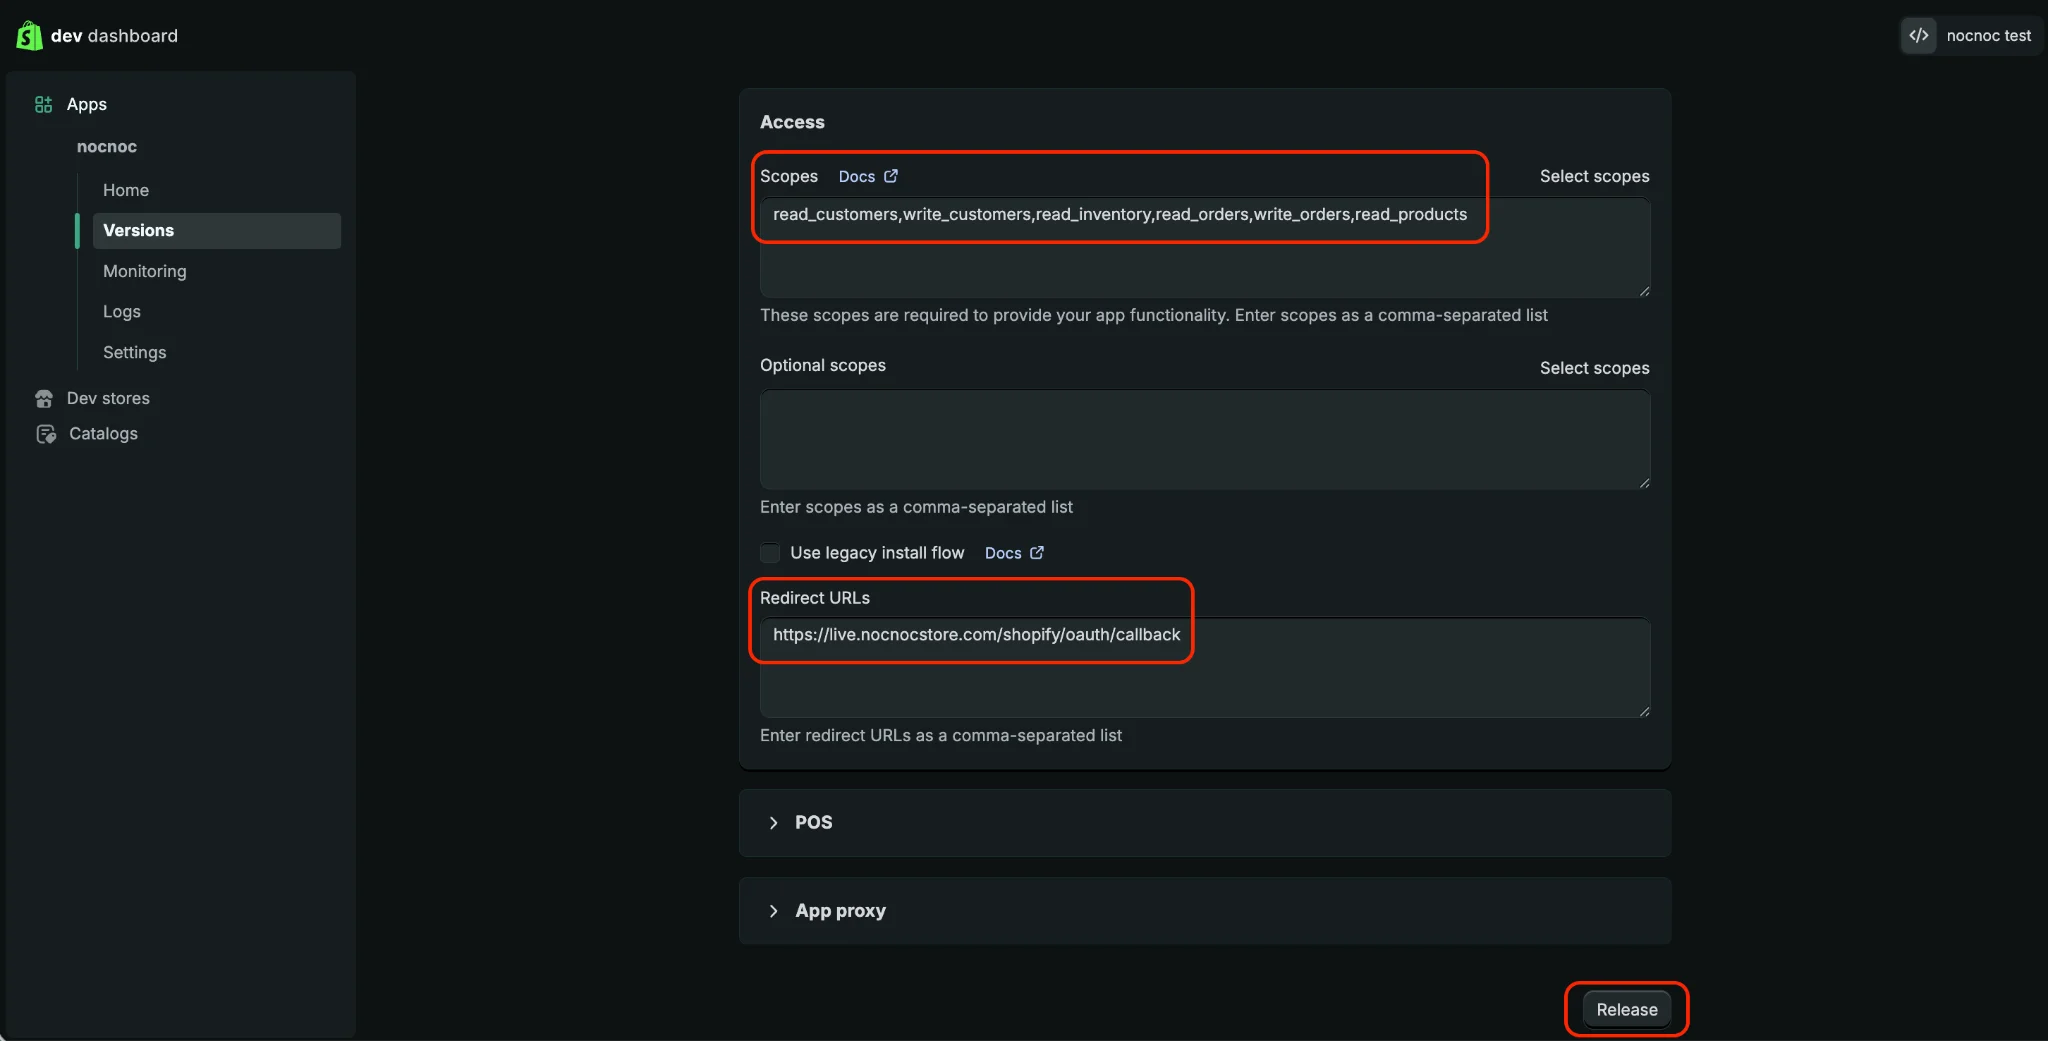
8
Name and release the version
Set the Version name to 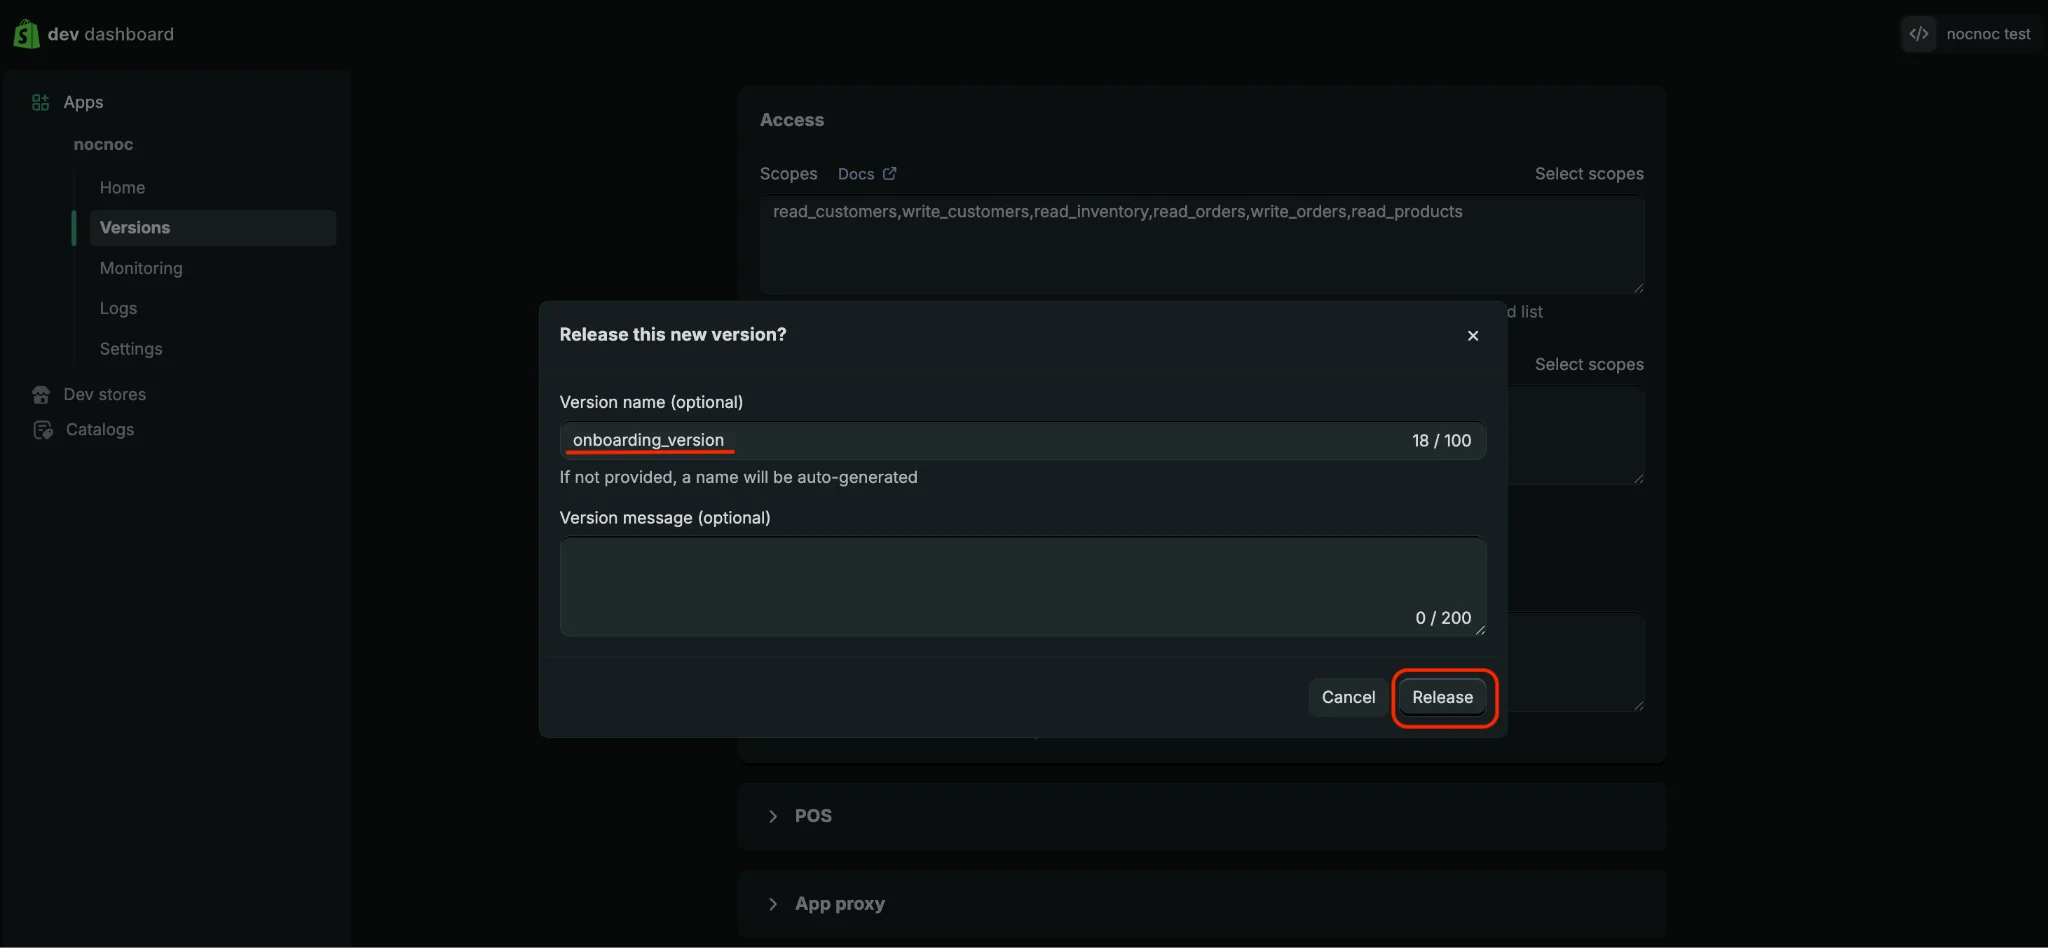
onboarding_version and click Release.9
Save your Client ID and Secret
In the Settings section of the nocnoc app, save the following — you’ll need to share them with your Account Manager: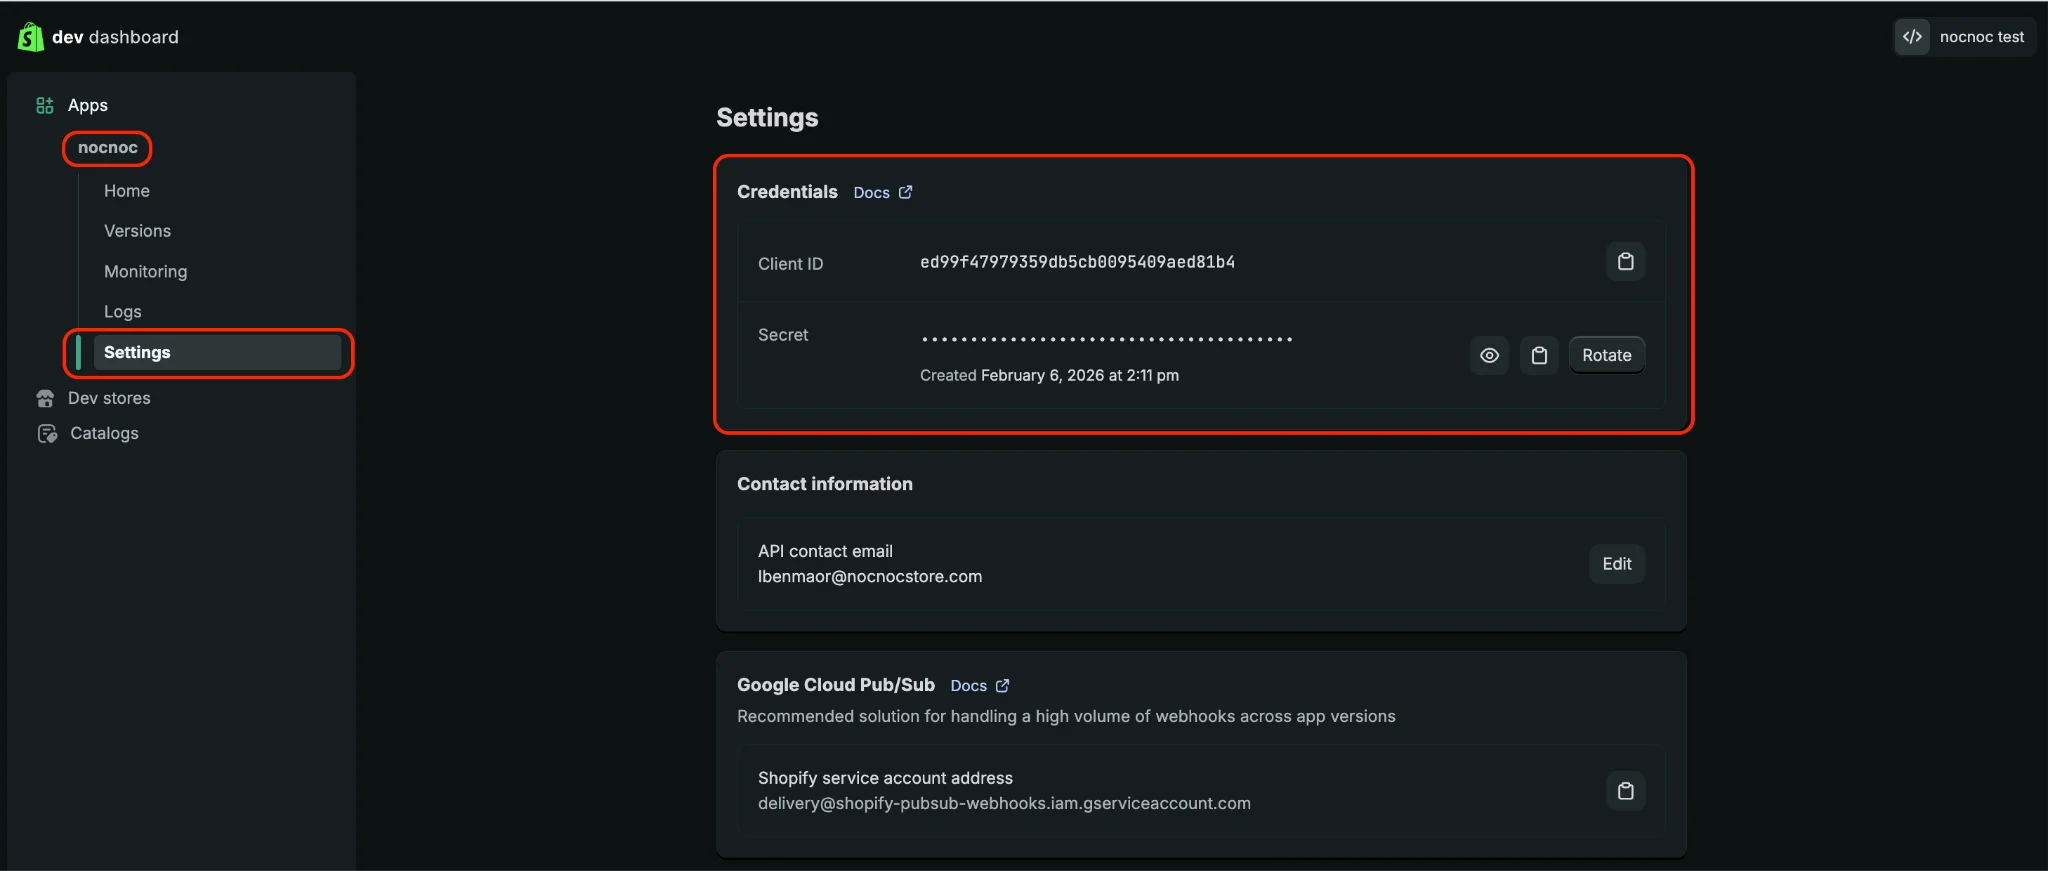
- Client ID
- Secret
10
Install the app
Go to the Home section of the nocnoc app and click Install app.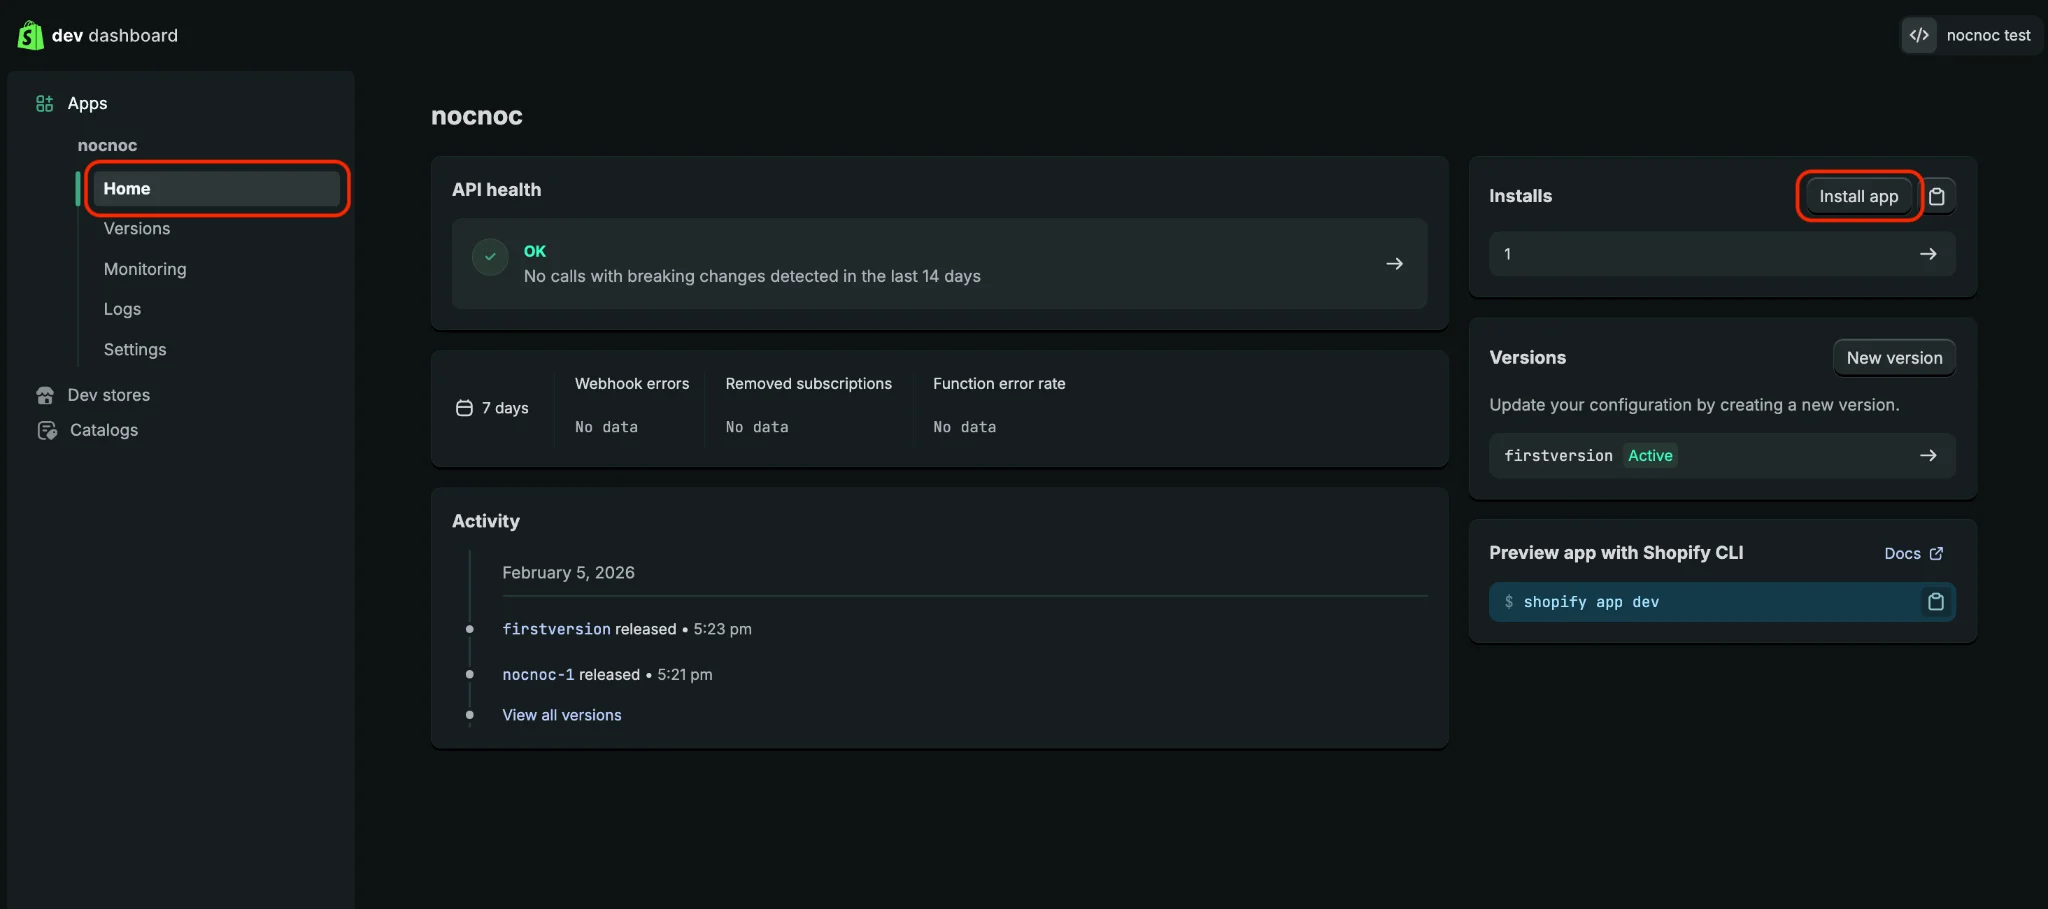
11
Select your store
In the window that opens, select the active Shopify store you want to connect to nocnoc.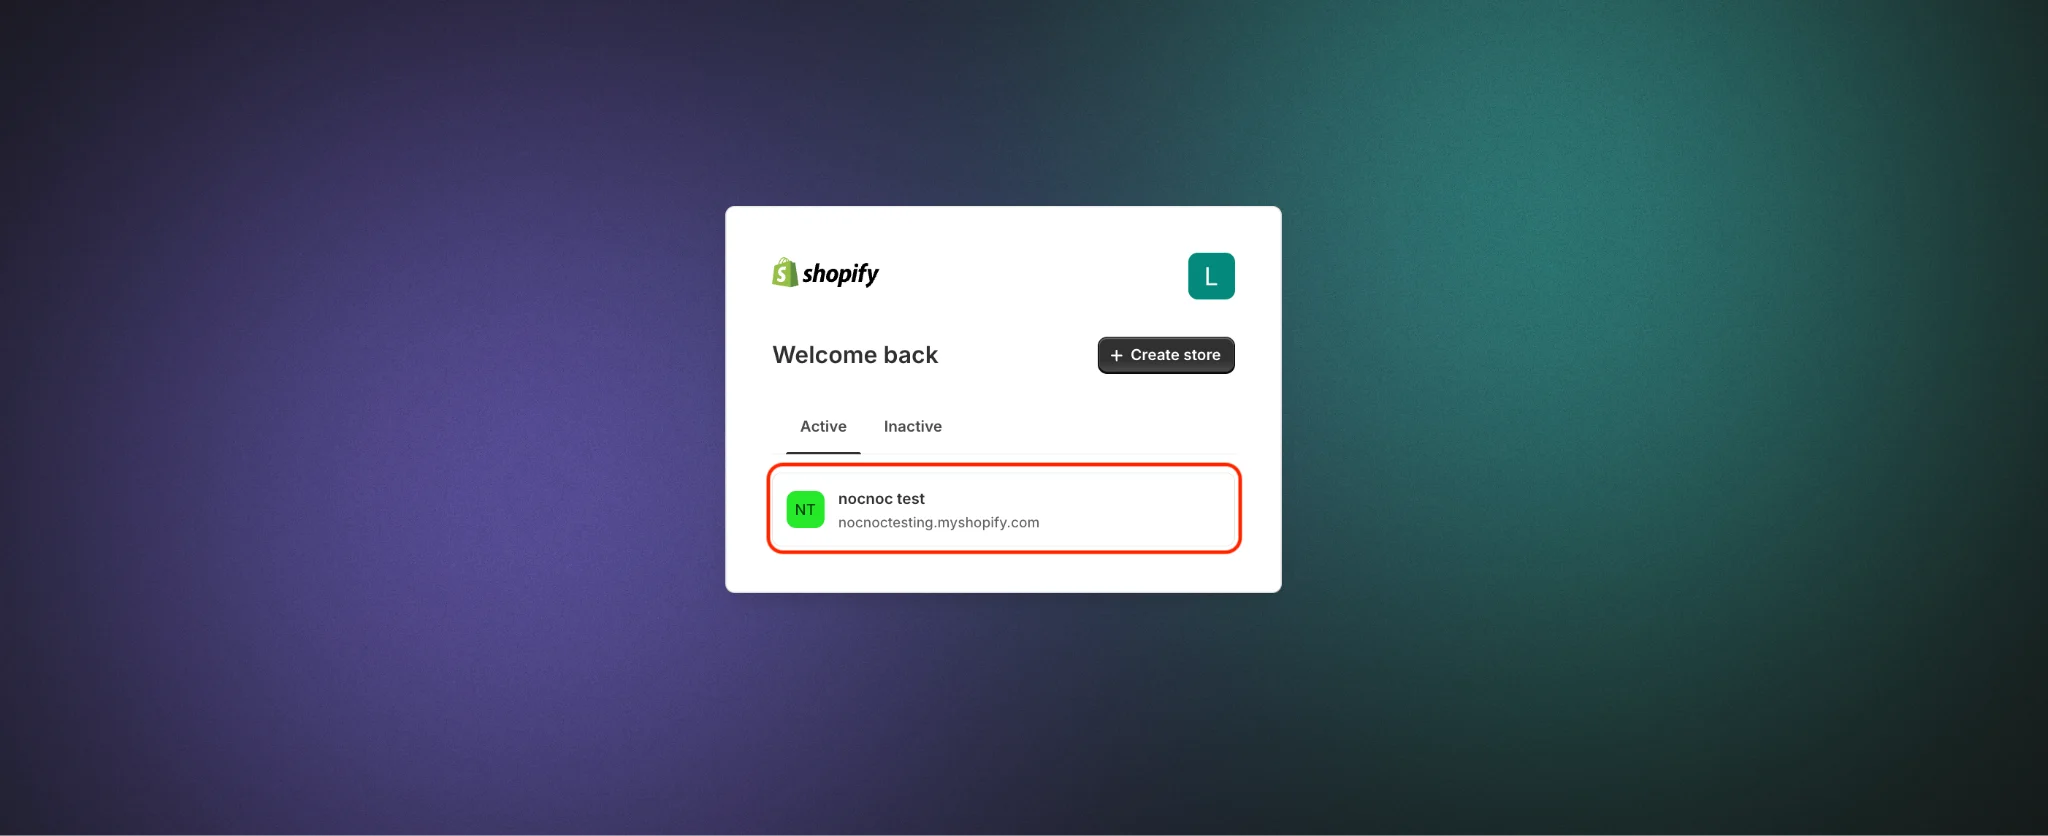
12
Confirm permissions
Review the access permissions requested and click Install.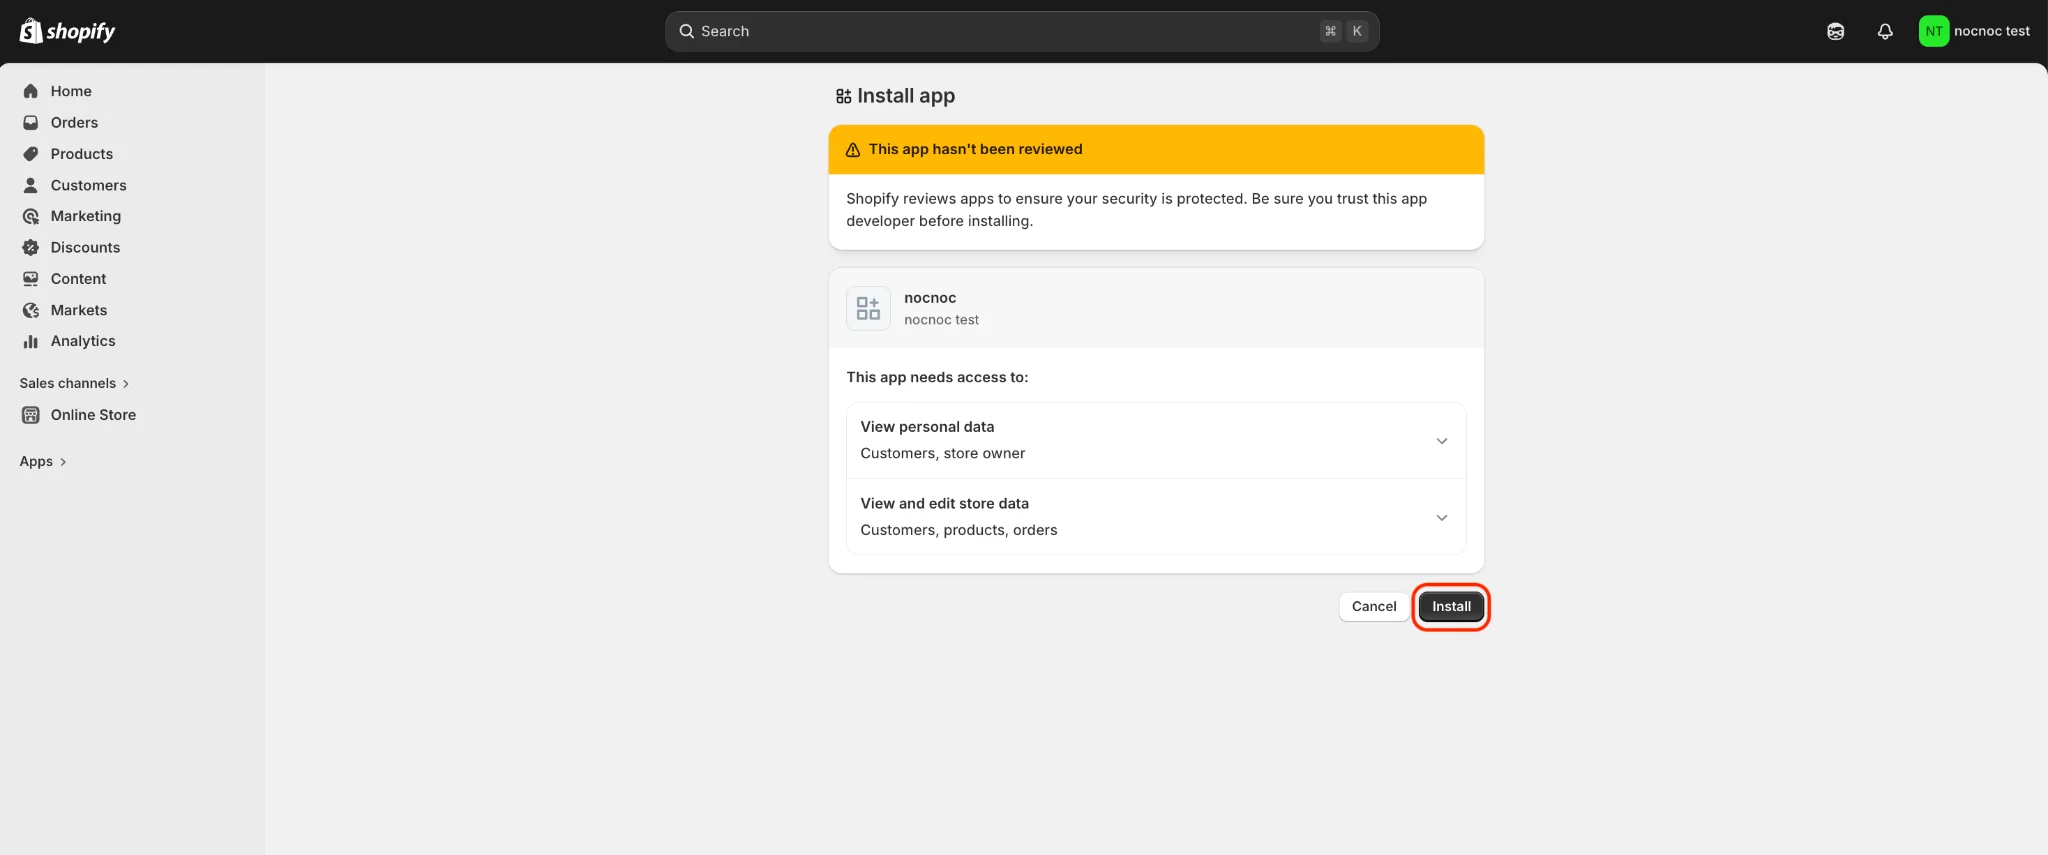
After clicking Install, you’ll be redirected to nocnoc’s website — no action is needed there. Close that page and return to your Shopify Admin to continue.
13
Navigate to Webhooks
Close the Dev Dashboard and return to Settings in your Shopify Admin panel.Navigate to Notifications → Webhooks.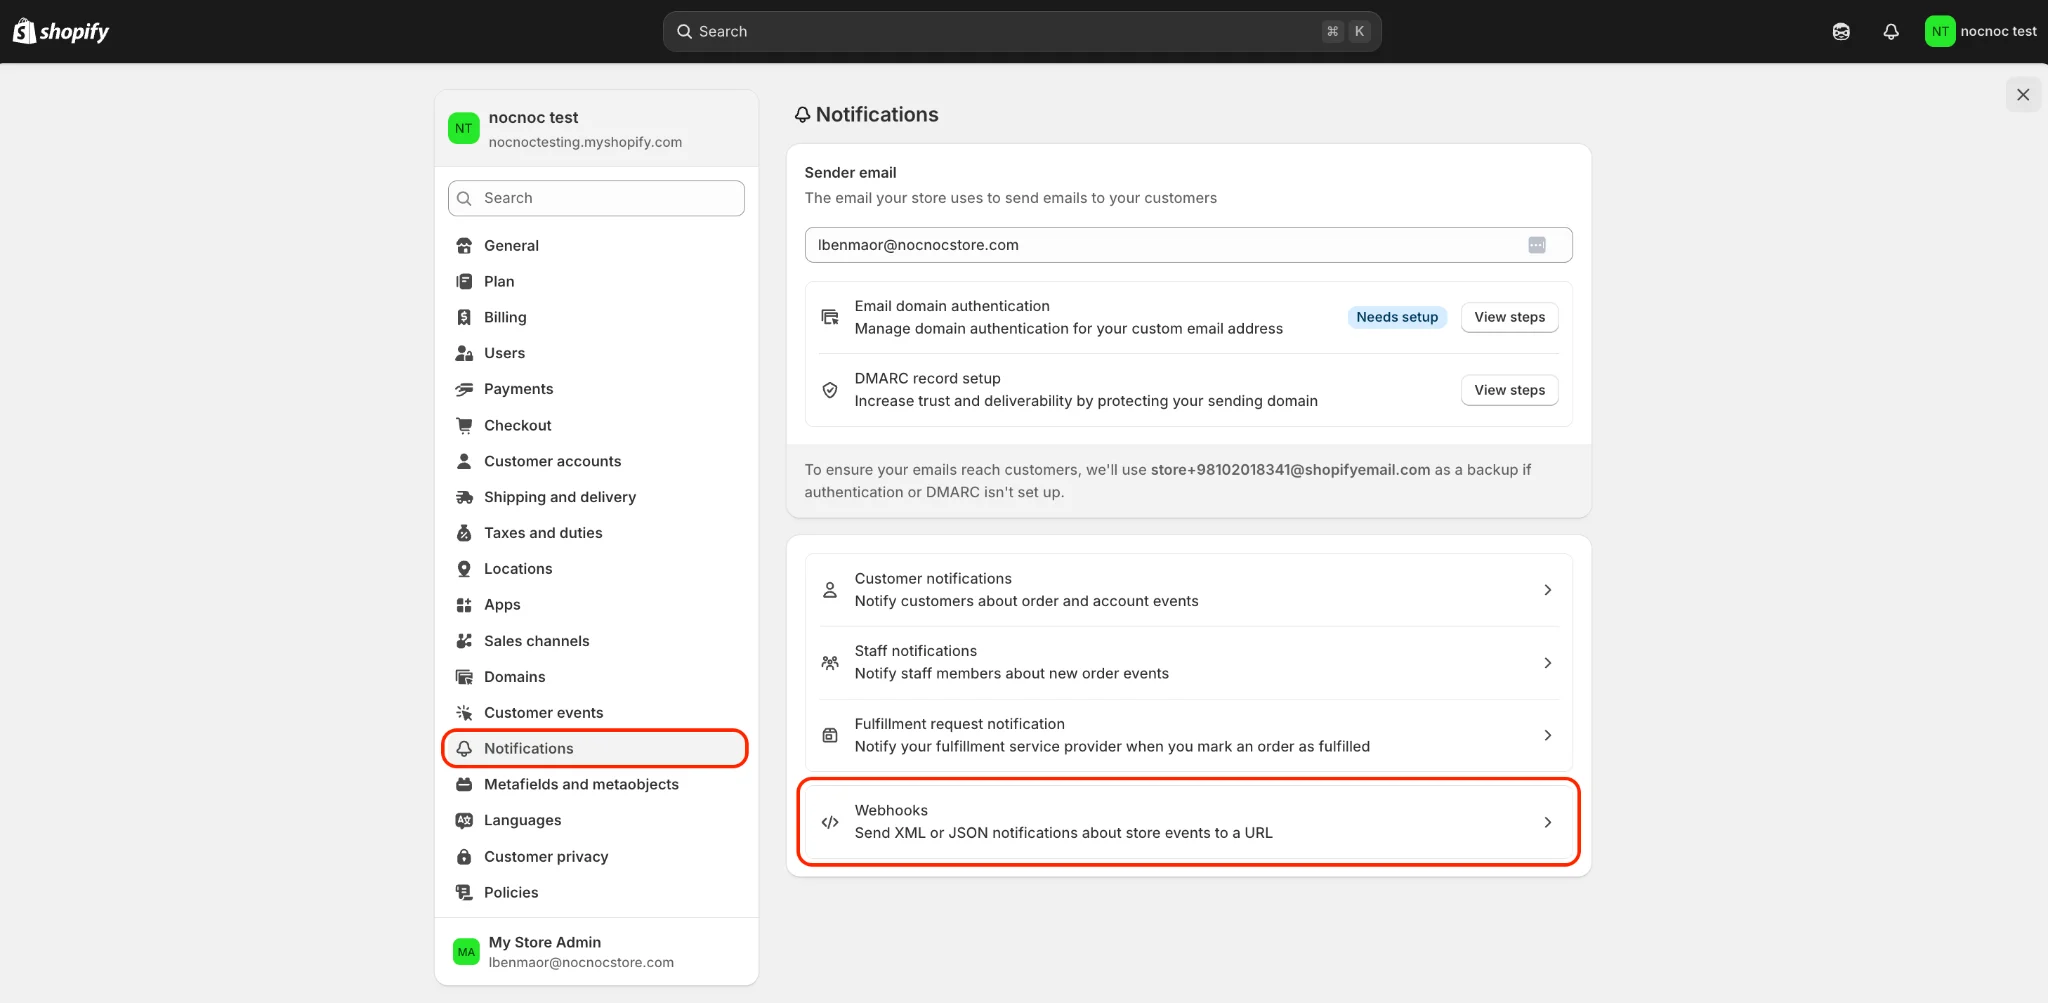
14
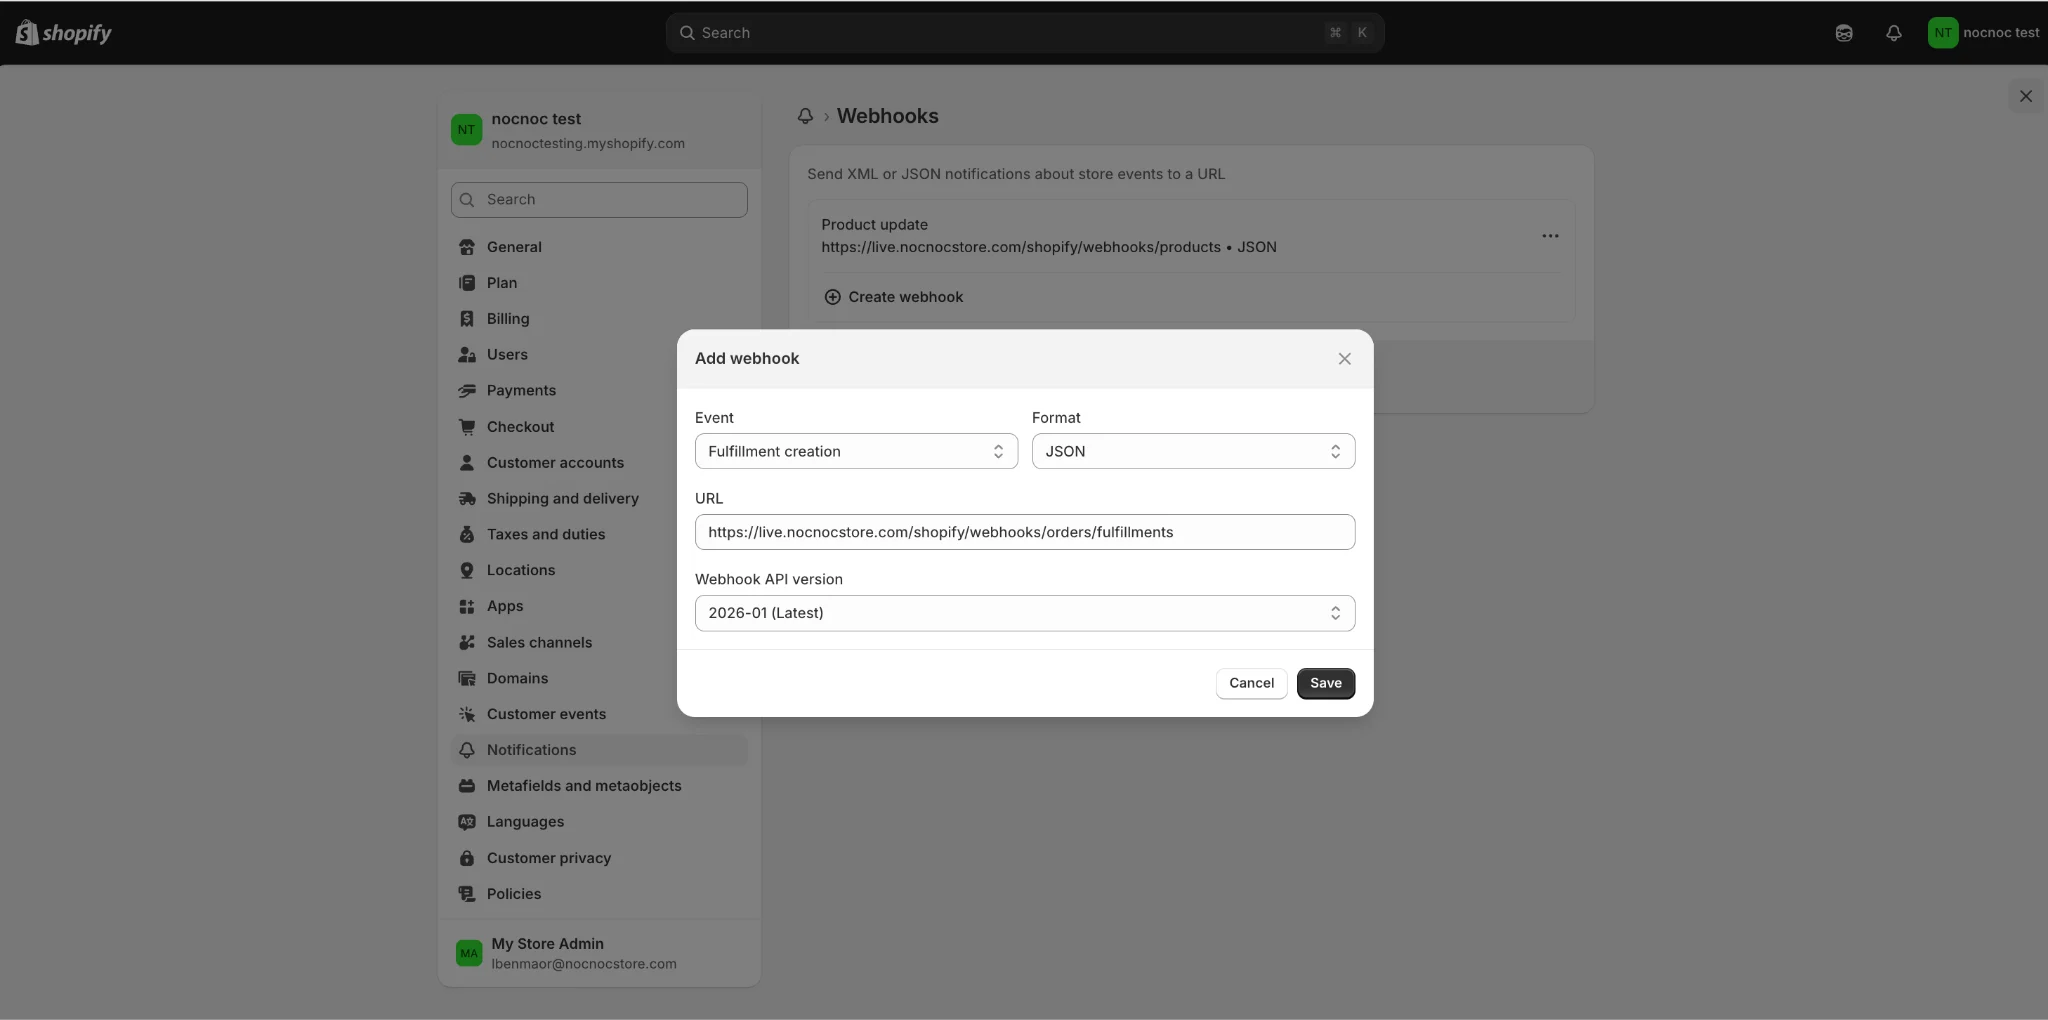
Create two webhooks
Create the following two webhooks:Webhook 1 — Product updates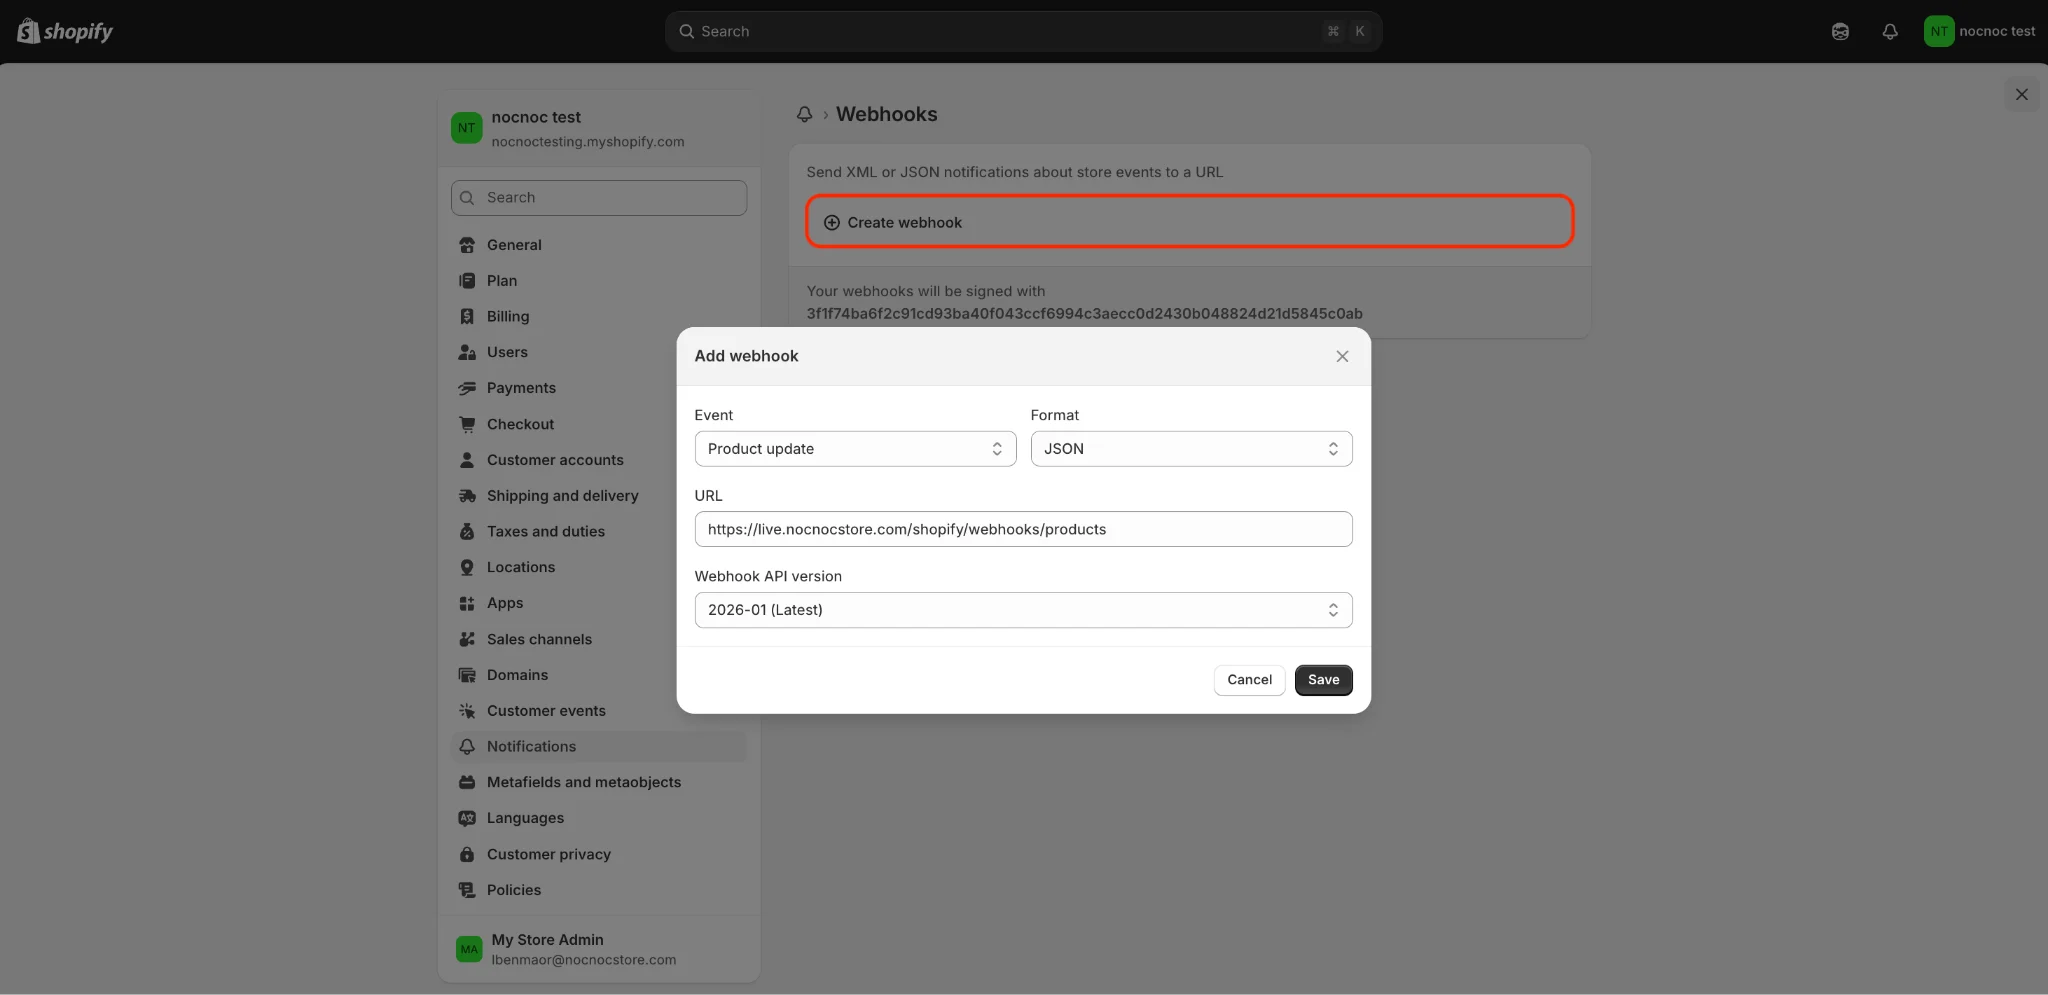
15
Send configuration details to your Account Manager
Once all previous steps are complete, email your Account Manager with the following information to finish the integration setup:
- Store domain URL (from Step 2) — the URL ending in
.myshopify.com(e.g.yourstore.myshopify.com). Find it in Settings → Domains. - Client ID (from Step 9)
- Secret (from Step 9)