Option 1 — Order Printer Pro
Requires the Order Printer Pro app from the Shopify App Store.
Option 2 — Native packing slips
Uses Shopify’s built-in packing slip template. No additional apps needed.
We recommend Option 1 (Order Printer Pro) whenever possible. It’s easier to set up and provides a more reliable barcode rendering.
Option 1: Order Printer Pro
Order Printer Pro is a Shopify app that you need to install from the Shopify App Store before starting.Step 1: Open the template editor
Access the Manage Templates section of Order Printer Pro. Select your Packing Slip template and click Edit Template.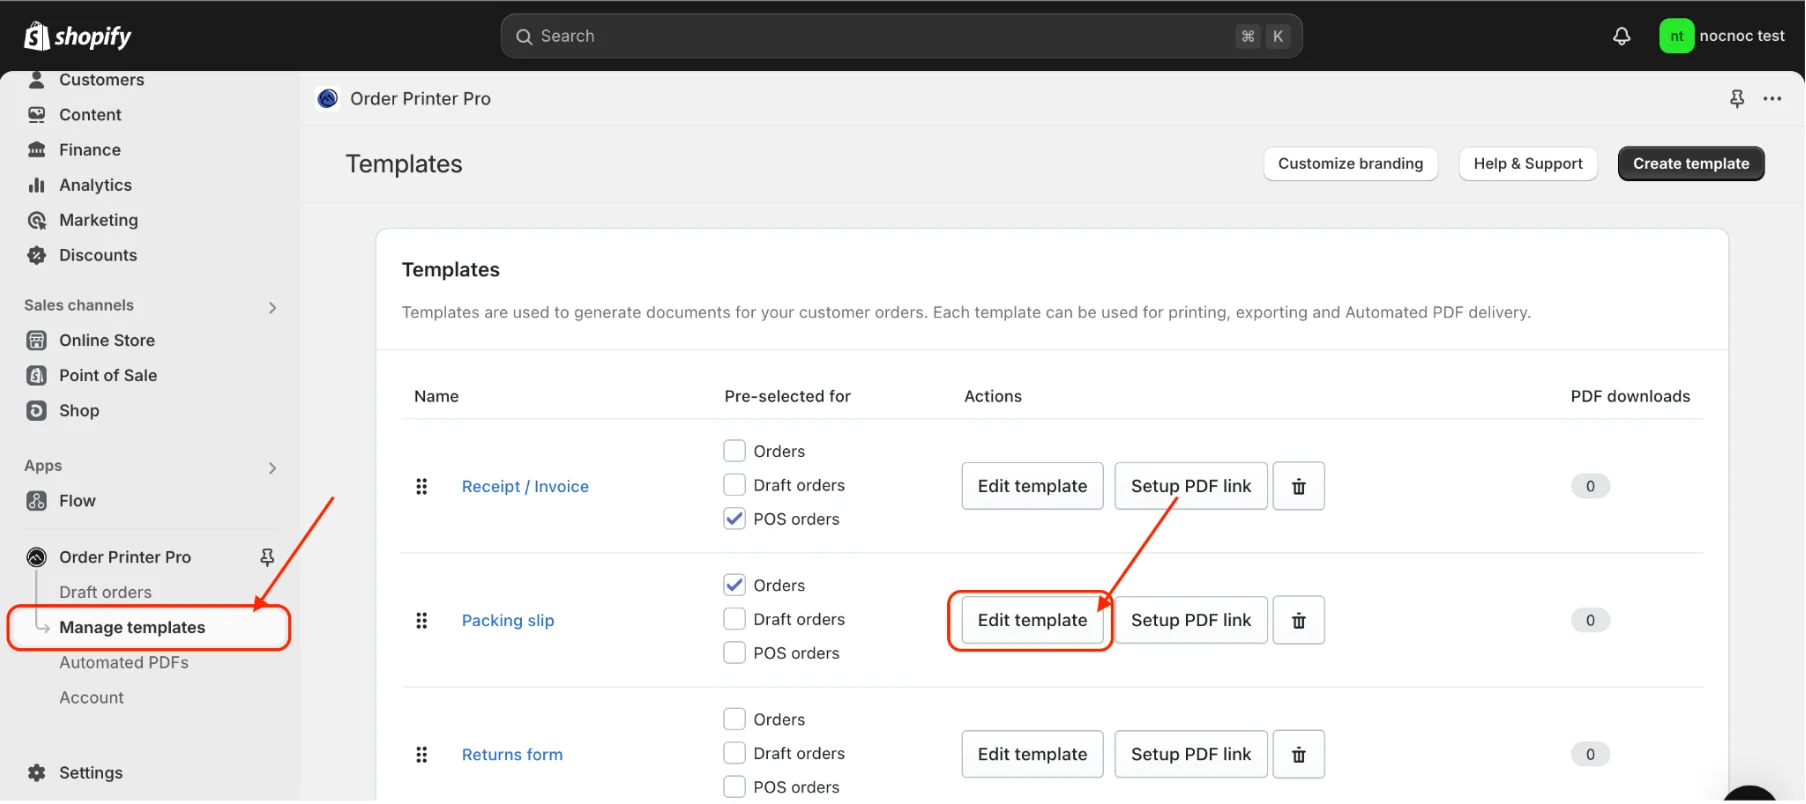
Step 2: Add the barcode code
Insert the following two code blocks into your template. Code 1 — Captures the nocnoc Order ID. Add this at the beginning of the template.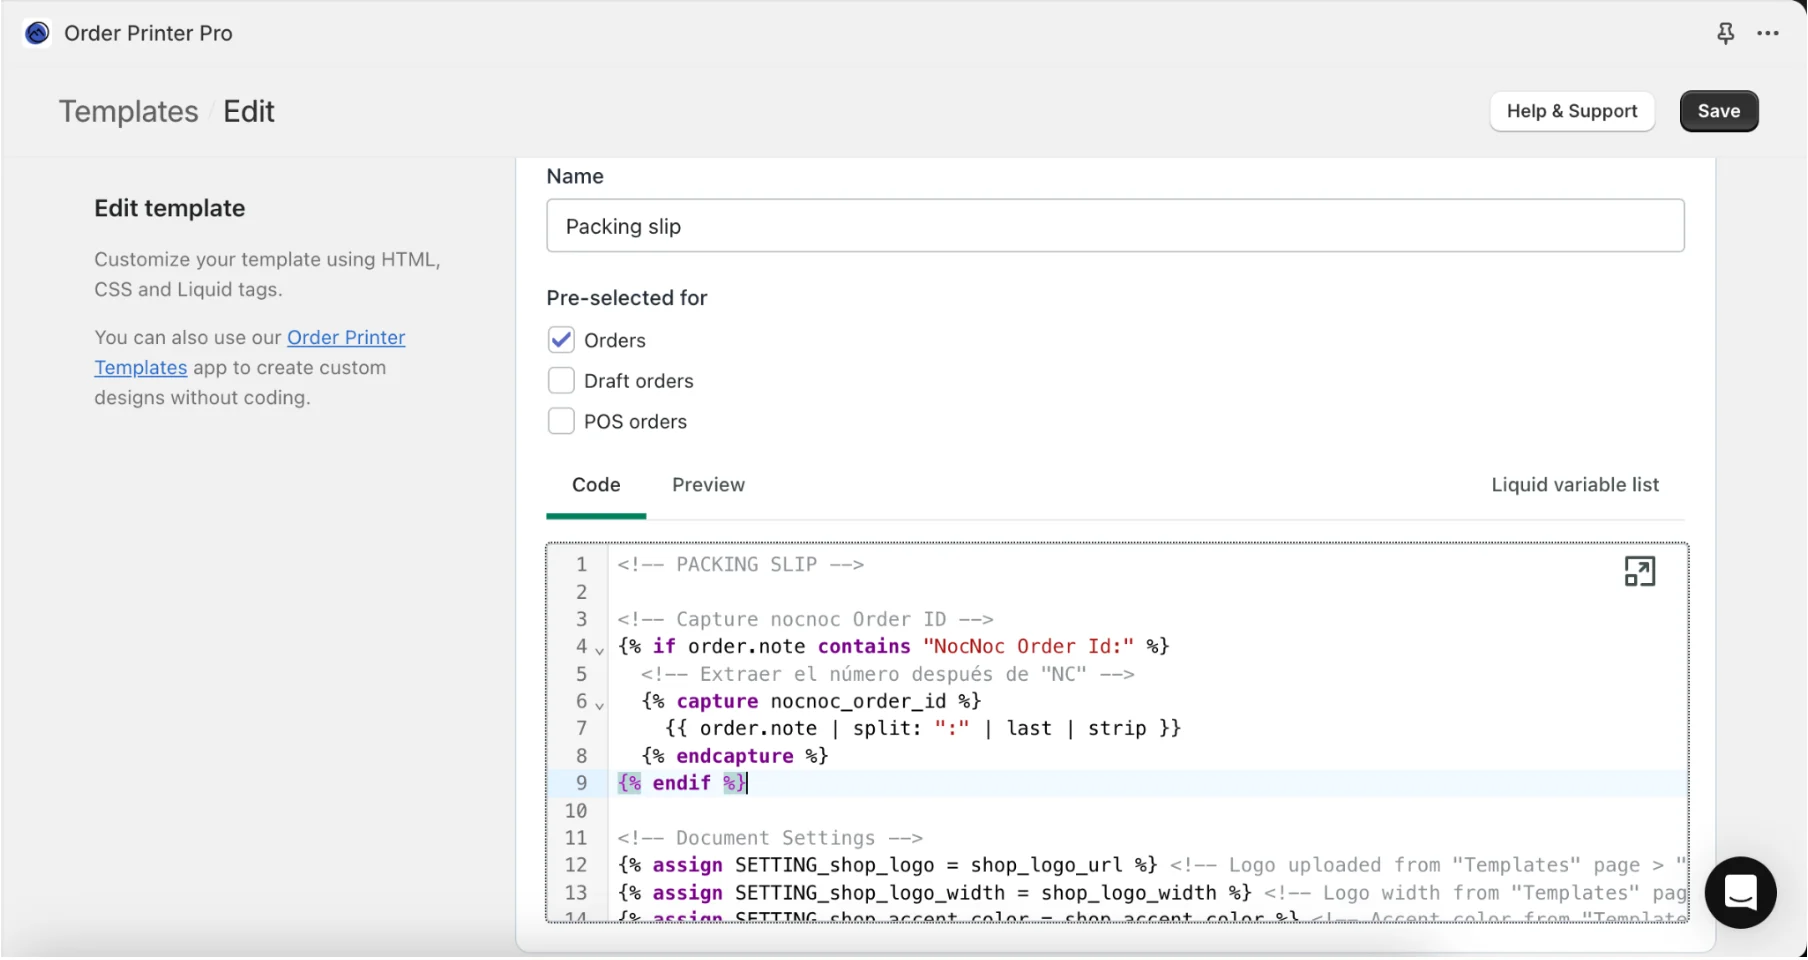
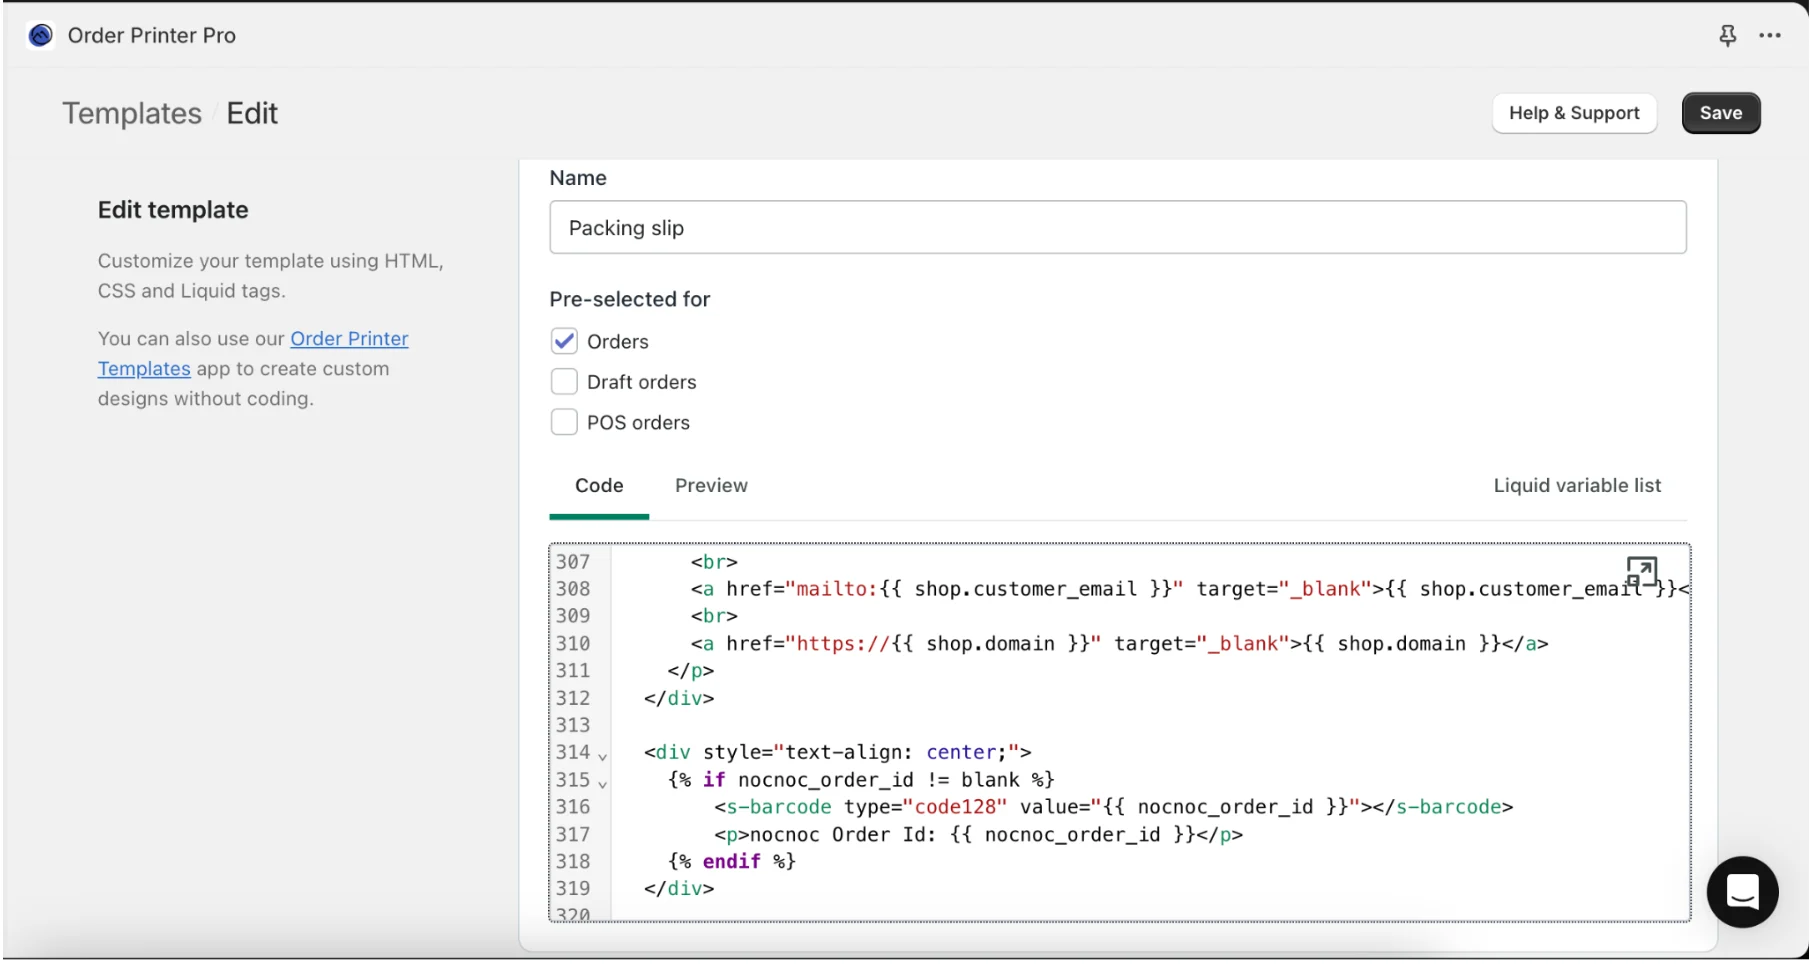
nocnoc OrderID: NCXXXXX label. Add this wherever you want in your template. It only displays for nocnoc orders and won’t affect the rest of your operation.
Option 2: Native packing slips
Step 1: Download and upload the barcode font
Download the Barcode 39 Text font from Google Fonts: https://fonts.google.com/specimen/Libre+Barcode+39+Text Extract the.zip file and upload the .ttf file to your Shopify store. Go to Content → Files and click Upload Files.
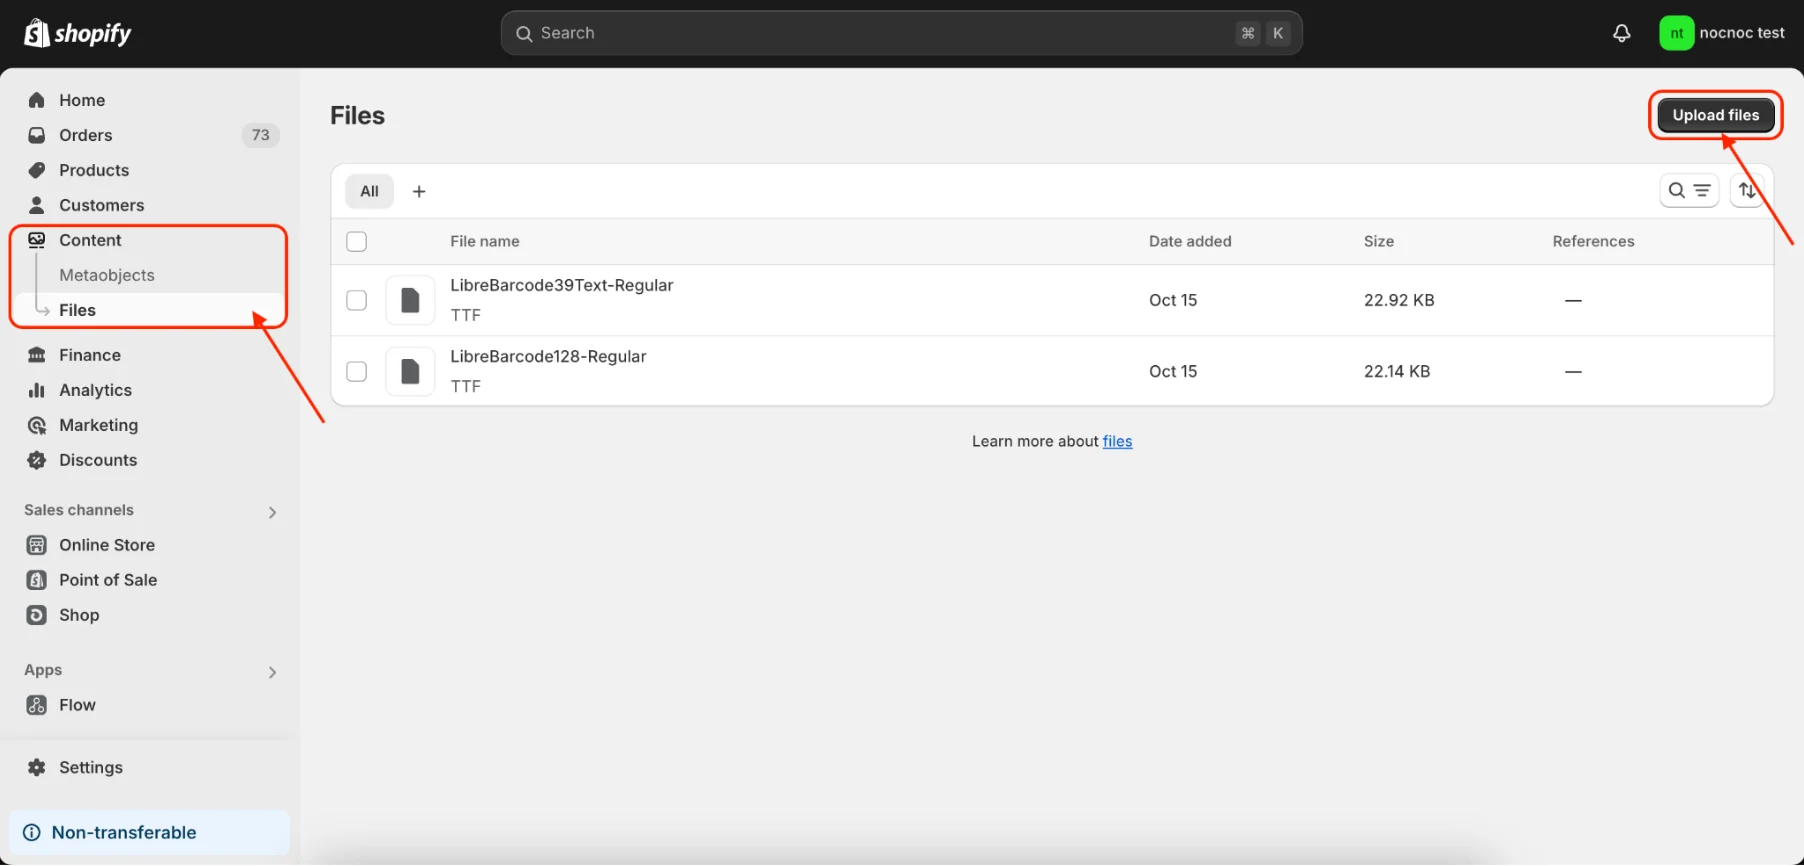
Copy and save the URL that Shopify generates for your uploaded file — you’ll need it in the next step.
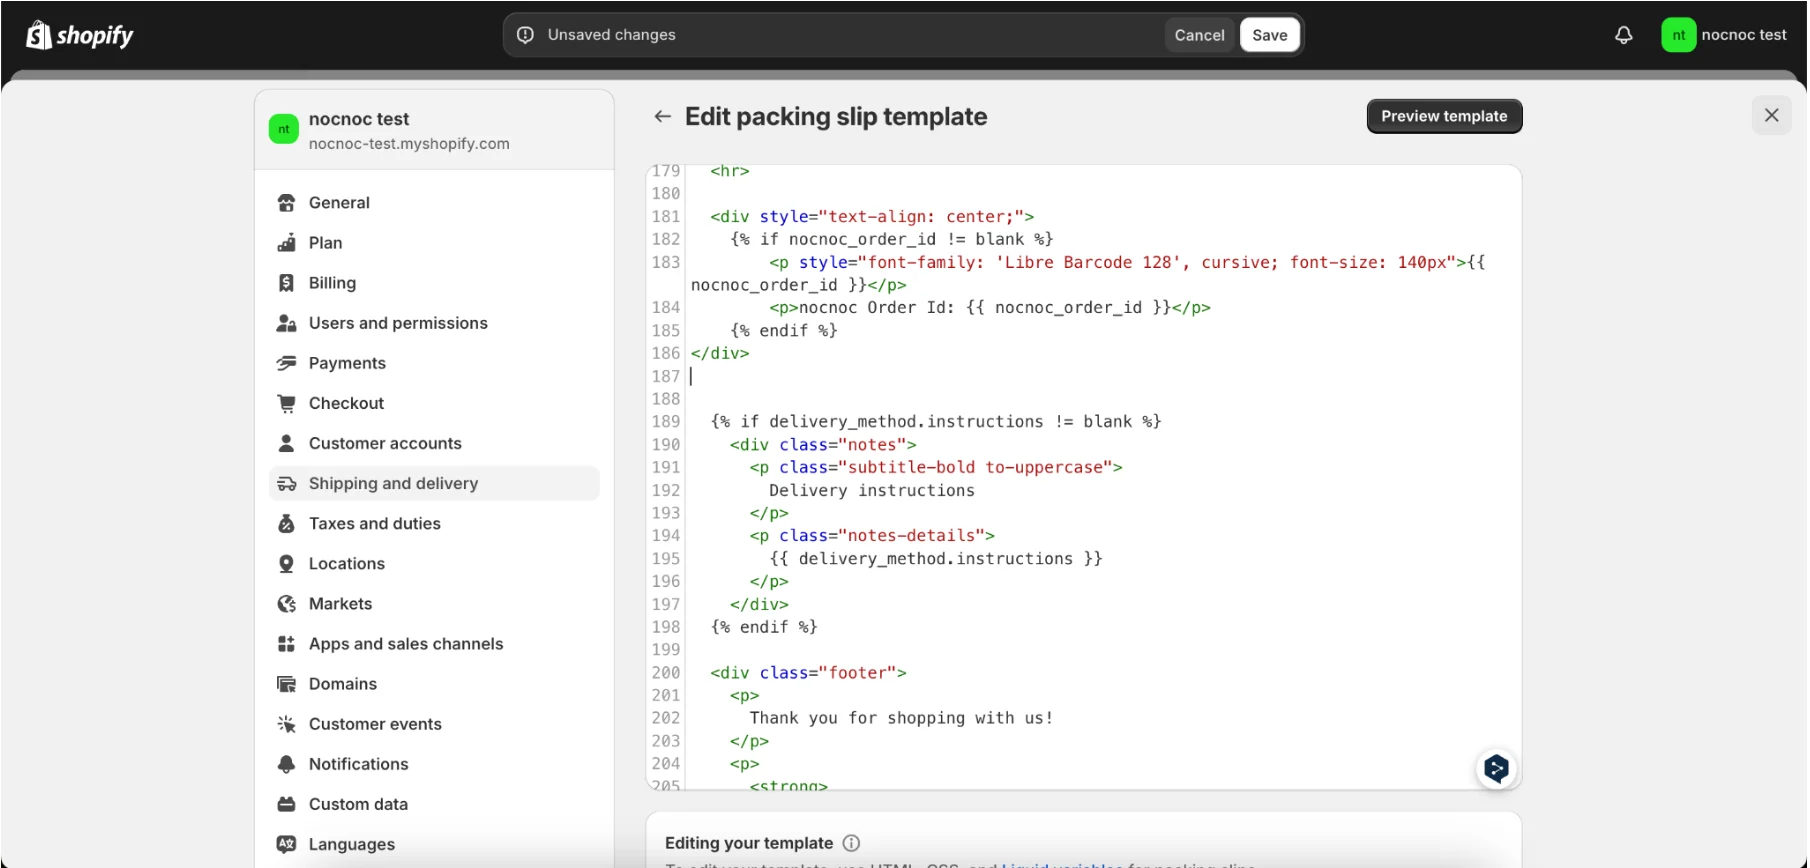
Step 2: Modify the packing slip template
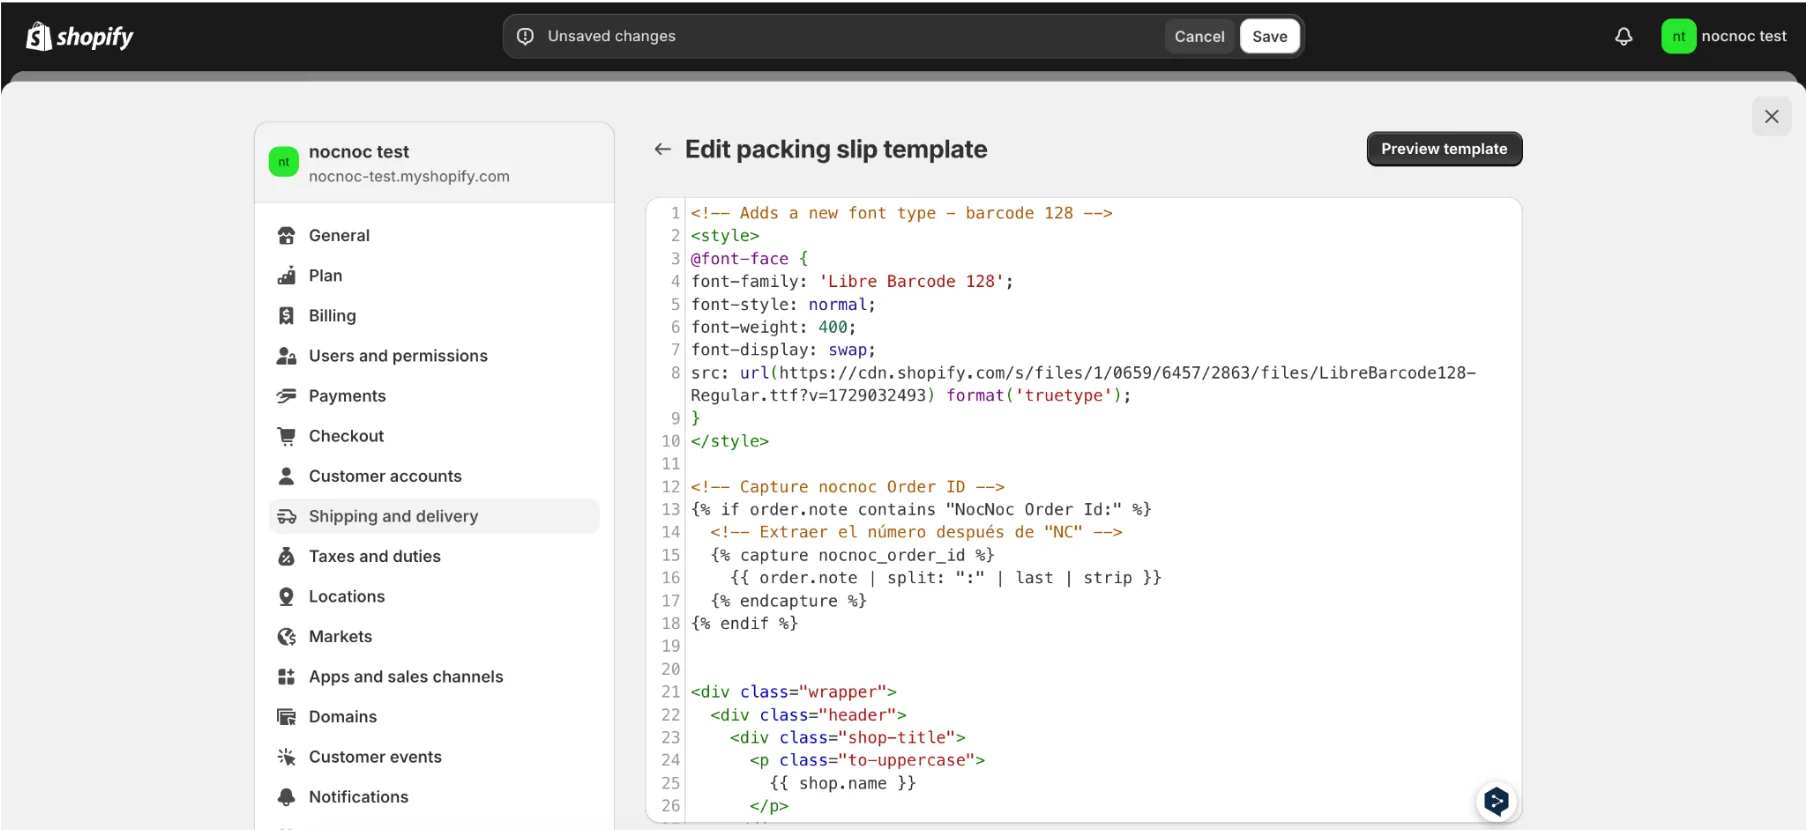
Go to Settings → Shipping and Delivery → Packing Slips Template and add the following three code blocks. Code 1 — Loads the barcode font. Add this at the beginning of the template. ReplaceURL_OF_YOUR_FONT_FILE with the URL from Step 1.
nocnoc OrderID: NCXXXXX label. Add this wherever you want in your template. It only displays for nocnoc orders and won’t affect the rest of your operation.