Prefer a video walkthrough? Watch the full tutorial on Loom before getting started.
Setup guide
This integration requires creating two Export Profiles and one Import Profile, which will then be configured on three separate Scheduled Tasks, plus two Saved Searches (for Products and for Orders).Download templates
Download the nocnoc templates before starting:Create profiles
Export profiles (×2)
- Navigate to Settings → Mapping Tools → Manage Export Mapping Profiles.
- Click the blue Actions icon in the bottom right corner → Create.
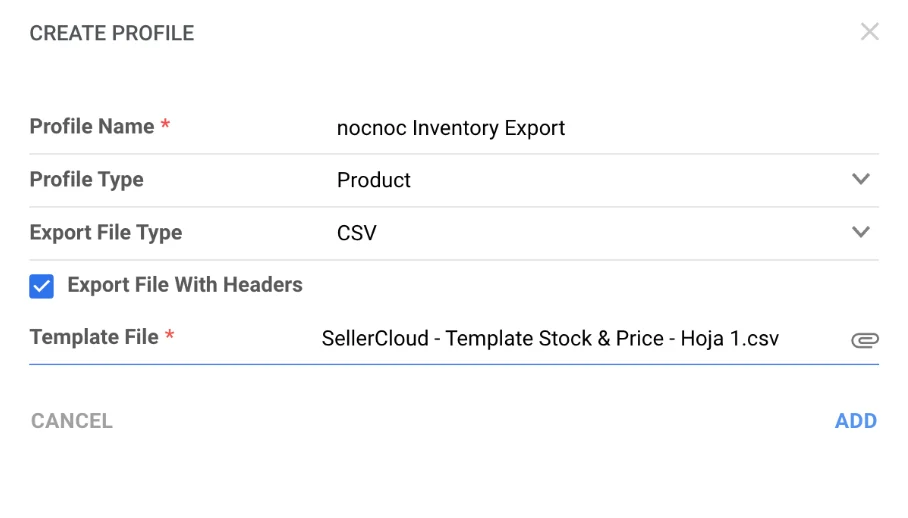
- Fill in the required fields:
- Profile Name — e.g.
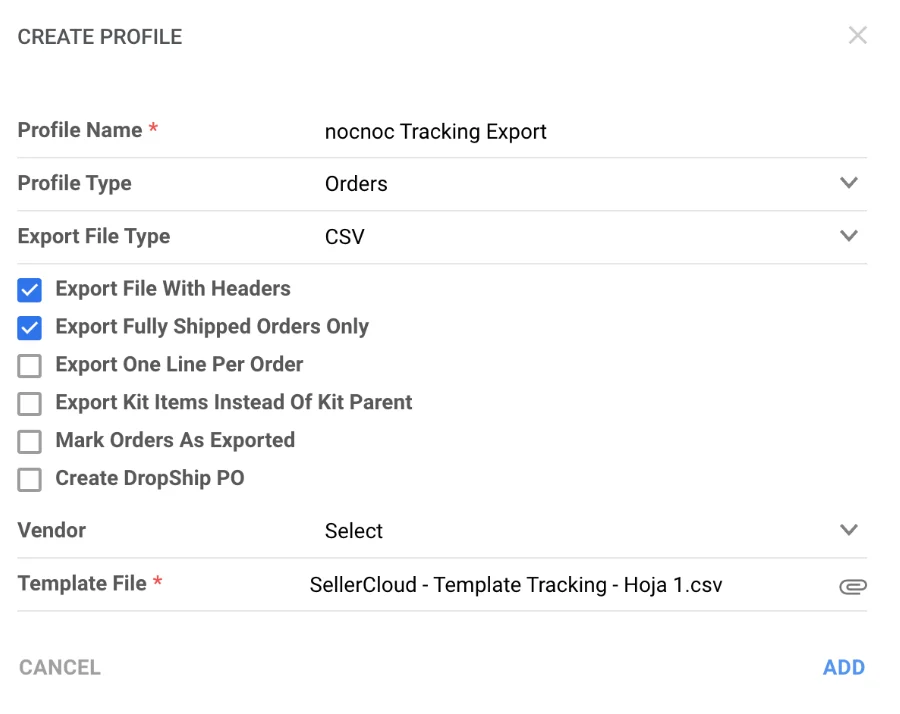
nocnoc Inventory Feedandnocnoc Tracking Export - Profile Type — set the first to
Productand the second toOrder- For the
Ordertype: set Export Type toTrackingand enable Export fully shipped orders only. The Vendor field can remain empty.
- For the
- Export File Type — set to
CSV - Check Export File with Headers
- Profile Name — e.g.
- Click Template File, find and select the downloaded template from your device.
- Click Add.
Import profile
- Navigate to Settings → Mapping Tools → Manage Import Mapping Profiles.
- Click the blue Actions icon in the bottom right corner → Create.
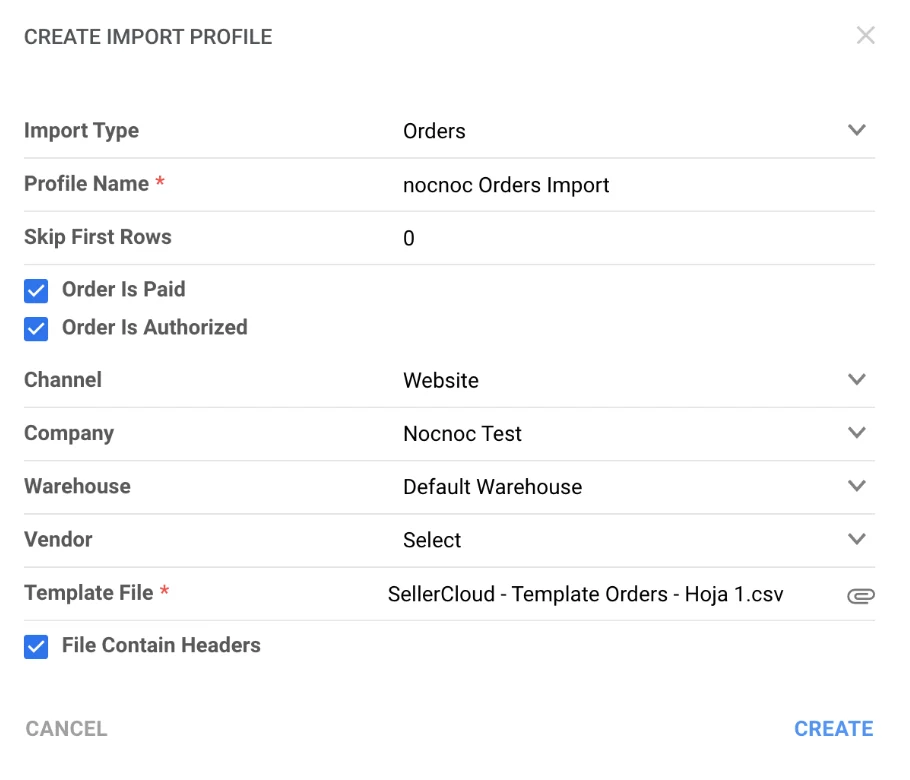
- Fill in the required fields:
- Profile Name — e.g.
nocnoc Orders - Import type — set to
Order - Skip First Rows — set to
0 - Check Order is Paid and Order is Authorized
- Order Source — set to
Website - Company — choose the nocnoc-designated company you created
- Warehouse — select the warehouse from which you will fulfill nocnoc orders
- Check File contain headers
- Profile Name — e.g.
- Click Template File, find and select the downloaded template from your device.
- Click Create.
Map profile fields
Inventory export profile
Go to Settings → Mapping Tools → Manage Export Profiles → nocnoc Inventory Export → Edit and map the following fields: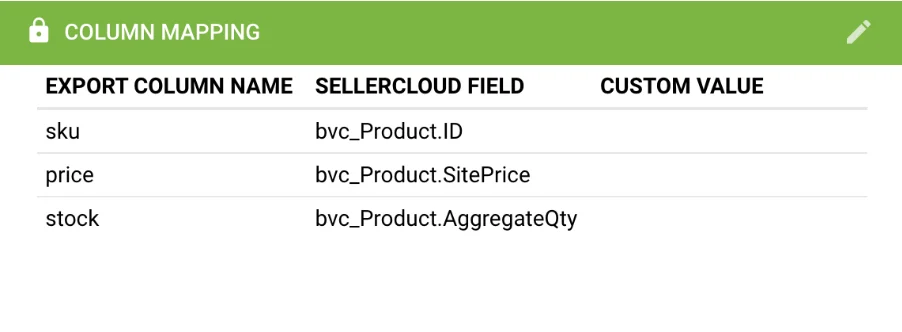
If you don’t want to use the Site Price for your nocnoc listings, you can request a Product Custom Column and map that instead. Contact Sellercloud Support to set this up.
Tracking export profile
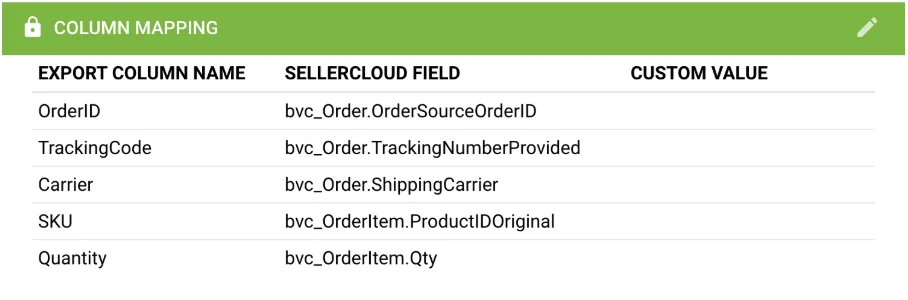
Go to Settings → Mapping Tools → Manage Export Profiles → nocnoc Tracking Export → Edit and map the following fields: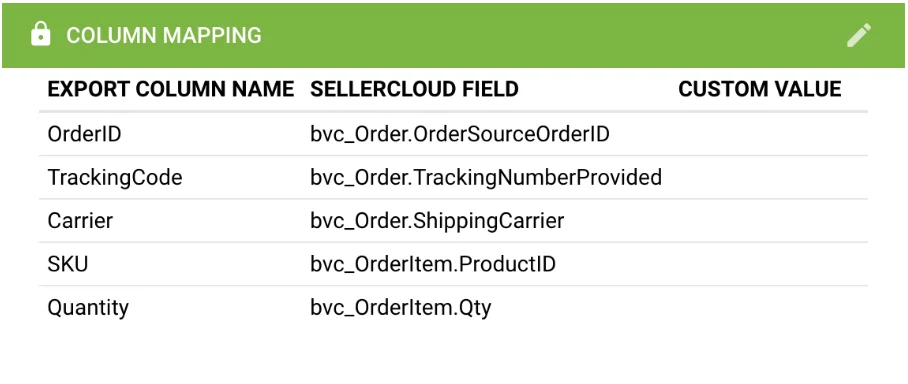
Order import profile
Go to Settings → Mapping Tools → Manage Import Profiles → nocnoc Orders → Edit and map the following fields: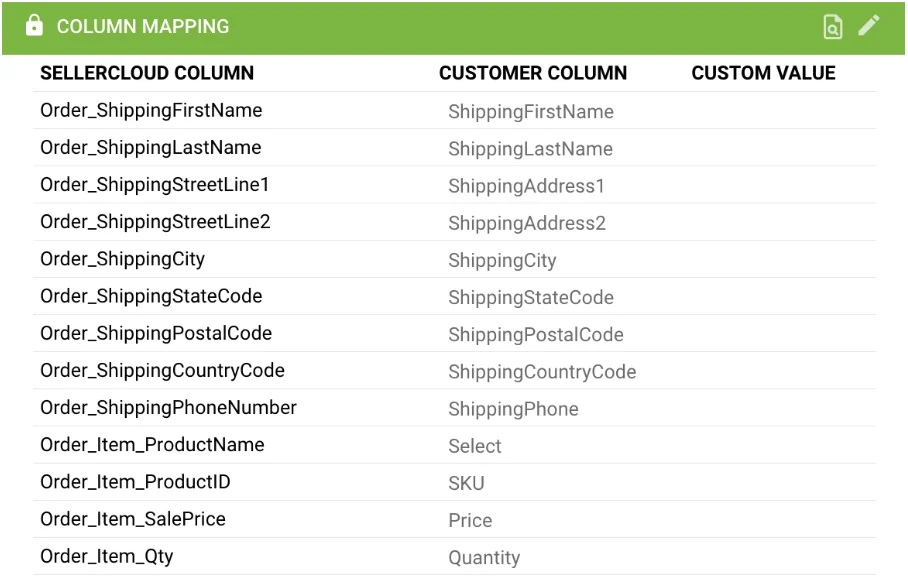
Create scheduled tasks
Inventory export task
Exports inventory and price feeds to nocnoc on a regular schedule. Requires a Saved View for products.If you don’t sell your entire catalog on nocnoc, you can filter by a custom column called
nocnocEnabled. Contact Sellercloud Support to set up custom columns.- Navigate to Settings → Scheduled Tasks and click Create.
- Fill in:
- Company — select the nocnoc-designated company
- Task Type —
Export Products - Task Name — e.g.
nocnoc Export Inventory - Start Date — the first date the task will run automatically
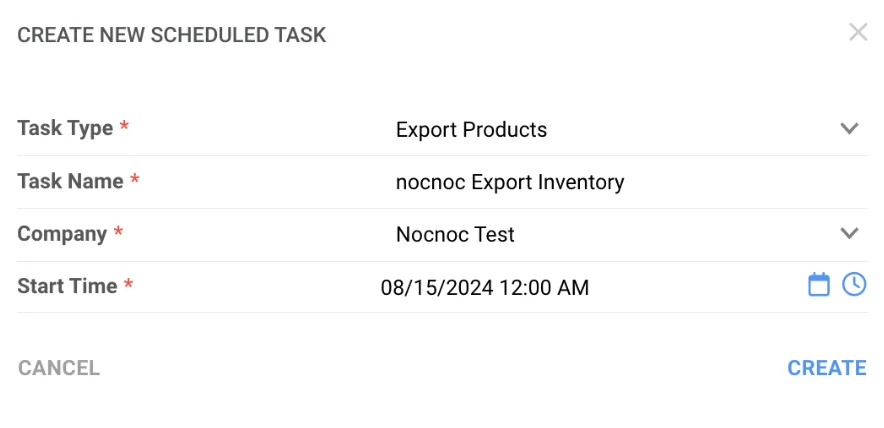
- Click Create, then open the task and click Edit:
- Frequency — set to run every 30 min to 1 hour
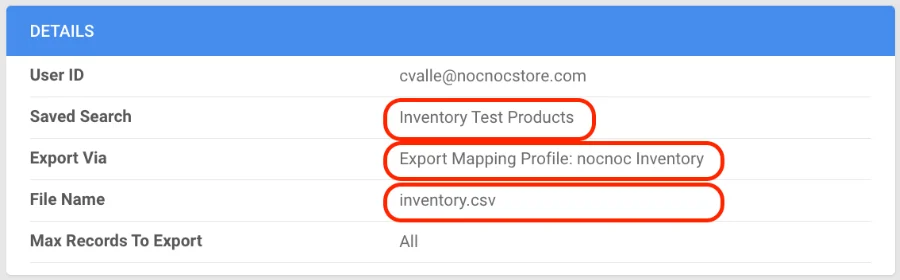
- User ID — select your username
- Saved Search — select your Product Saved View
- Export Via —
Export Mapping Profile: nocnoc Inventory Export - File Name — must be
inventory.csv(must end with.csv)
- Export To —
FTP - Fill in the FTP credentials provided by nocnoc
- Enable Use Passive and Use Secure FTP

- In the General panel, toggle the task to Enabled.
- Click Save.
Tracking export task
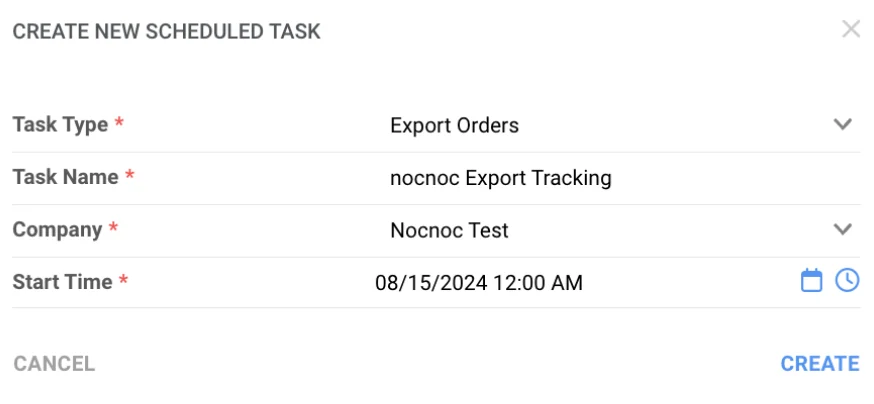
Sends fulfilled order tracking information to nocnoc. Requires a Saved View for orders filtered by Company, Order Status: In Process or Completed, and Shipping Status: Shipped.- Navigate to Settings → Scheduled Tasks and click Create.
- Fill in:
- Company — select the nocnoc-designated company
- Task Type —
Export Orders - Task Name — e.g.
nocnoc Tracking Export - Start Date — the first date the task will run automatically
- Click Create, then open the task and click Edit:
- Frequency — every 12 hours (tracking doesn’t need to be real-time)
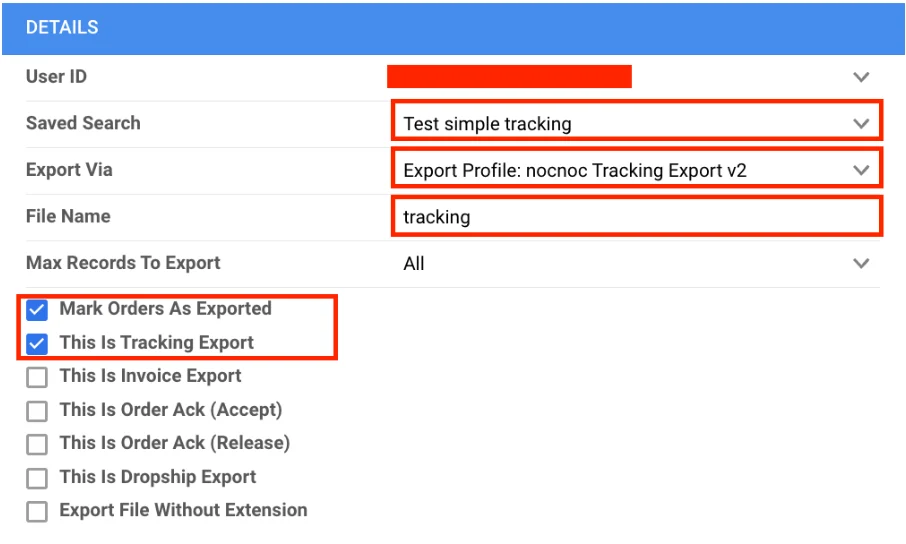
- User ID — select your username
- Saved Search — select your Order Saved View
- Export Via —
Export Mapping Profile: nocnoc Tracking Export - File Name — must be
tracking(must NOT end with.csv) - Enable Mark Orders As Exported and This Is Tracking Export
- Export To —
FTP - Fill in the FTP credentials provided by nocnoc
- Enable Use Passive and Use Secure FTP

- In the General panel, toggle the task to Enabled.
- Click Save.
Order import task
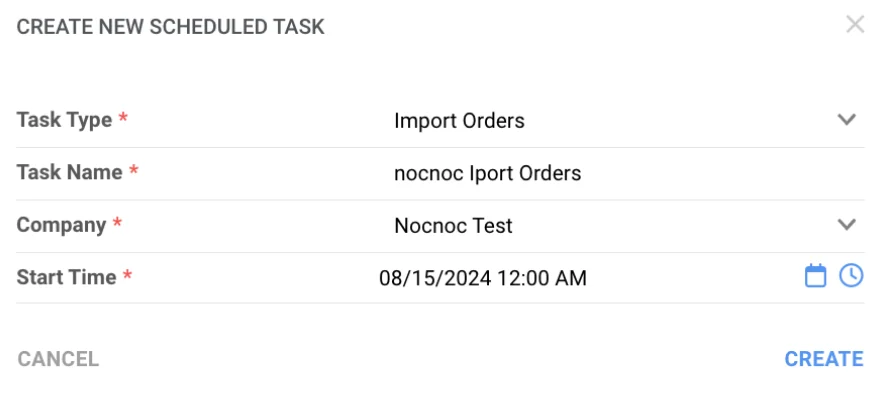
Imports new nocnoc orders into Sellercloud on a regular schedule.- Navigate to Settings → Scheduled Tasks and click Create.
- Fill in:
- Company — select the nocnoc-designated company
- Task Type —
Import Orders - Task Name — e.g.
nocnoc Order Import - Start Date — the first date the task will run automatically
- Click Create, then open the task and click Edit:
- Frequency — every 30 minutes
- Create Orders for Company — choose the nocnoc-designated company
- Plugin —
Profile: nocnoc Orders

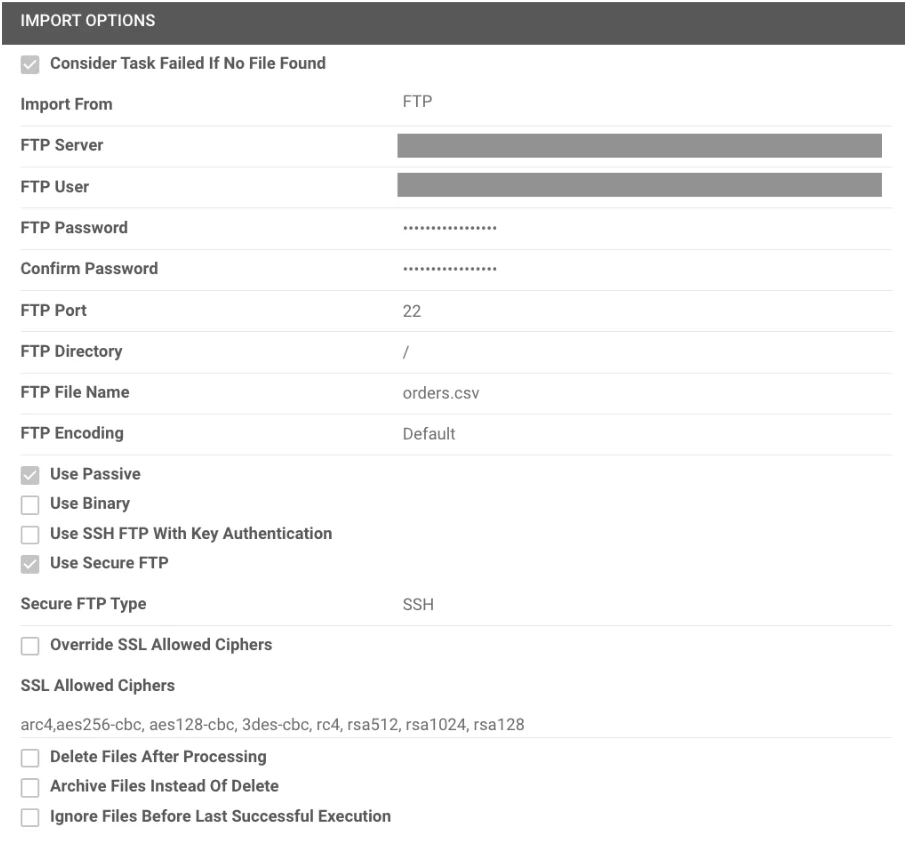
- Import From —
FTP - Fill in the FTP credentials provided by nocnoc
- Enable Use Passive and Use Secure FTP
- File name —
orders.csv(must end with.csv)
- In the General panel, toggle the task to Enabled.
- Click Save.
Have a question about this integration? Contact our support team →