1
Create a new store
Access the left sidebar on the GoFlow dashboard and go to Directory → Stores.Click New Store in the upper-right corner.Search for 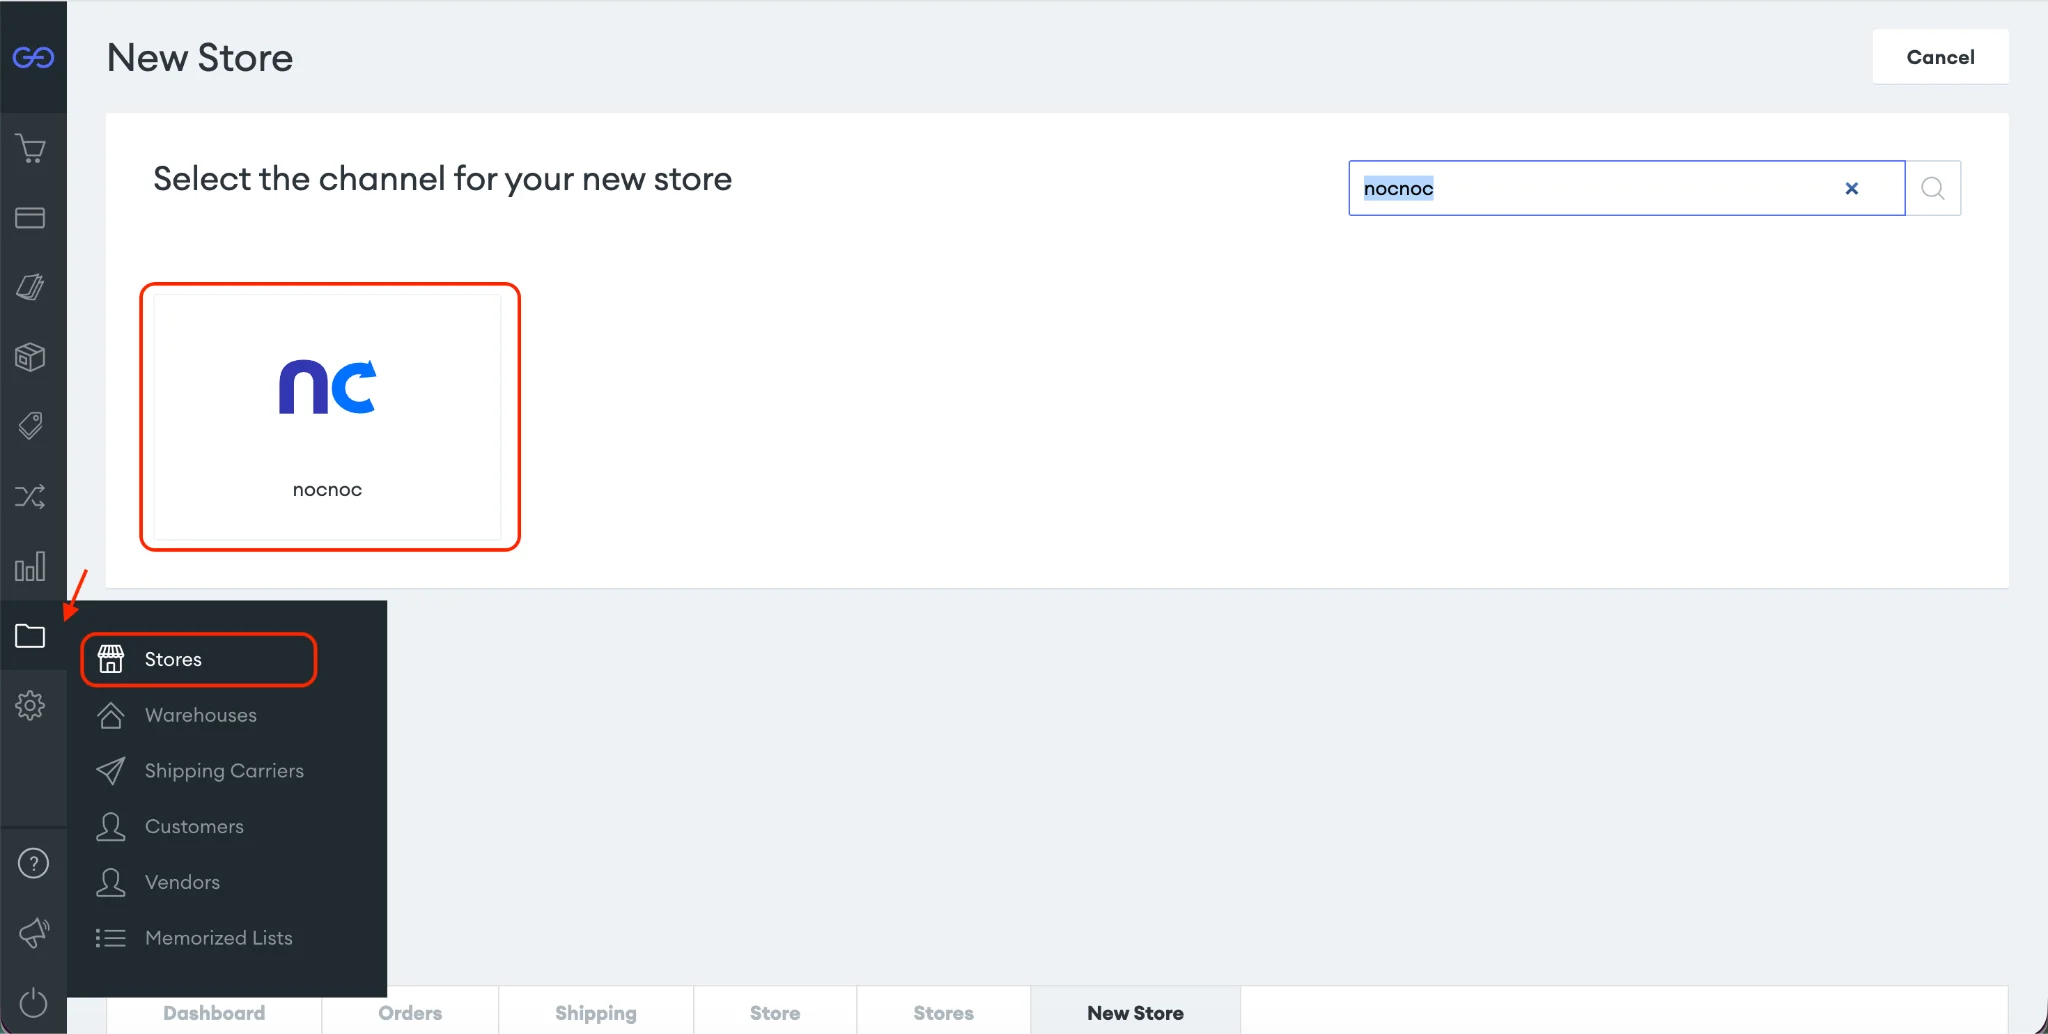
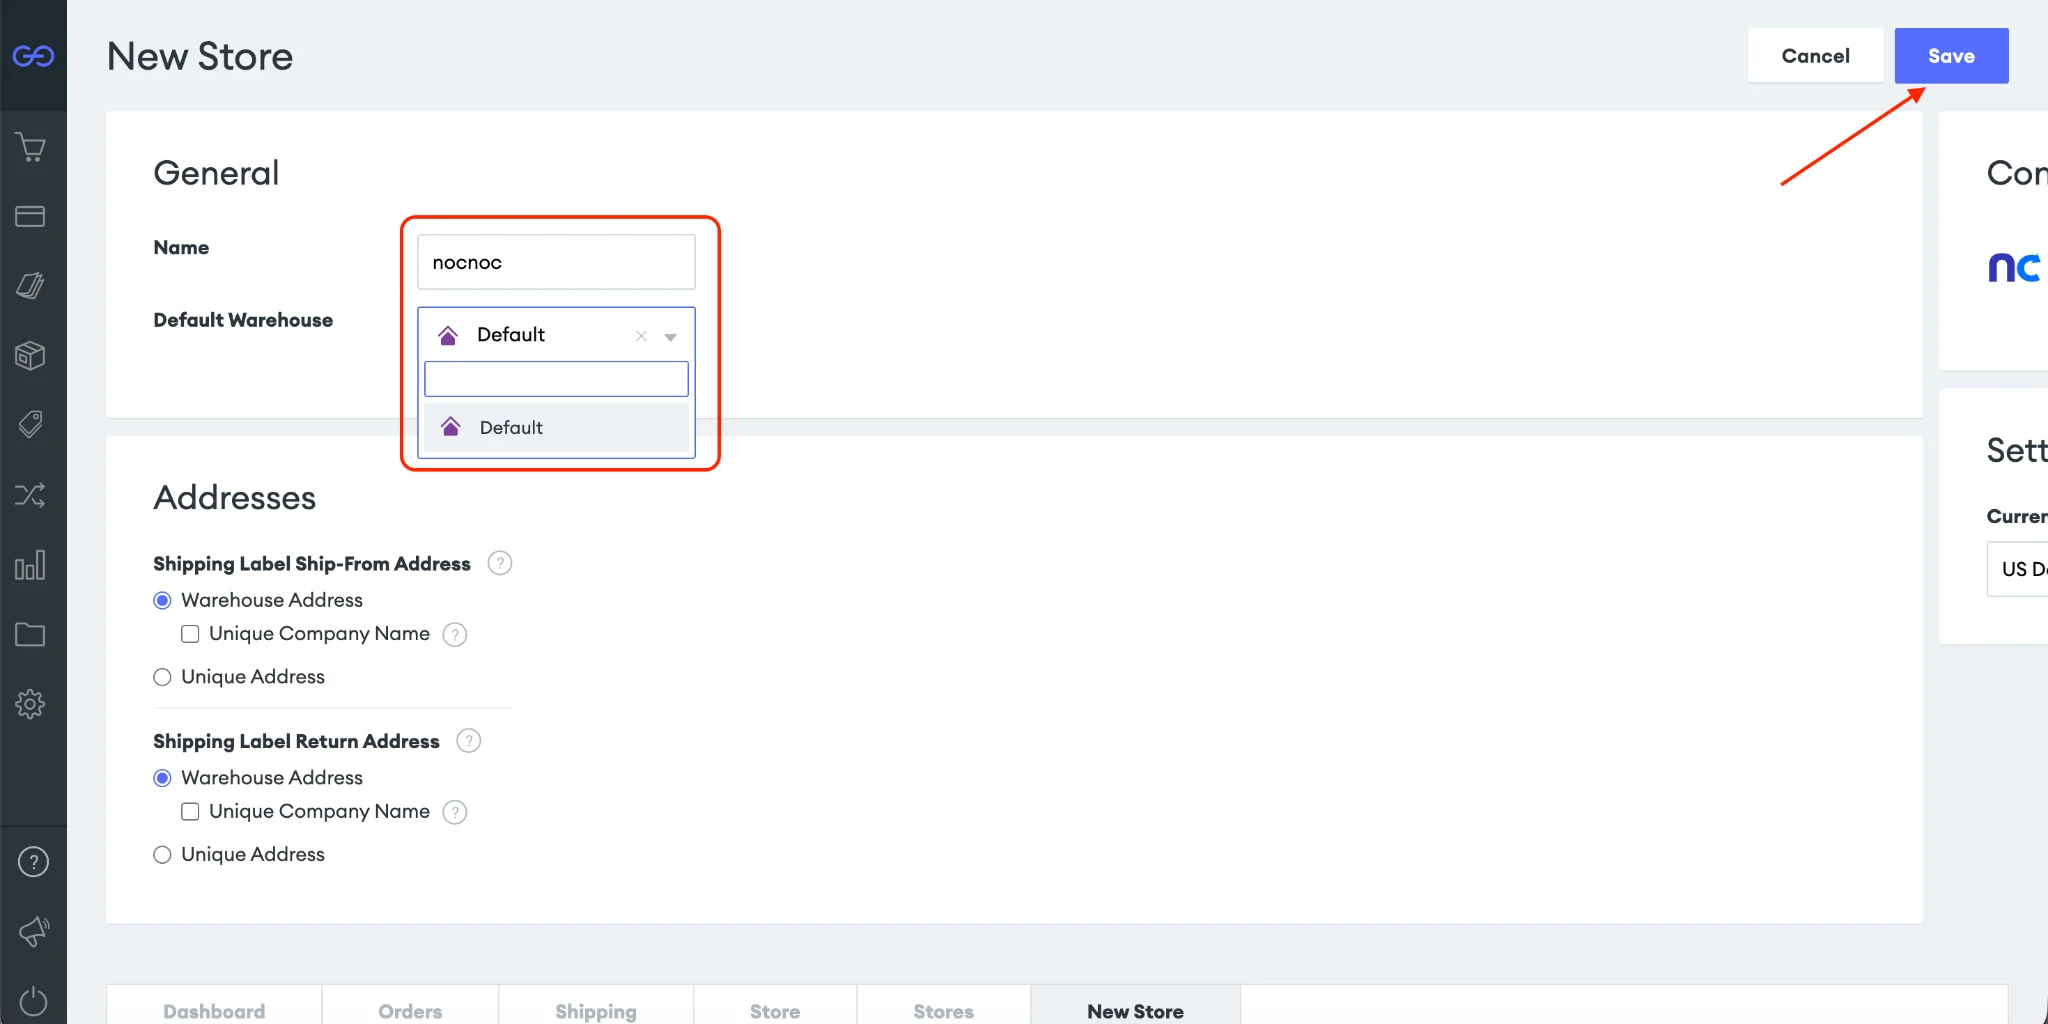
nocnoc in the search bar and select it as the channel.Enter nocnoc as the store name, select at least one warehouse for order fulfillment, and click Save.2
Connect the store to nocnoc
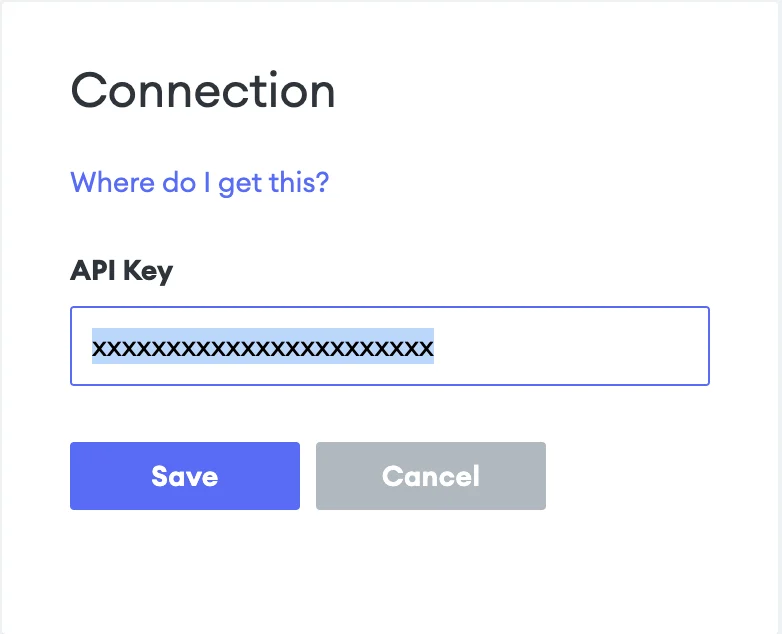
On the store page, go to the Connection card (lower right side) and click Connect.Enter your API key — contact your nocnoc Account Manager to obtain it.Click Save to connect the store to your nocnoc account.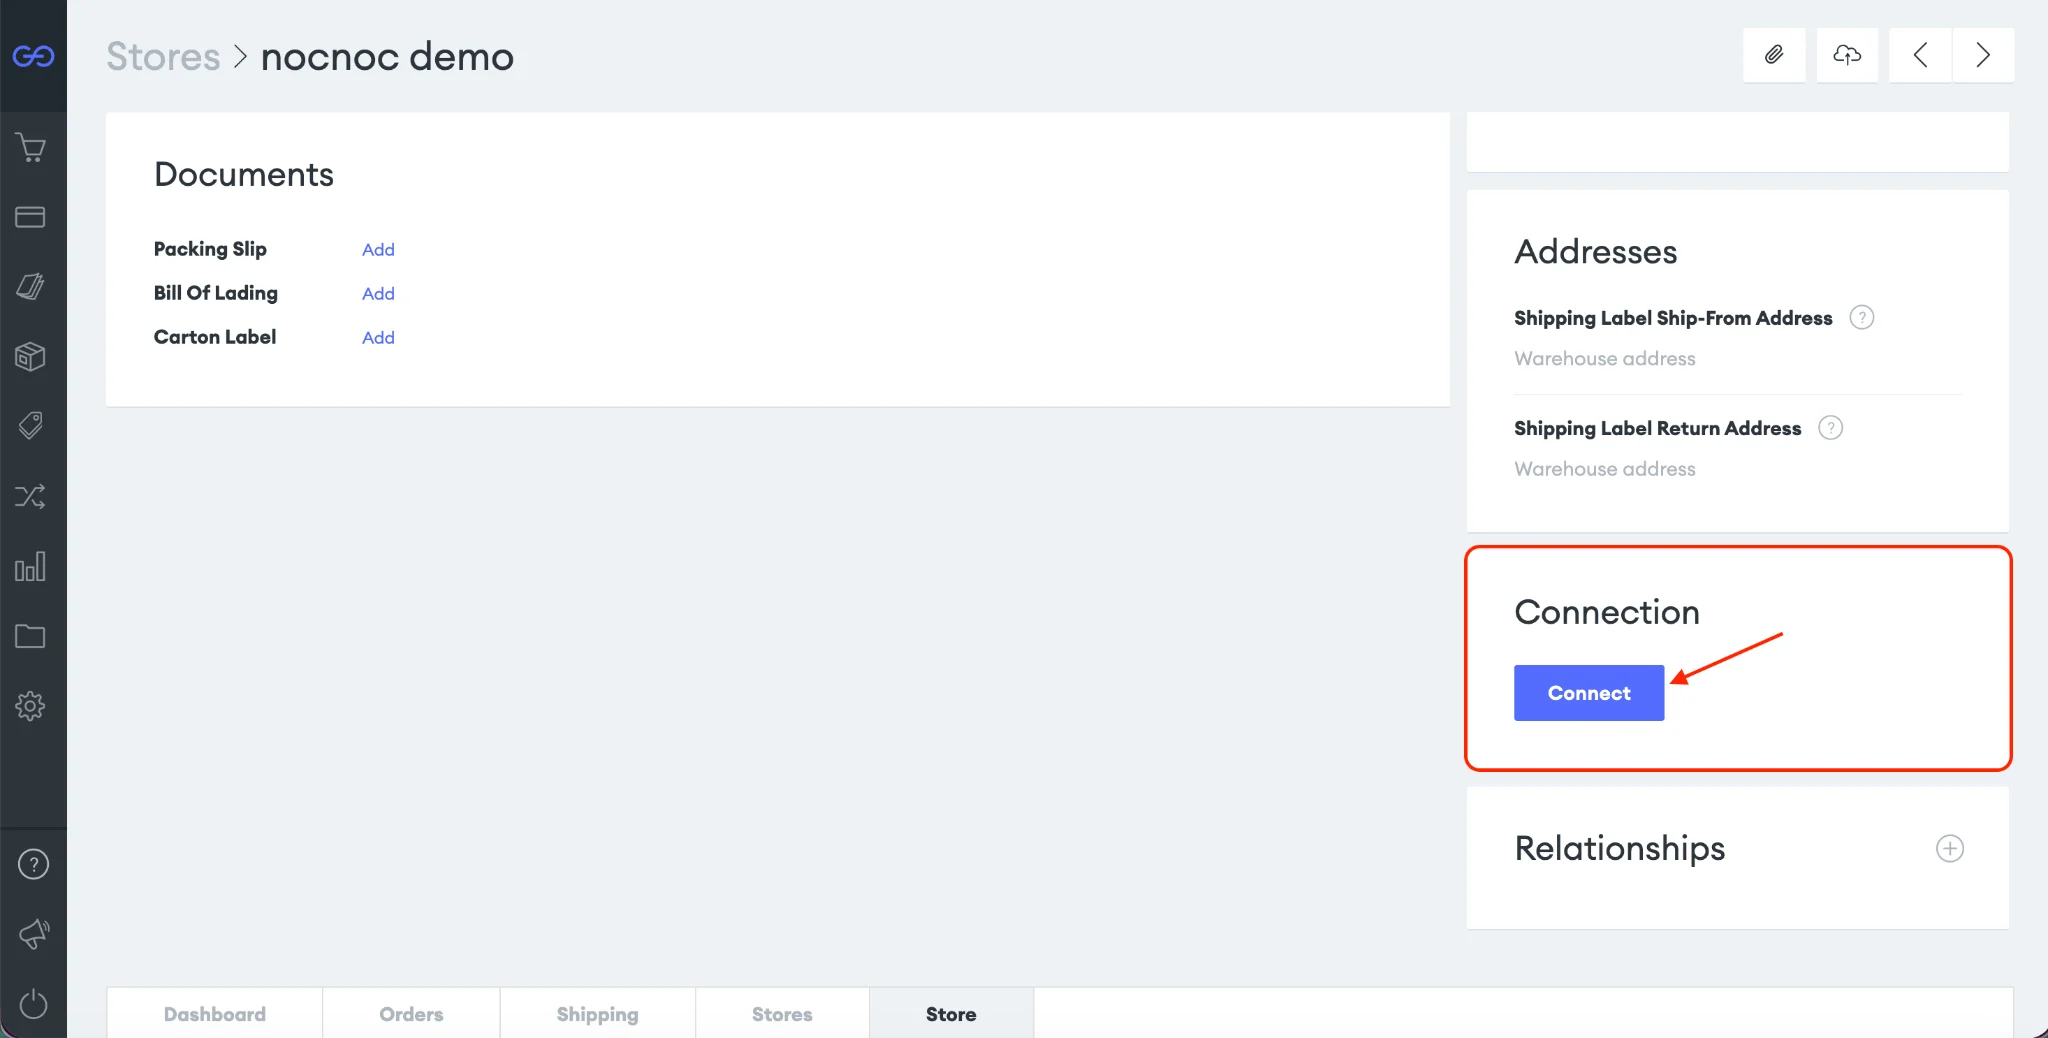
3
Configure the store settings
Shipping — In the Shipping card, click Manage Shipping to configure your shipping settings.Inventory — In the Inventory Allocation card, click Add Inventory Allocation Settings to configure inventory allocation.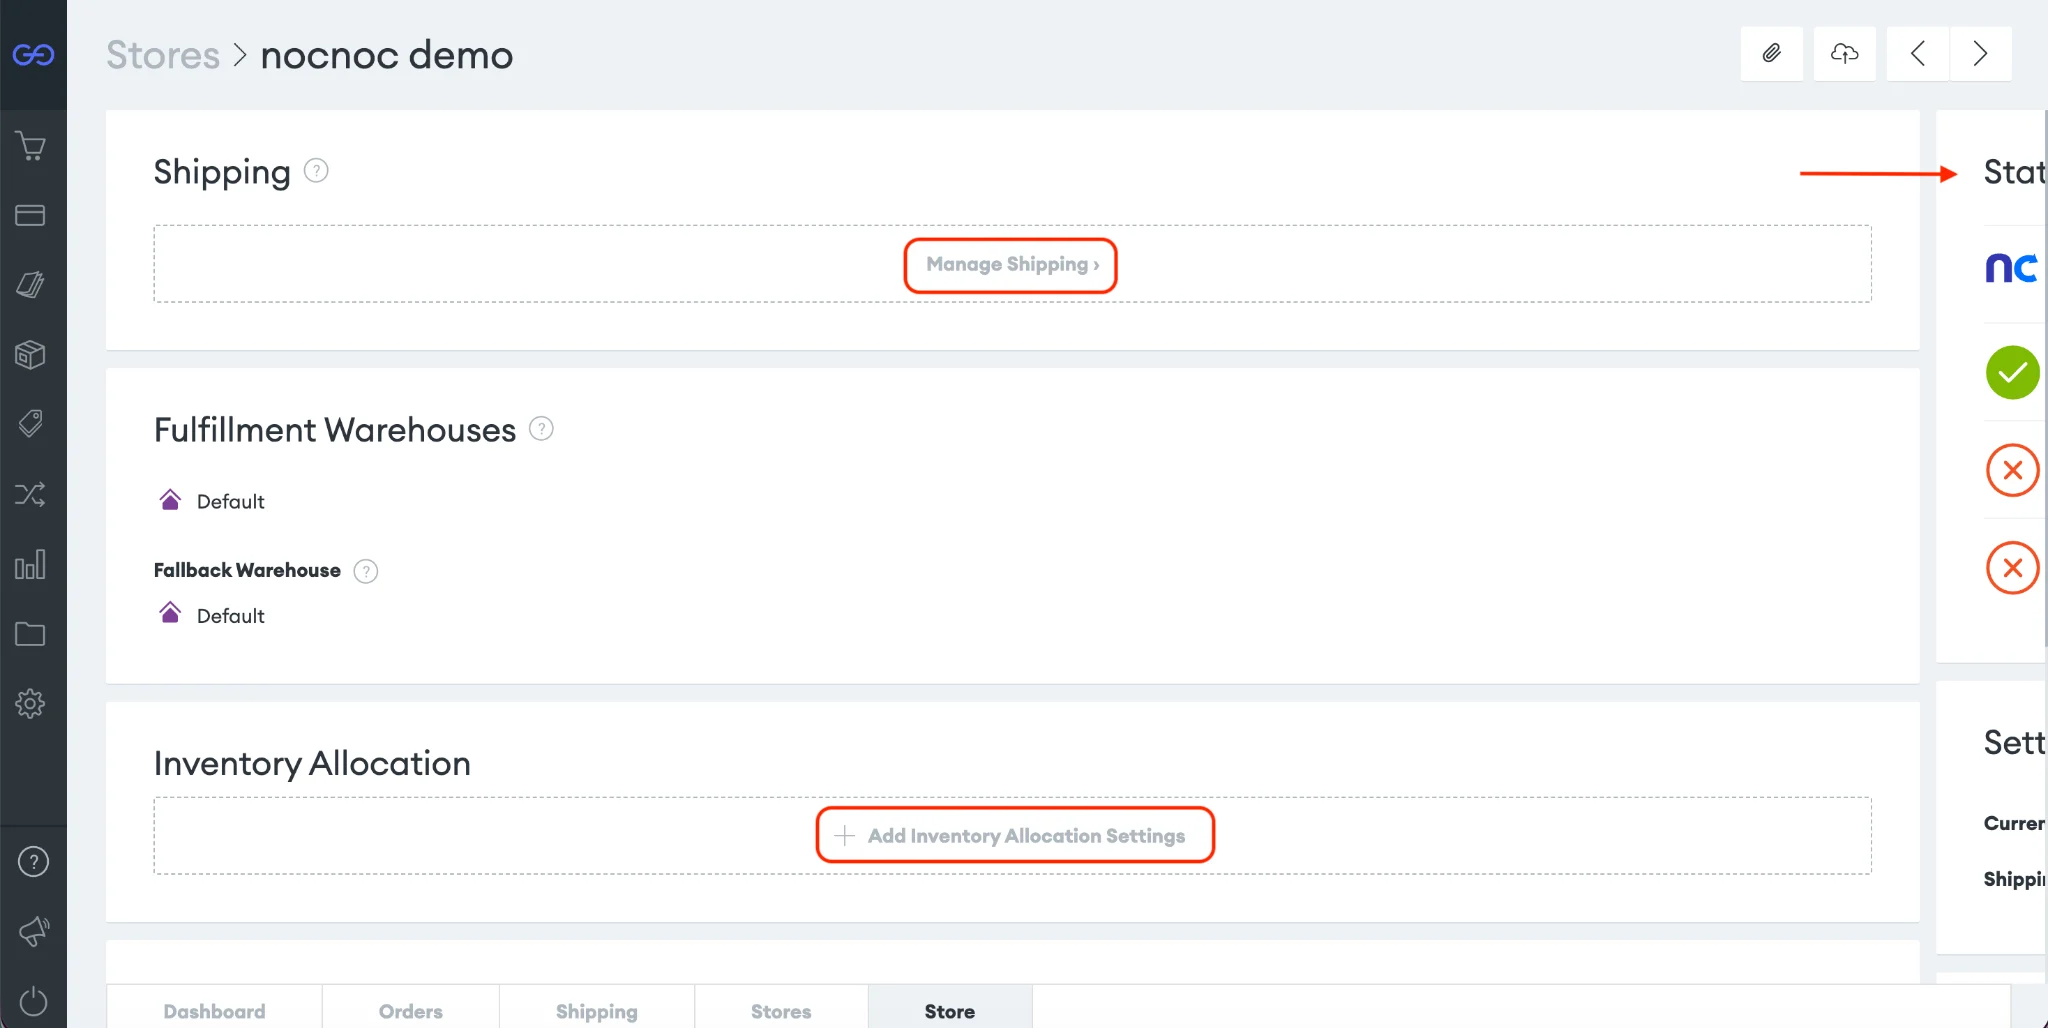
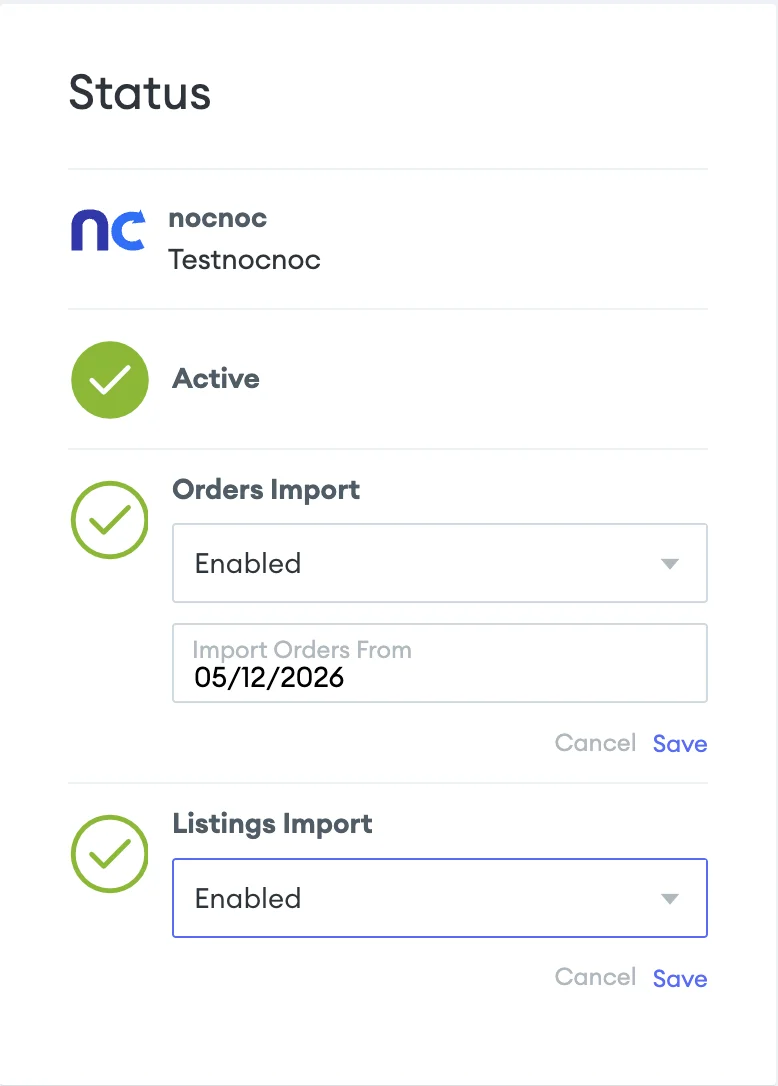
Order and listing imports run on scheduled intervals. If you notice any missing orders or products right after setup, they should appear shortly once the next sync runs.