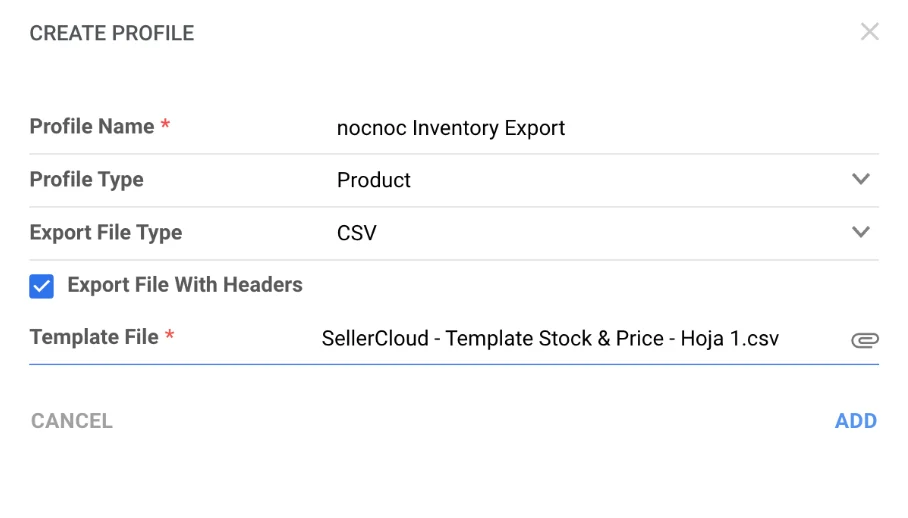
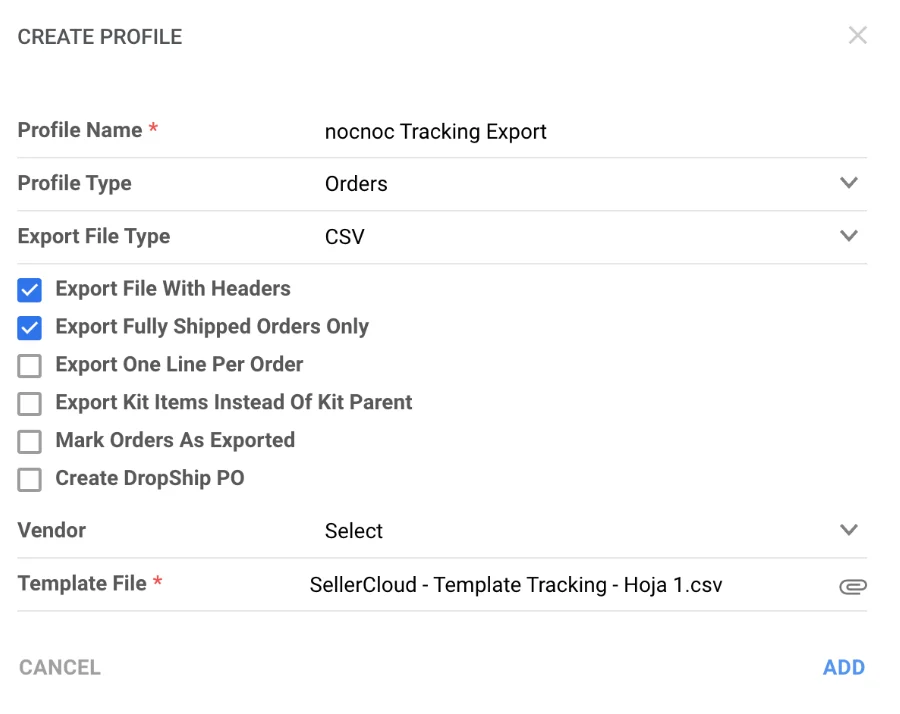
 ### Import profile
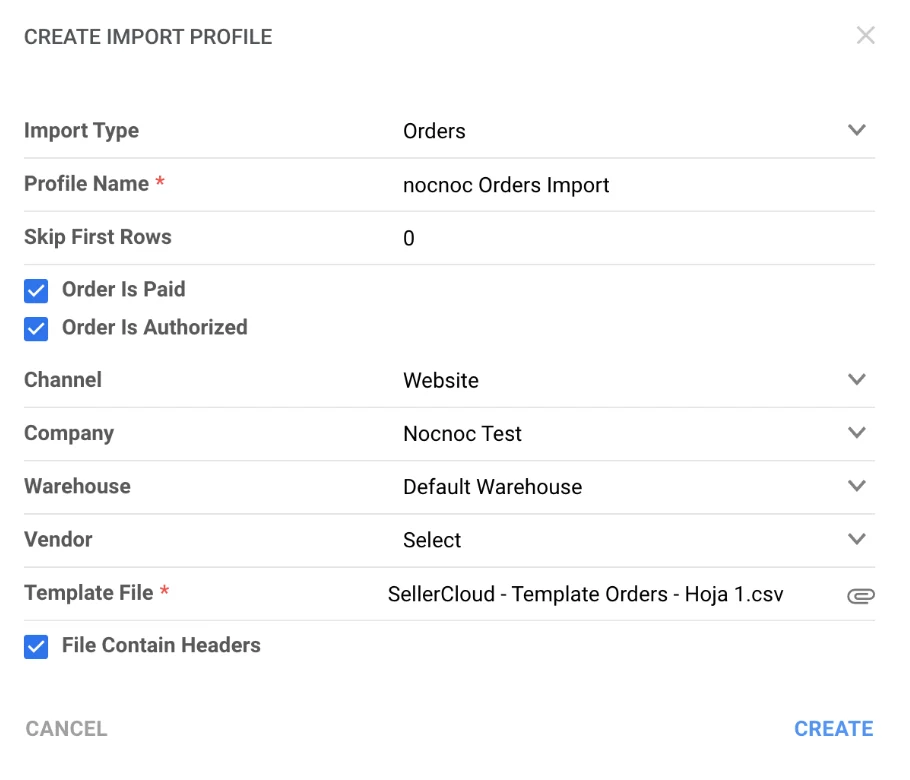
1. Navigate to **Settings → Mapping Tools → Manage Import Mapping Profiles**.
2. Click the blue **Actions** icon in the bottom right corner → **Create**.
3. Fill in the required fields:
* **Profile Name** — e.g. `nocnoc Orders`
* **Import type** — set to `Order`
* **Skip First Rows** — set to `0`
* Check **Order is Paid** and **Order is Authorized**
* **Order Source** — set to `Website`
* **Company** — choose the nocnoc-designated company you created
* **Warehouse** — select the warehouse from which you will fulfill nocnoc orders
* Check **File contain headers**
4. Click **Template File**, find and select the downloaded template from your device.
5. Click **Create**.
### Import profile
1. Navigate to **Settings → Mapping Tools → Manage Import Mapping Profiles**.
2. Click the blue **Actions** icon in the bottom right corner → **Create**.
3. Fill in the required fields:
* **Profile Name** — e.g. `nocnoc Orders`
* **Import type** — set to `Order`
* **Skip First Rows** — set to `0`
* Check **Order is Paid** and **Order is Authorized**
* **Order Source** — set to `Website`
* **Company** — choose the nocnoc-designated company you created
* **Warehouse** — select the warehouse from which you will fulfill nocnoc orders
* Check **File contain headers**
4. Click **Template File**, find and select the downloaded template from your device.
5. Click **Create**.
 ## Map profile fields
### Inventory export profile
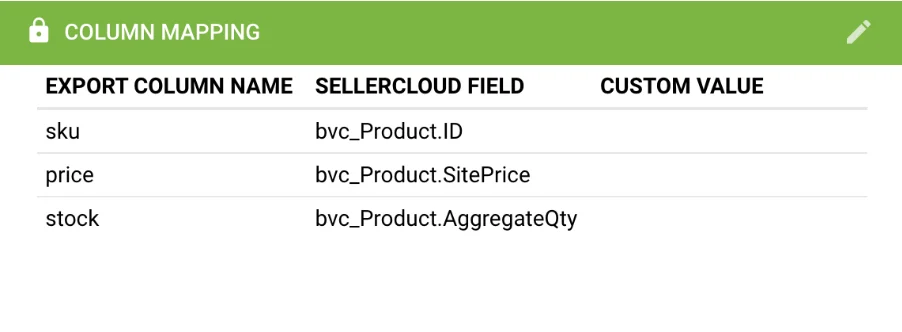
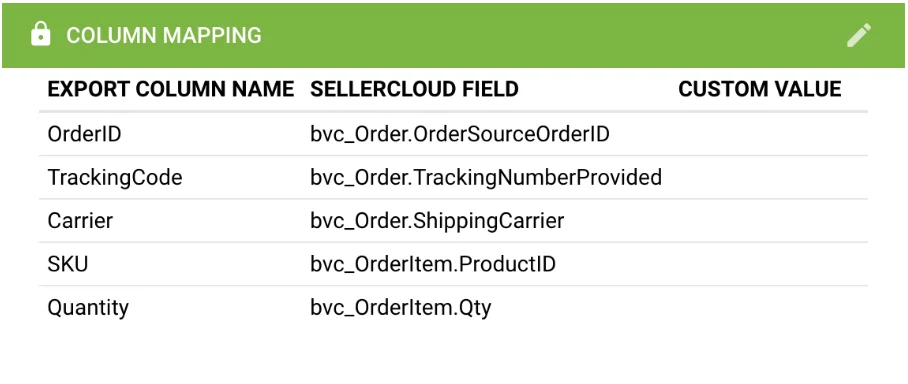
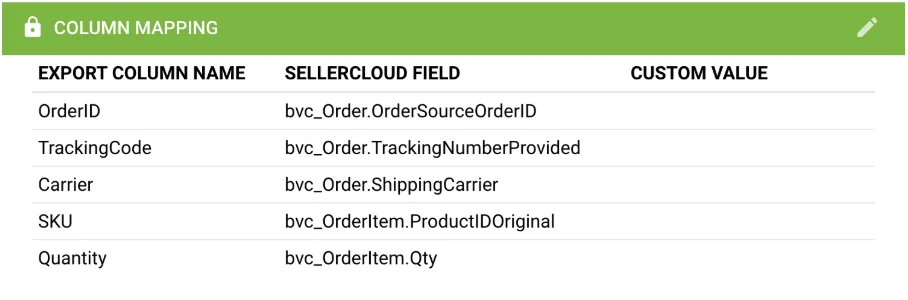
Go to **Settings → Mapping Tools → Manage Export Profiles → nocnoc Inventory Export → Edit** and map the following fields:
| Field | Maps to |
| ------- | -------------------------- |
| `sku` | `bvc_Product.ID` |
| `price` | `bvc_Product.SitePrice` |
| `stock` | `bvc_Product.AggregateQty` |
## Map profile fields
### Inventory export profile
Go to **Settings → Mapping Tools → Manage Export Profiles → nocnoc Inventory Export → Edit** and map the following fields:
| Field | Maps to |
| ------- | -------------------------- |
| `sku` | `bvc_Product.ID` |
| `price` | `bvc_Product.SitePrice` |
| `stock` | `bvc_Product.AggregateQty` |
 ### Order import profile
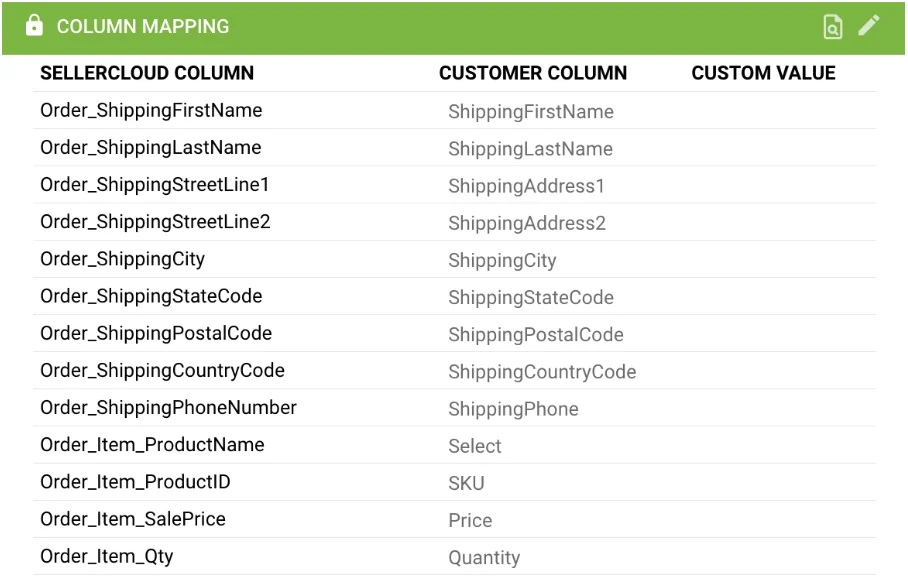
Go to **Settings → Mapping Tools → Manage Import Profiles → nocnoc Orders → Edit** and map the following fields:
| Field | Maps to |
| --------------------- | --------------------------- |
| `OrderID` | `Order_OrderSourceOrderID` |
| `SKU` | `Order_Item_ProductID` |
| `Quantity` | `Order_Item_Qty` |
| `Price` | `Order_Item_SalePrice` |
| `CreatedAt` | `Order_TimeOfOrder` |
| `ShippingFirstName` | `Order_ShippingFirstName` |
| `ShippingLastName` | `Order_ShippingLastName` |
| `ShippingAddress1` | `Order_ShippingStreetLine1` |
| `ShippingAddress2` | `Order_ShippingStreetLine2` |
| `ShippingCity` | `Order_ShippingCity` |
| `ShippingPhone` | `Order_ShippingPhoneNumber` |
| `ShippingStateCode` | `Order_ShippingStateCode` |
| `ShippingPostalCode` | `Order_ShippingPostalCode` |
| `ShippingCountryCode` | `Order_ShippingCountryCode` |
### Order import profile
Go to **Settings → Mapping Tools → Manage Import Profiles → nocnoc Orders → Edit** and map the following fields:
| Field | Maps to |
| --------------------- | --------------------------- |
| `OrderID` | `Order_OrderSourceOrderID` |
| `SKU` | `Order_Item_ProductID` |
| `Quantity` | `Order_Item_Qty` |
| `Price` | `Order_Item_SalePrice` |
| `CreatedAt` | `Order_TimeOfOrder` |
| `ShippingFirstName` | `Order_ShippingFirstName` |
| `ShippingLastName` | `Order_ShippingLastName` |
| `ShippingAddress1` | `Order_ShippingStreetLine1` |
| `ShippingAddress2` | `Order_ShippingStreetLine2` |
| `ShippingCity` | `Order_ShippingCity` |
| `ShippingPhone` | `Order_ShippingPhoneNumber` |
| `ShippingStateCode` | `Order_ShippingStateCode` |
| `ShippingPostalCode` | `Order_ShippingPostalCode` |
| `ShippingCountryCode` | `Order_ShippingCountryCode` |
 ## Create scheduled tasks
### Inventory export task
Exports inventory and price feeds to nocnoc on a regular schedule. Requires a [Saved View](https://sellercloud.com/help/omnichannel-ecommerce/saved-searches/) for products.
## Create scheduled tasks
### Inventory export task
Exports inventory and price feeds to nocnoc on a regular schedule. Requires a [Saved View](https://sellercloud.com/help/omnichannel-ecommerce/saved-searches/) for products.
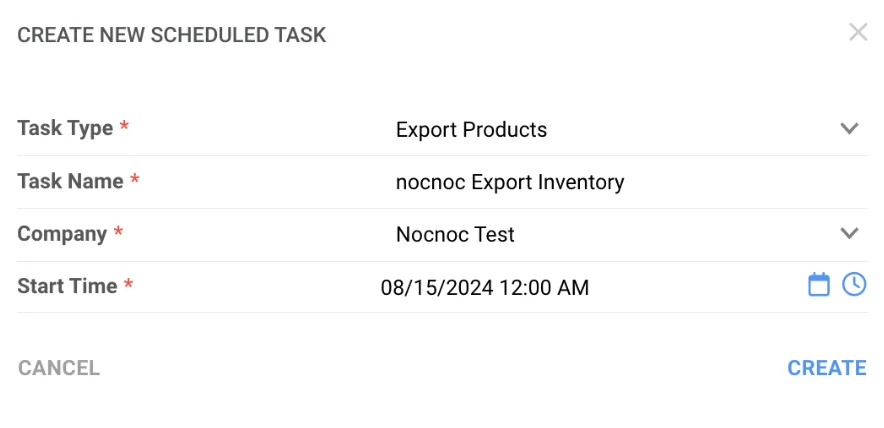 3. Click **Create**, then open the task and click **Edit**:
* **Frequency** — set to run every 30 min to 1 hour
* **User ID** — select your username
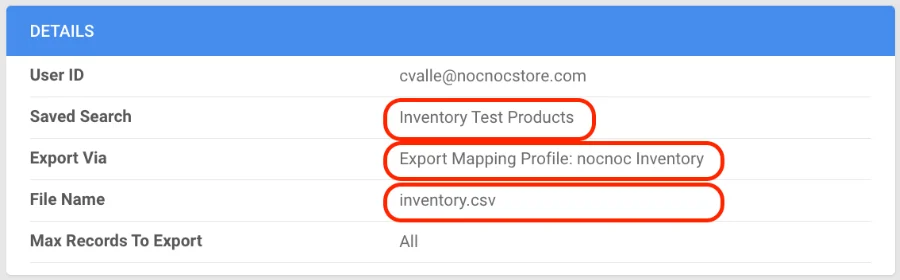
* **Saved Search** — select your Product Saved View
* **Export Via** — `Export Mapping Profile: nocnoc Inventory Export`
* **File Name** — must be `inventory.csv` (must end with `.csv`)
3. Click **Create**, then open the task and click **Edit**:
* **Frequency** — set to run every 30 min to 1 hour
* **User ID** — select your username
* **Saved Search** — select your Product Saved View
* **Export Via** — `Export Mapping Profile: nocnoc Inventory Export`
* **File Name** — must be `inventory.csv` (must end with `.csv`)
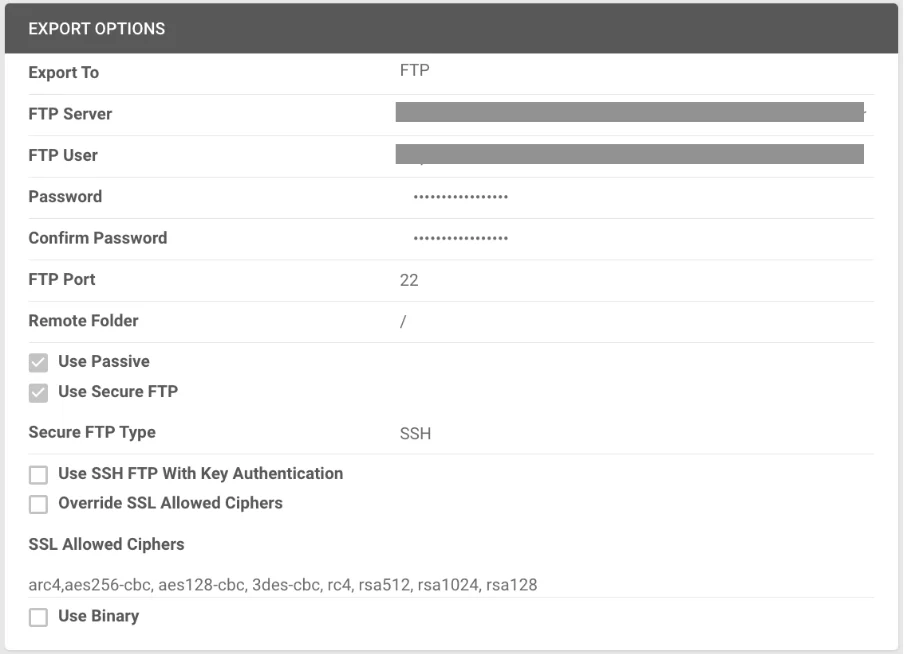
 * **Export To** — `FTP`
* Fill in the FTP credentials provided by nocnoc
* Enable **Use Passive** and **Use Secure FTP**
* **Export To** — `FTP`
* Fill in the FTP credentials provided by nocnoc
* Enable **Use Passive** and **Use Secure FTP**
 4. In the **General** panel, toggle the task to **Enabled**.
5. Click **Save**.
### Tracking export task
Sends fulfilled order tracking information to nocnoc. Requires a [Saved View](https://sellercloud.com/help/omnichannel-ecommerce/saved-searches/) for orders filtered by **Company**, **Order Status: In Process or Completed**, and **Shipping Status: Shipped**.
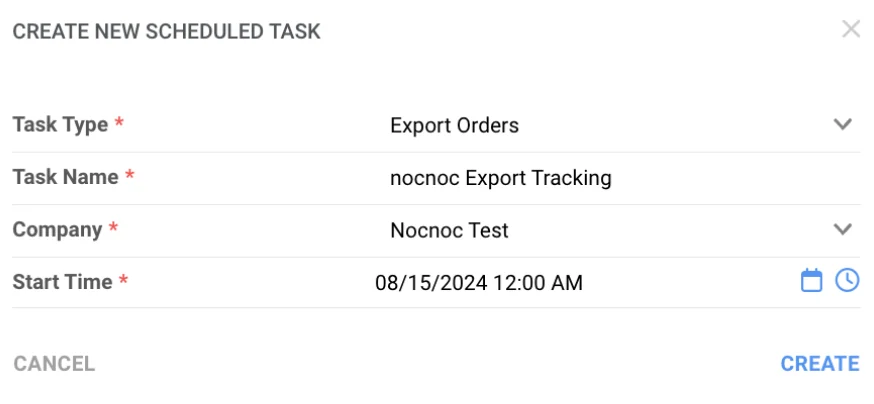
1. Navigate to **Settings → Scheduled Tasks** and click **Create**.
2. Fill in:
* **Company** — select the nocnoc-designated company
* **Task Type** — `Export Orders`
* **Task Name** — e.g. `nocnoc Tracking Export`
* **Start Date** — the first date the task will run automatically
4. In the **General** panel, toggle the task to **Enabled**.
5. Click **Save**.
### Tracking export task
Sends fulfilled order tracking information to nocnoc. Requires a [Saved View](https://sellercloud.com/help/omnichannel-ecommerce/saved-searches/) for orders filtered by **Company**, **Order Status: In Process or Completed**, and **Shipping Status: Shipped**.
1. Navigate to **Settings → Scheduled Tasks** and click **Create**.
2. Fill in:
* **Company** — select the nocnoc-designated company
* **Task Type** — `Export Orders`
* **Task Name** — e.g. `nocnoc Tracking Export`
* **Start Date** — the first date the task will run automatically
 3. Click **Create**, then open the task and click **Edit**:
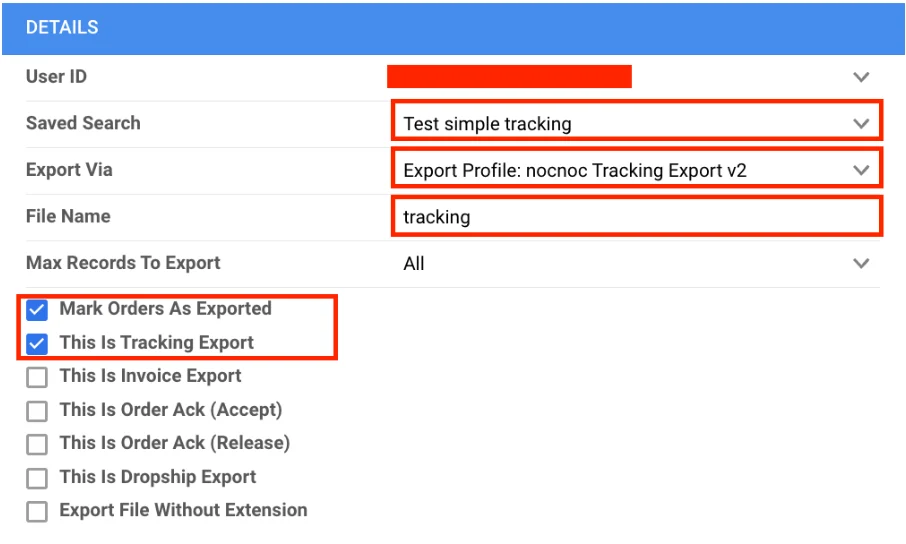
* **Frequency** — every 12 hours (tracking doesn't need to be real-time)
* **User ID** — select your username
* **Saved Search** — select your Order Saved View
* **Export Via** — `Export Mapping Profile: nocnoc Tracking Export`
* **File Name** — must be `tracking` (must NOT end with `.csv`)
* Enable **Mark Orders As Exported** and **This Is Tracking Export**
3. Click **Create**, then open the task and click **Edit**:
* **Frequency** — every 12 hours (tracking doesn't need to be real-time)
* **User ID** — select your username
* **Saved Search** — select your Order Saved View
* **Export Via** — `Export Mapping Profile: nocnoc Tracking Export`
* **File Name** — must be `tracking` (must NOT end with `.csv`)
* Enable **Mark Orders As Exported** and **This Is Tracking Export**
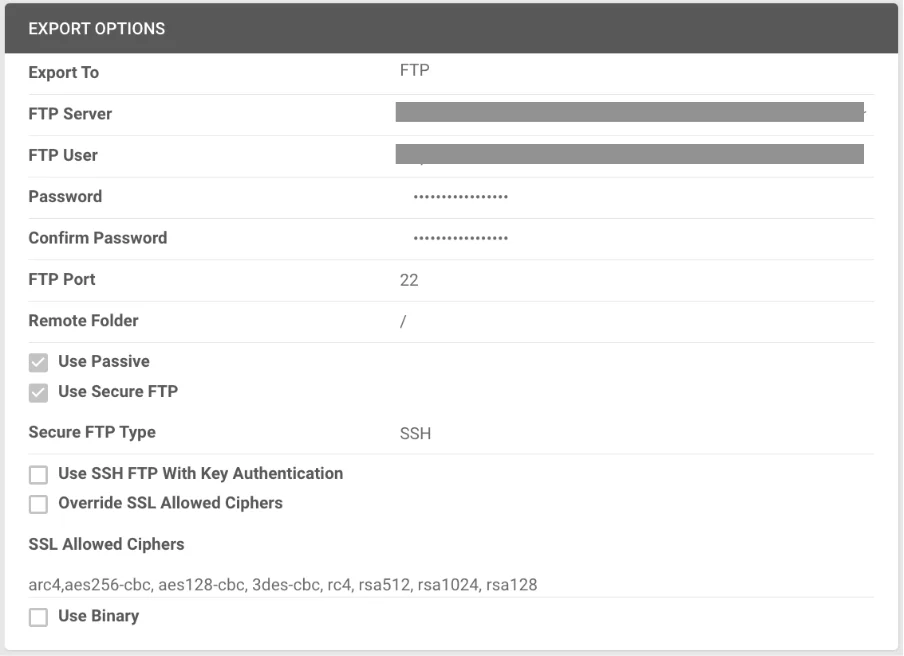
 * **Export To** — `FTP`
* Fill in the FTP credentials provided by nocnoc
* Enable **Use Passive** and **Use Secure FTP**
* **Export To** — `FTP`
* Fill in the FTP credentials provided by nocnoc
* Enable **Use Passive** and **Use Secure FTP**
 4. In the **General** panel, toggle the task to **Enabled**.
5. Click **Save**.
### Order import task
Imports new nocnoc orders into Sellercloud on a regular schedule.
1. Navigate to **Settings → Scheduled Tasks** and click **Create**.
2. Fill in:
* **Company** — select the nocnoc-designated company
* **Task Type** — `Import Orders`
* **Task Name** — e.g. `nocnoc Order Import`
* **Start Date** — the first date the task will run automatically
4. In the **General** panel, toggle the task to **Enabled**.
5. Click **Save**.
### Order import task
Imports new nocnoc orders into Sellercloud on a regular schedule.
1. Navigate to **Settings → Scheduled Tasks** and click **Create**.
2. Fill in:
* **Company** — select the nocnoc-designated company
* **Task Type** — `Import Orders`
* **Task Name** — e.g. `nocnoc Order Import`
* **Start Date** — the first date the task will run automatically
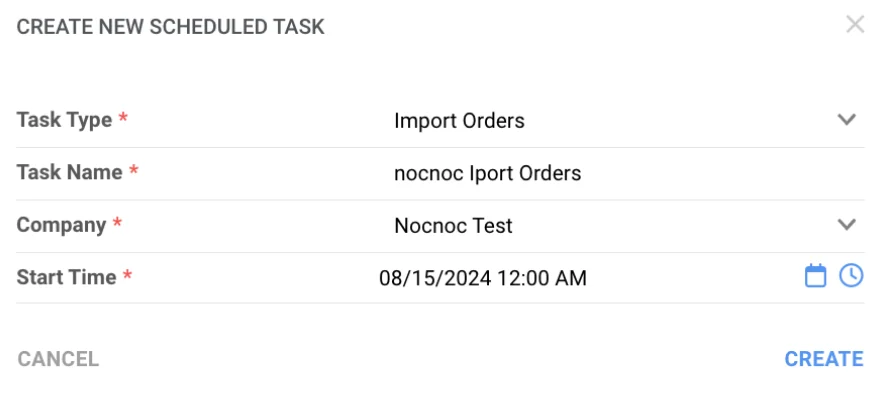 3. Click **Create**, then open the task and click **Edit**:
* **Frequency** — every 30 minutes
* **Create Orders for Company** — choose the nocnoc-designated company
* **Plugin** — `Profile: nocnoc Orders`
3. Click **Create**, then open the task and click **Edit**:
* **Frequency** — every 30 minutes
* **Create Orders for Company** — choose the nocnoc-designated company
* **Plugin** — `Profile: nocnoc Orders`
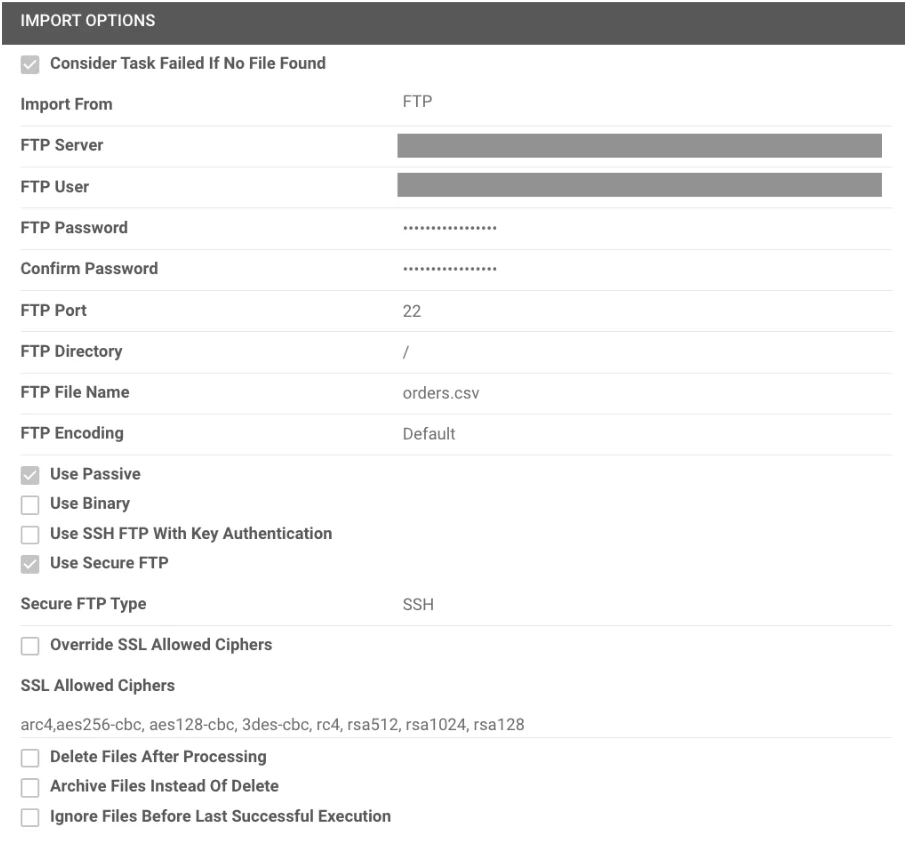
 * **Import From** — `FTP`
* Fill in the FTP credentials provided by nocnoc
* Enable **Use Passive** and **Use Secure FTP**
* **File name** — `orders.csv` (must end with `.csv`)
* **Import From** — `FTP`
* Fill in the FTP credentials provided by nocnoc
* Enable **Use Passive** and **Use Secure FTP**
* **File name** — `orders.csv` (must end with `.csv`)
 4. In the **General** panel, toggle the task to **Enabled**.
5. Click **Save**.
4. In the **General** panel, toggle the task to **Enabled**.
5. Click **Save**.
Have a question about this integration?{' '} Contact our support team →